Power Work Continues…
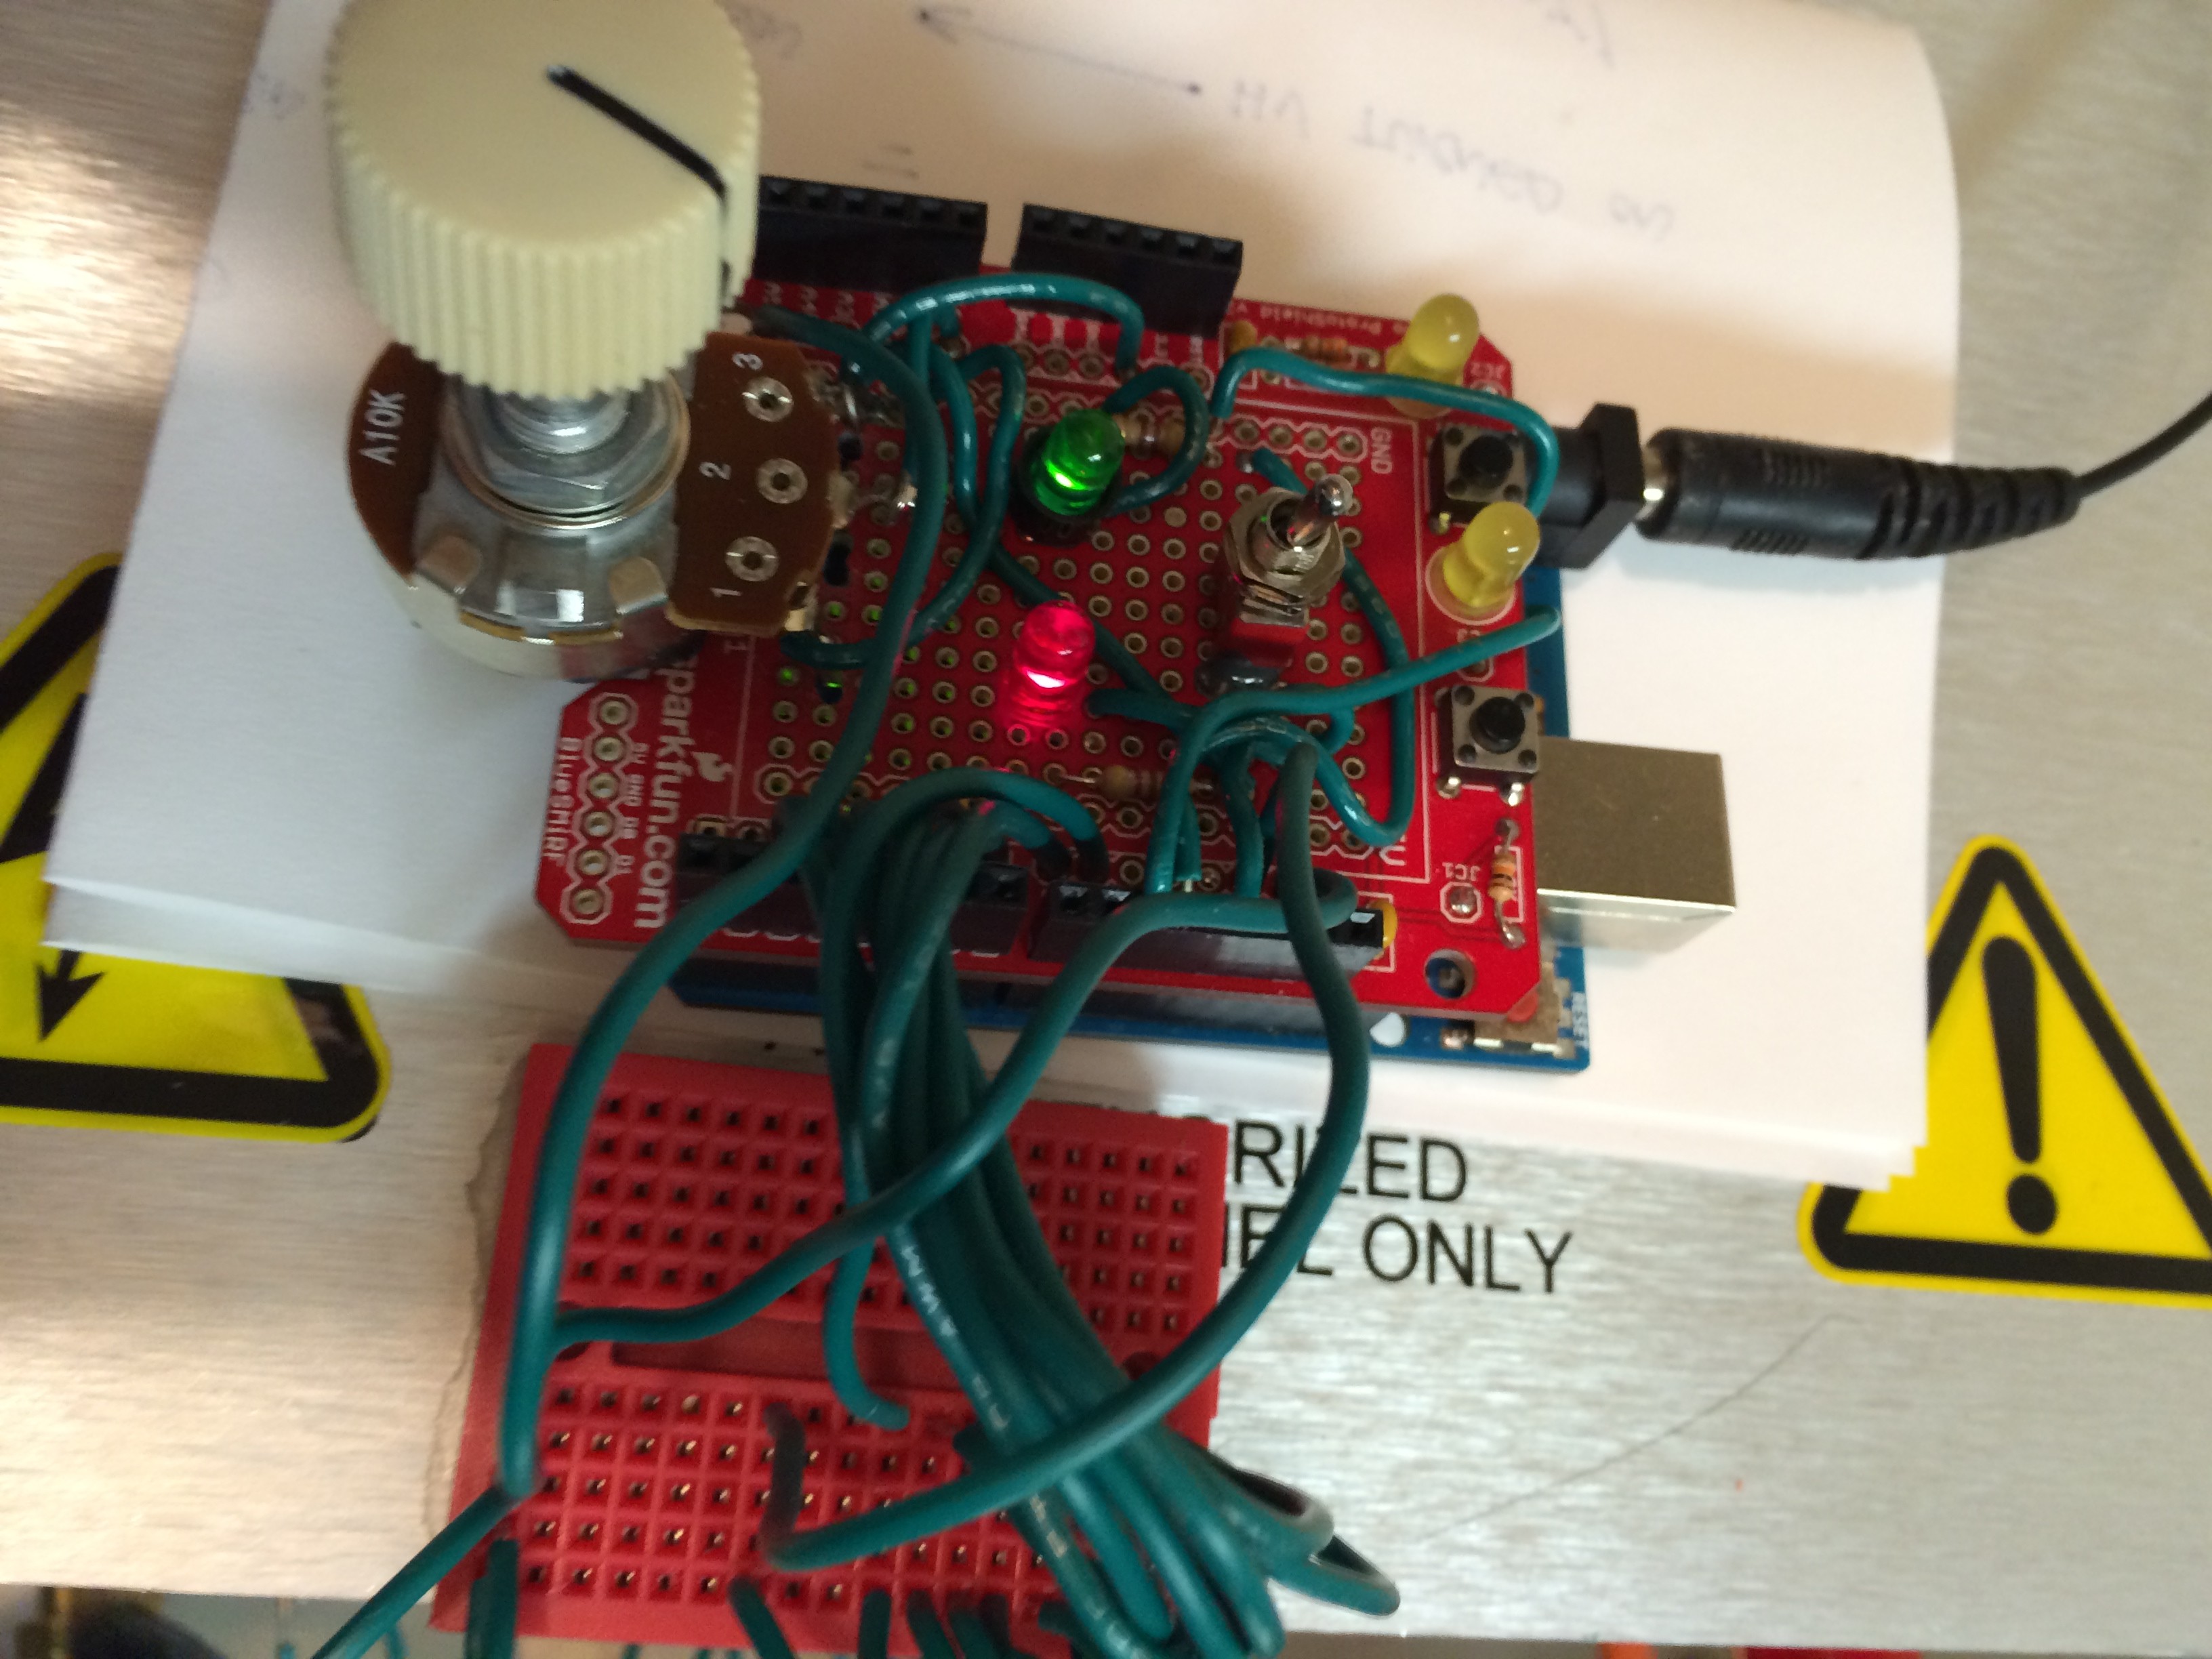
Arduino-based Controller in Operation
After putting in many hours of work building a controller and deciphering old and incomplete manuals, I have made progress understanding how this box works but unfortunately I haven’t been able to get any voltage output yet. I’ve figured out all the signals and how they work and my Arduino controller, shown above, works as planned. In the picture above, the knob on the left adjusts the level of the output voltage between 0 and -60 kilovolts. On the right is the “operation” switch, basically an on-off switch. There is a green LED that indicates the switch is ON and there is a red flashing LED that indicates the high voltage is ready.
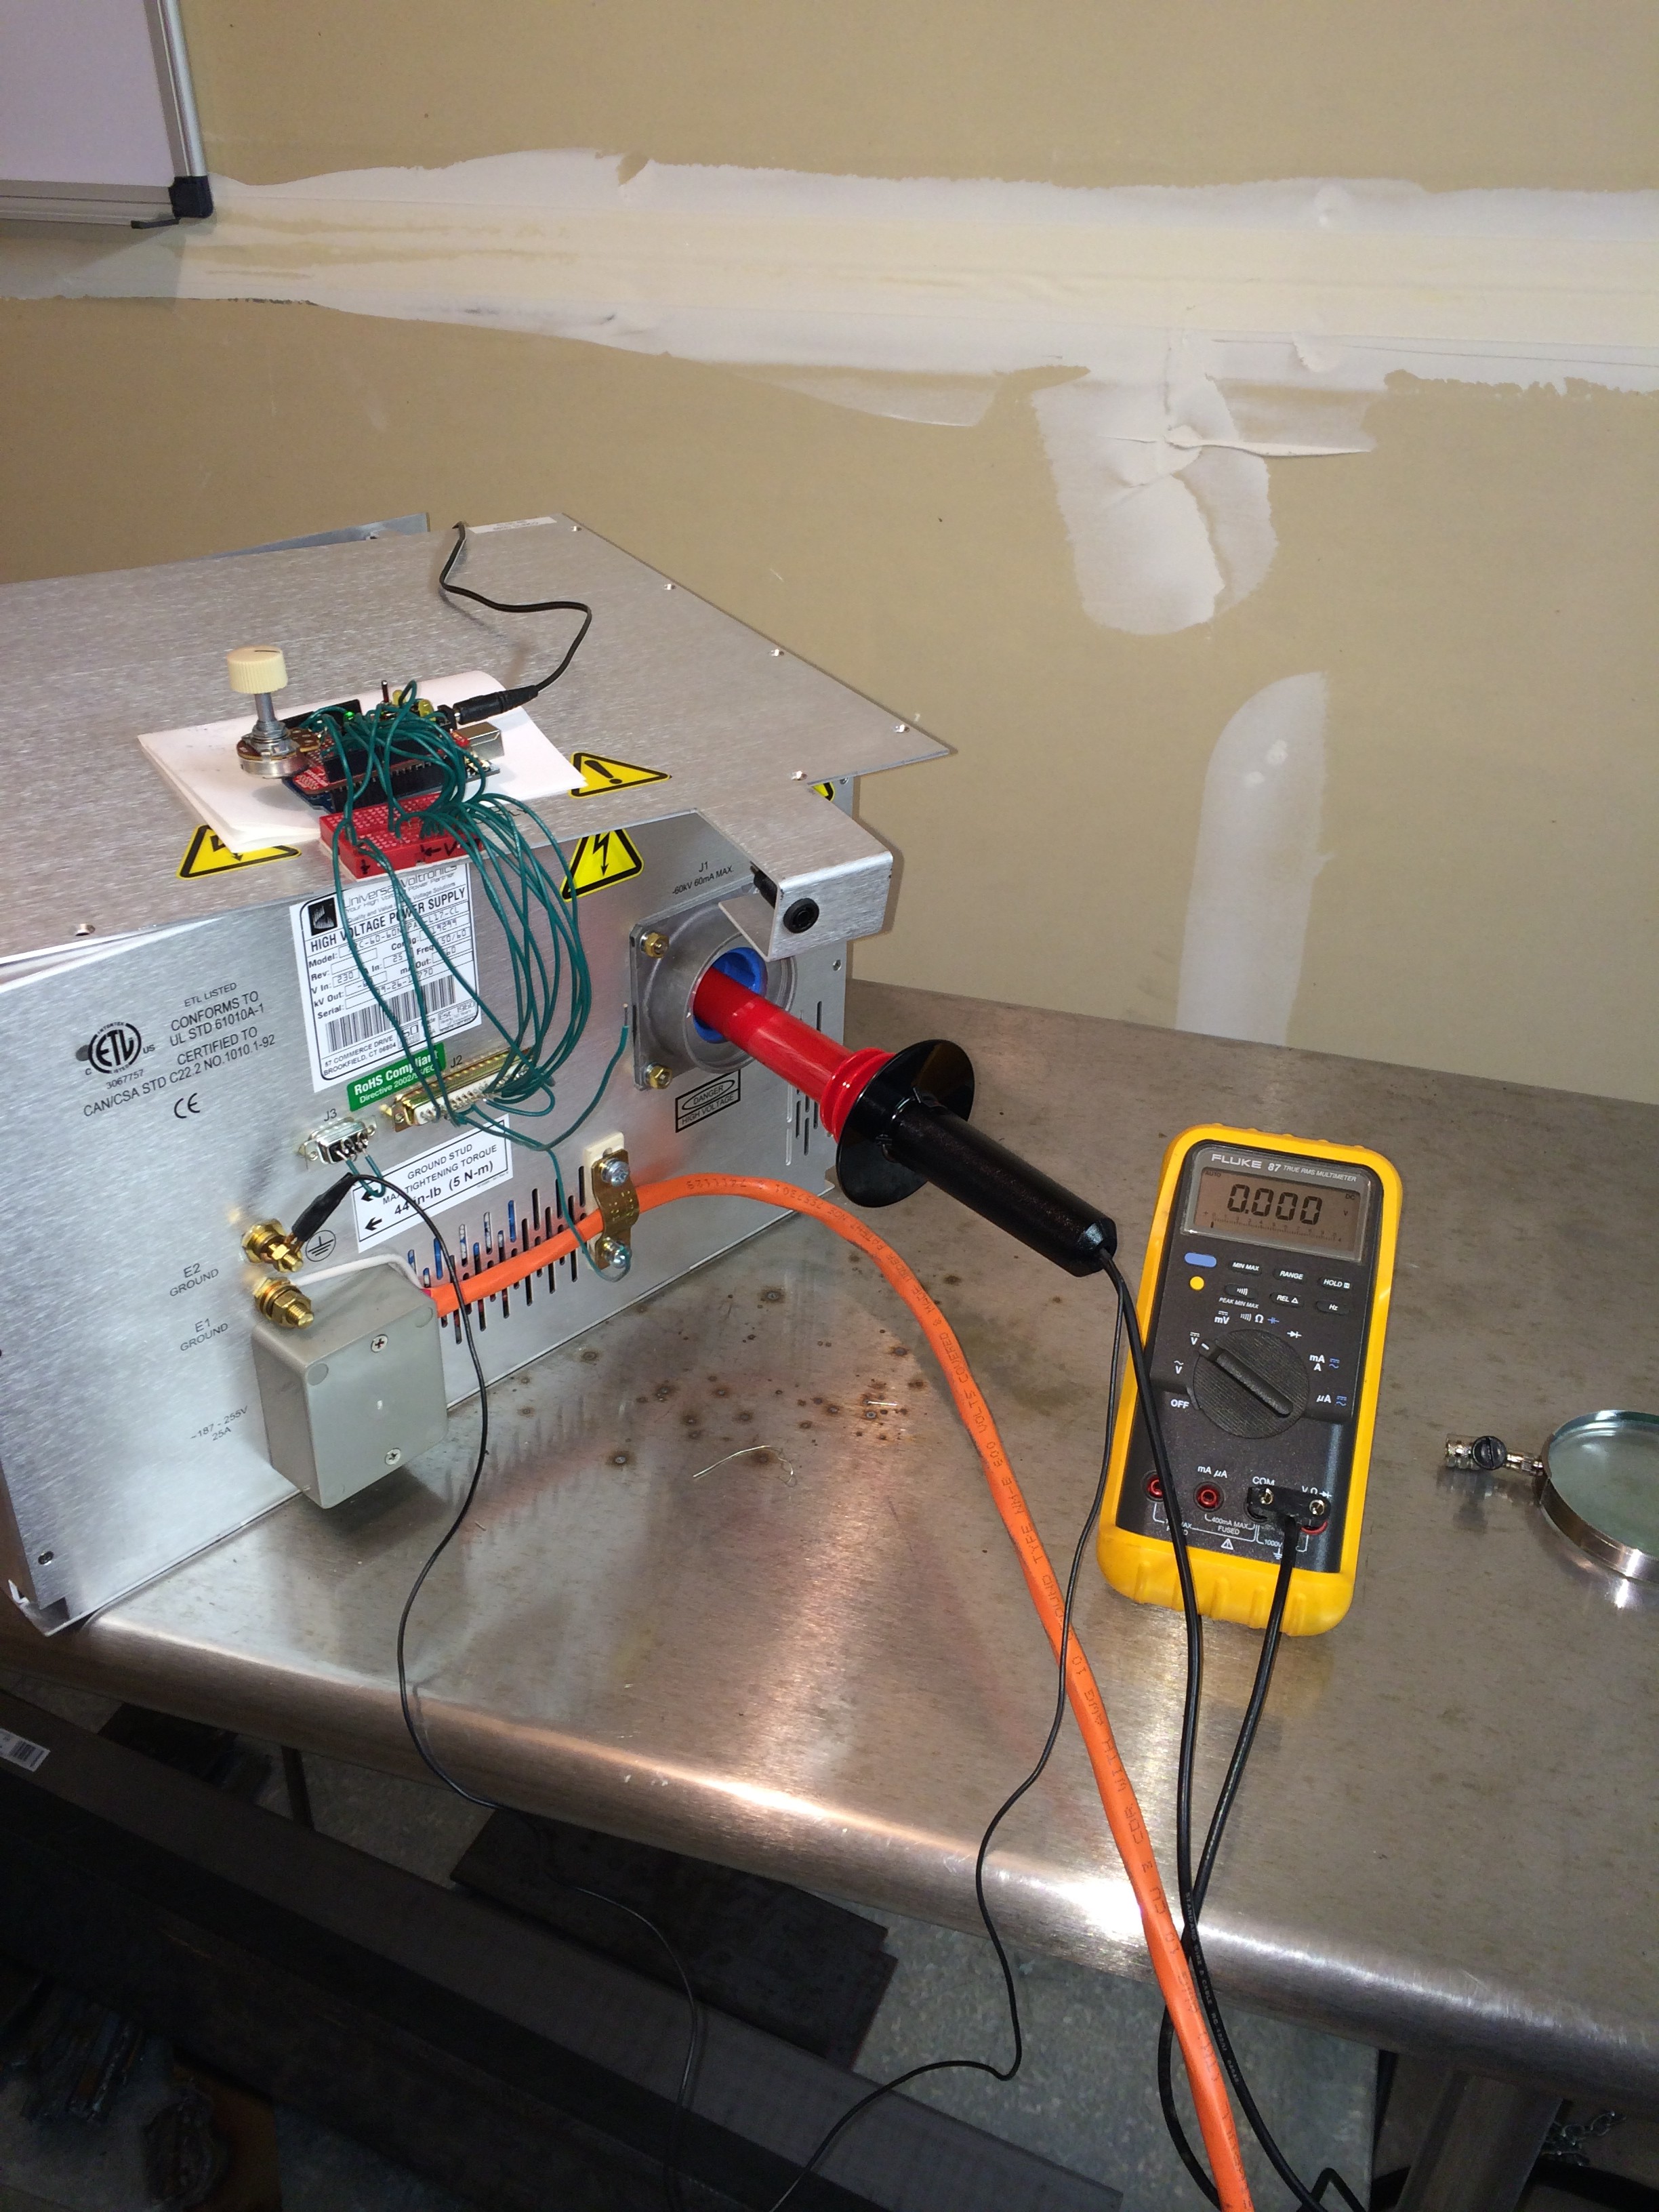
I figured out the three connectors in the high voltage receptacle and connected my high voltage probe to the proper one. Unfortunately, I have not gotten any voltage out despite tinkering with all the input lines in the system. It could be that the high voltage module is broken. I did confirm the internal computer boards are working and the inputs from the Arduino controller are correct. I should be getting some sort of output, but as you can see below, my meter reads zero.
I’ve pretty much confirmed this is a broken supply. Not surprising given how cheap it was. My next choice is to buy another one or build one.
Posted in Nuclear Fusion Reactor by Mark with comments disabled.
Windy Days Hike
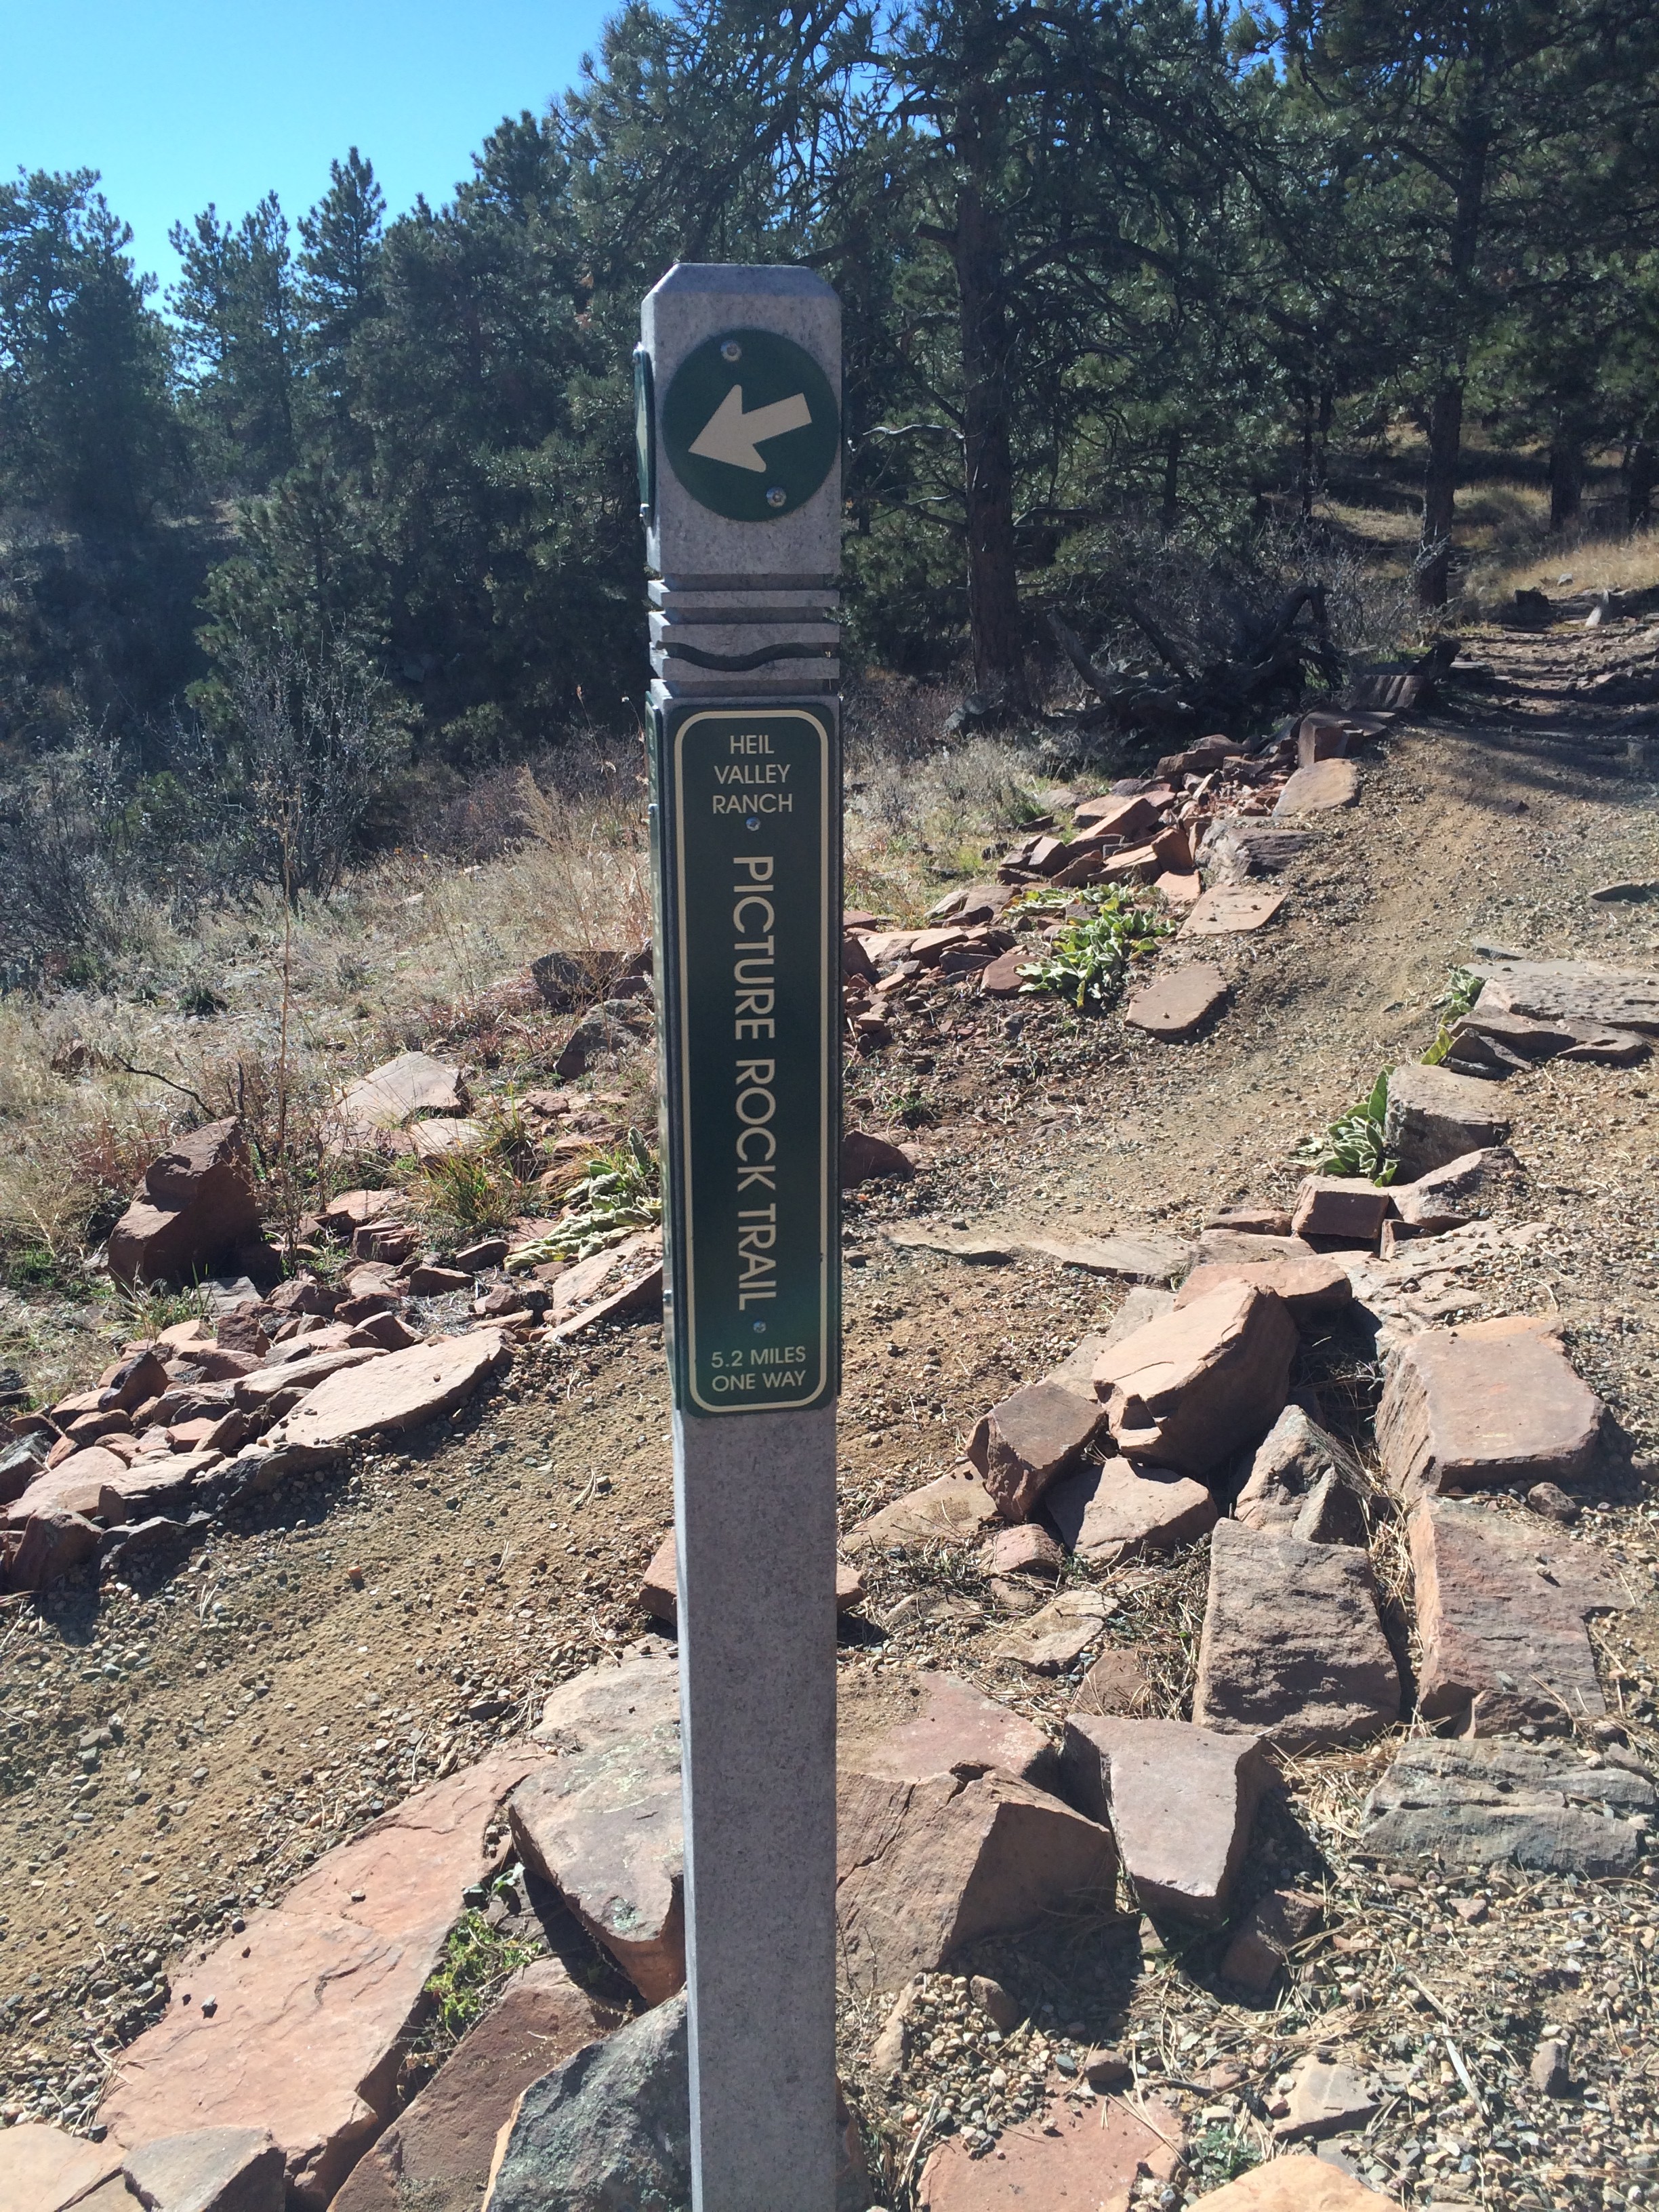
Trail Sign Pointing The Way
A couple of weekends ago we visited the newly reopened Lyons, CO to do a 10 mile hike with our friends Ann and Gary, who live in Lyons.. The drive into town reveals the amazing devastation of the September flood. Neither Ann’s or Gary’s house was damaged, but Ann could not live in her place due to lack of gas, electricity, water and sewage utilities. They finally got the utilities working but the town remains highly damaged and probably will be that way for a long time. We lived in Lyons for many years and it was shocking to see landmarks that are likely wiped out forever.
Nevertheless, we hiked a loop from Ann’s house through Heil Ranch Open Space on the Picture Rock Trail. The temperature was mild for November but the wind was so high at the beginning that we had a hard time crossing the flats prior to getting into the forest and on the actual trail. It’s that time of year again, the winter winds will soon dominate the high country. I’ve noticed this happens around New Year’s Day. A windless day above timberline is the exception during the winter in the Front Range north of I-70. Below is a GPS track of our hike. The town of Lyons is in the upper center part of the map.

Lucky for us the wind died down by late morning and the rest of the day was beautiful. Lots of mountain bikes on this trail, which is annoying if you are hiking but I personally have no complaints. Mountain bikers need a place to ride too, and many of the trails in the central Boulder mountain parks, where I hike very often, ban bikes.
The hike was nothing spectacular except to get out and enjoy a really nice day!

Posted in Journal by Mark with comments disabled.
Power controller progress
 Many Green Wires
I spent the evening soldering wires to connectors. I now have the power supply control bus connected up to an Arduino shield. Something tells me OSHA wouldn’t approve..;)
Posted in Uncategorized by Mark with comments disabled.
Power Test
 Power Supply Power
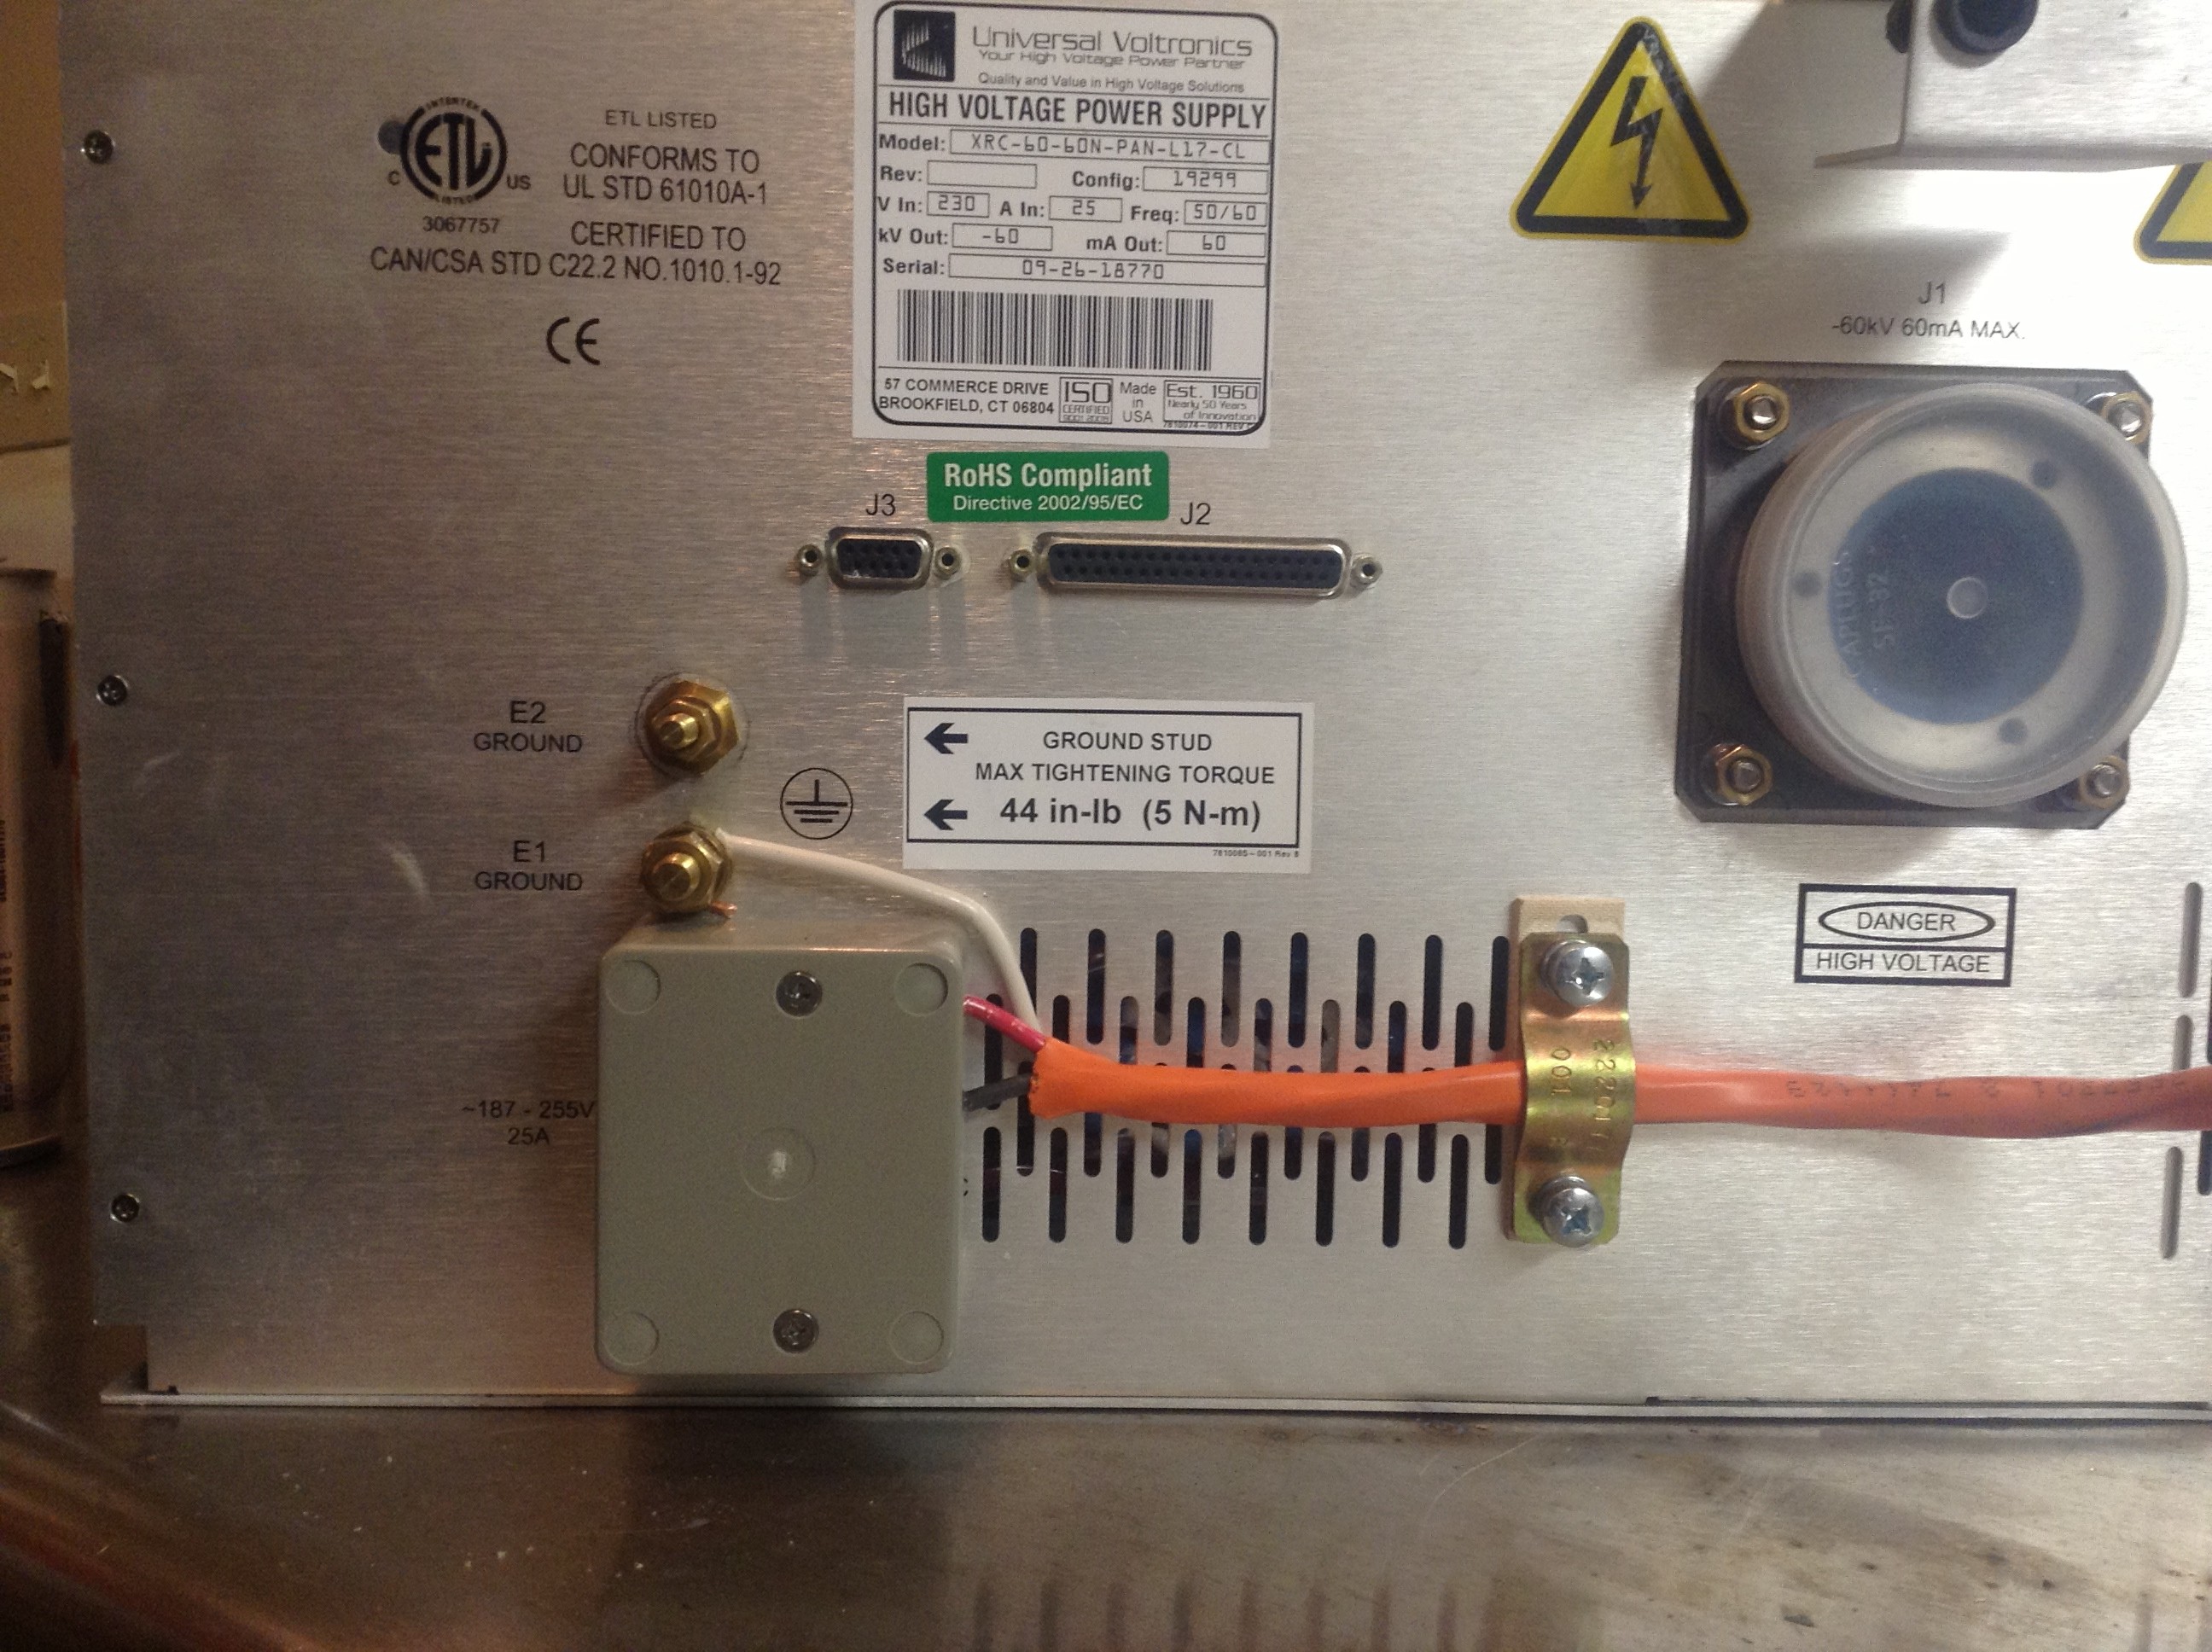
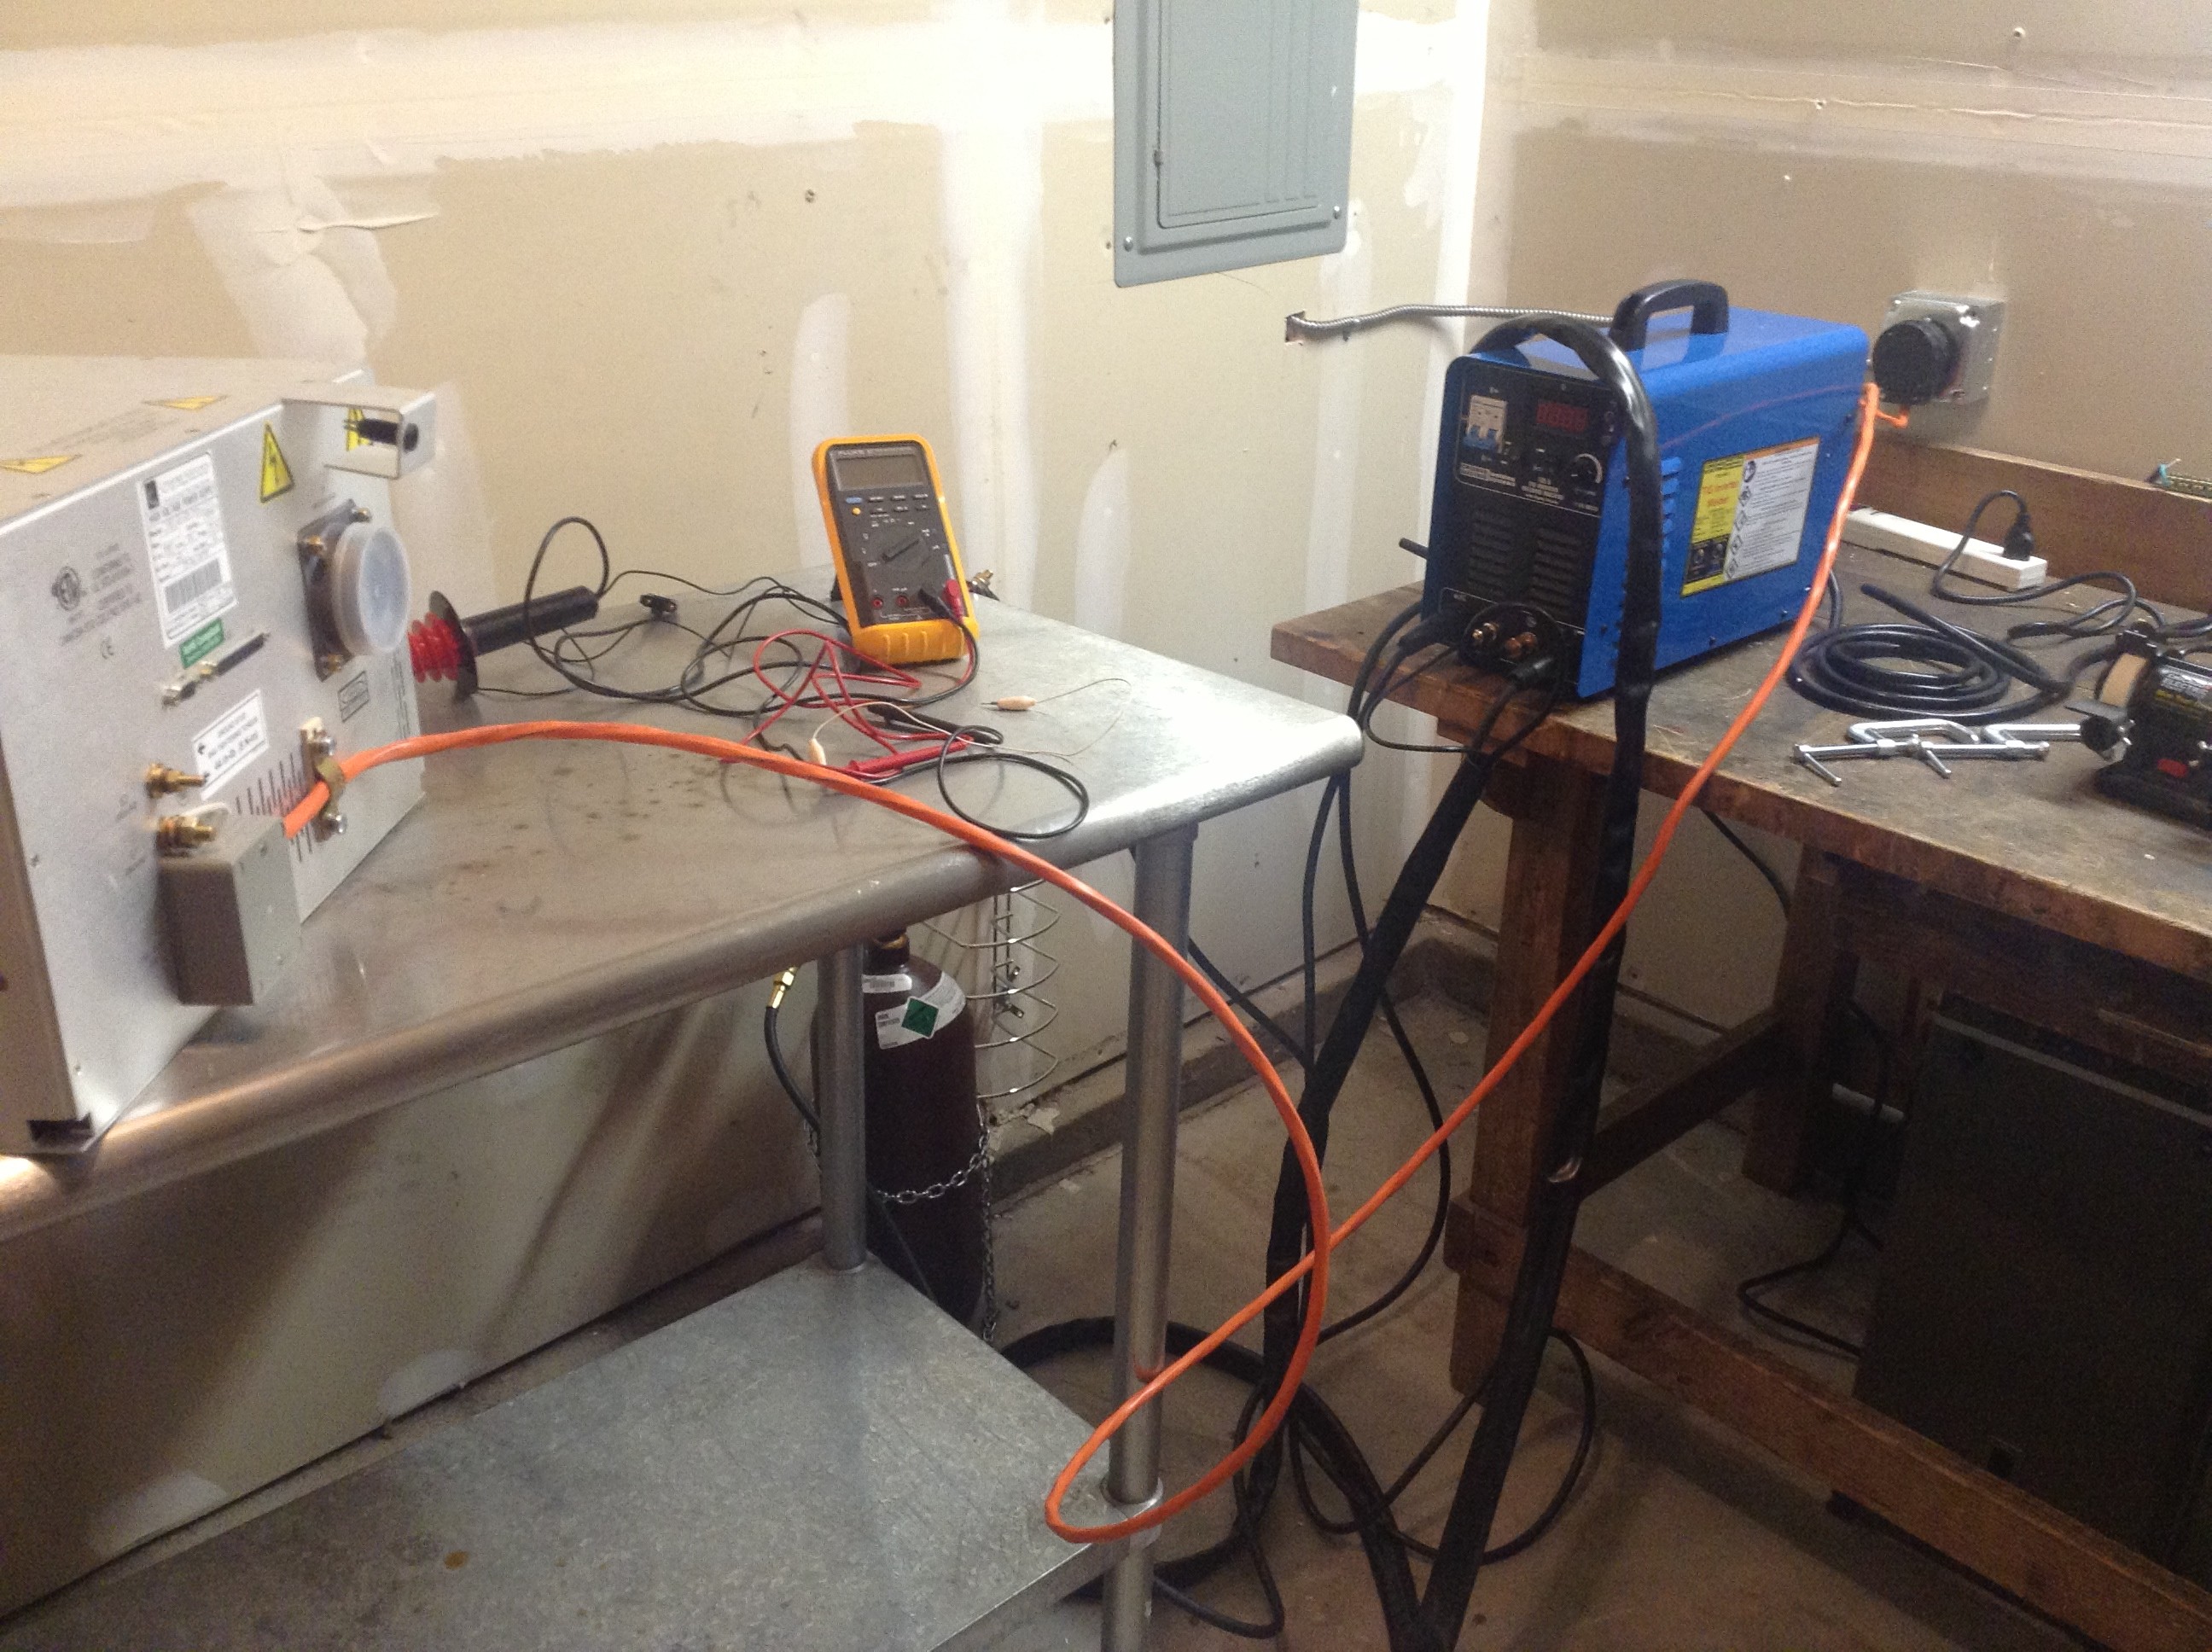
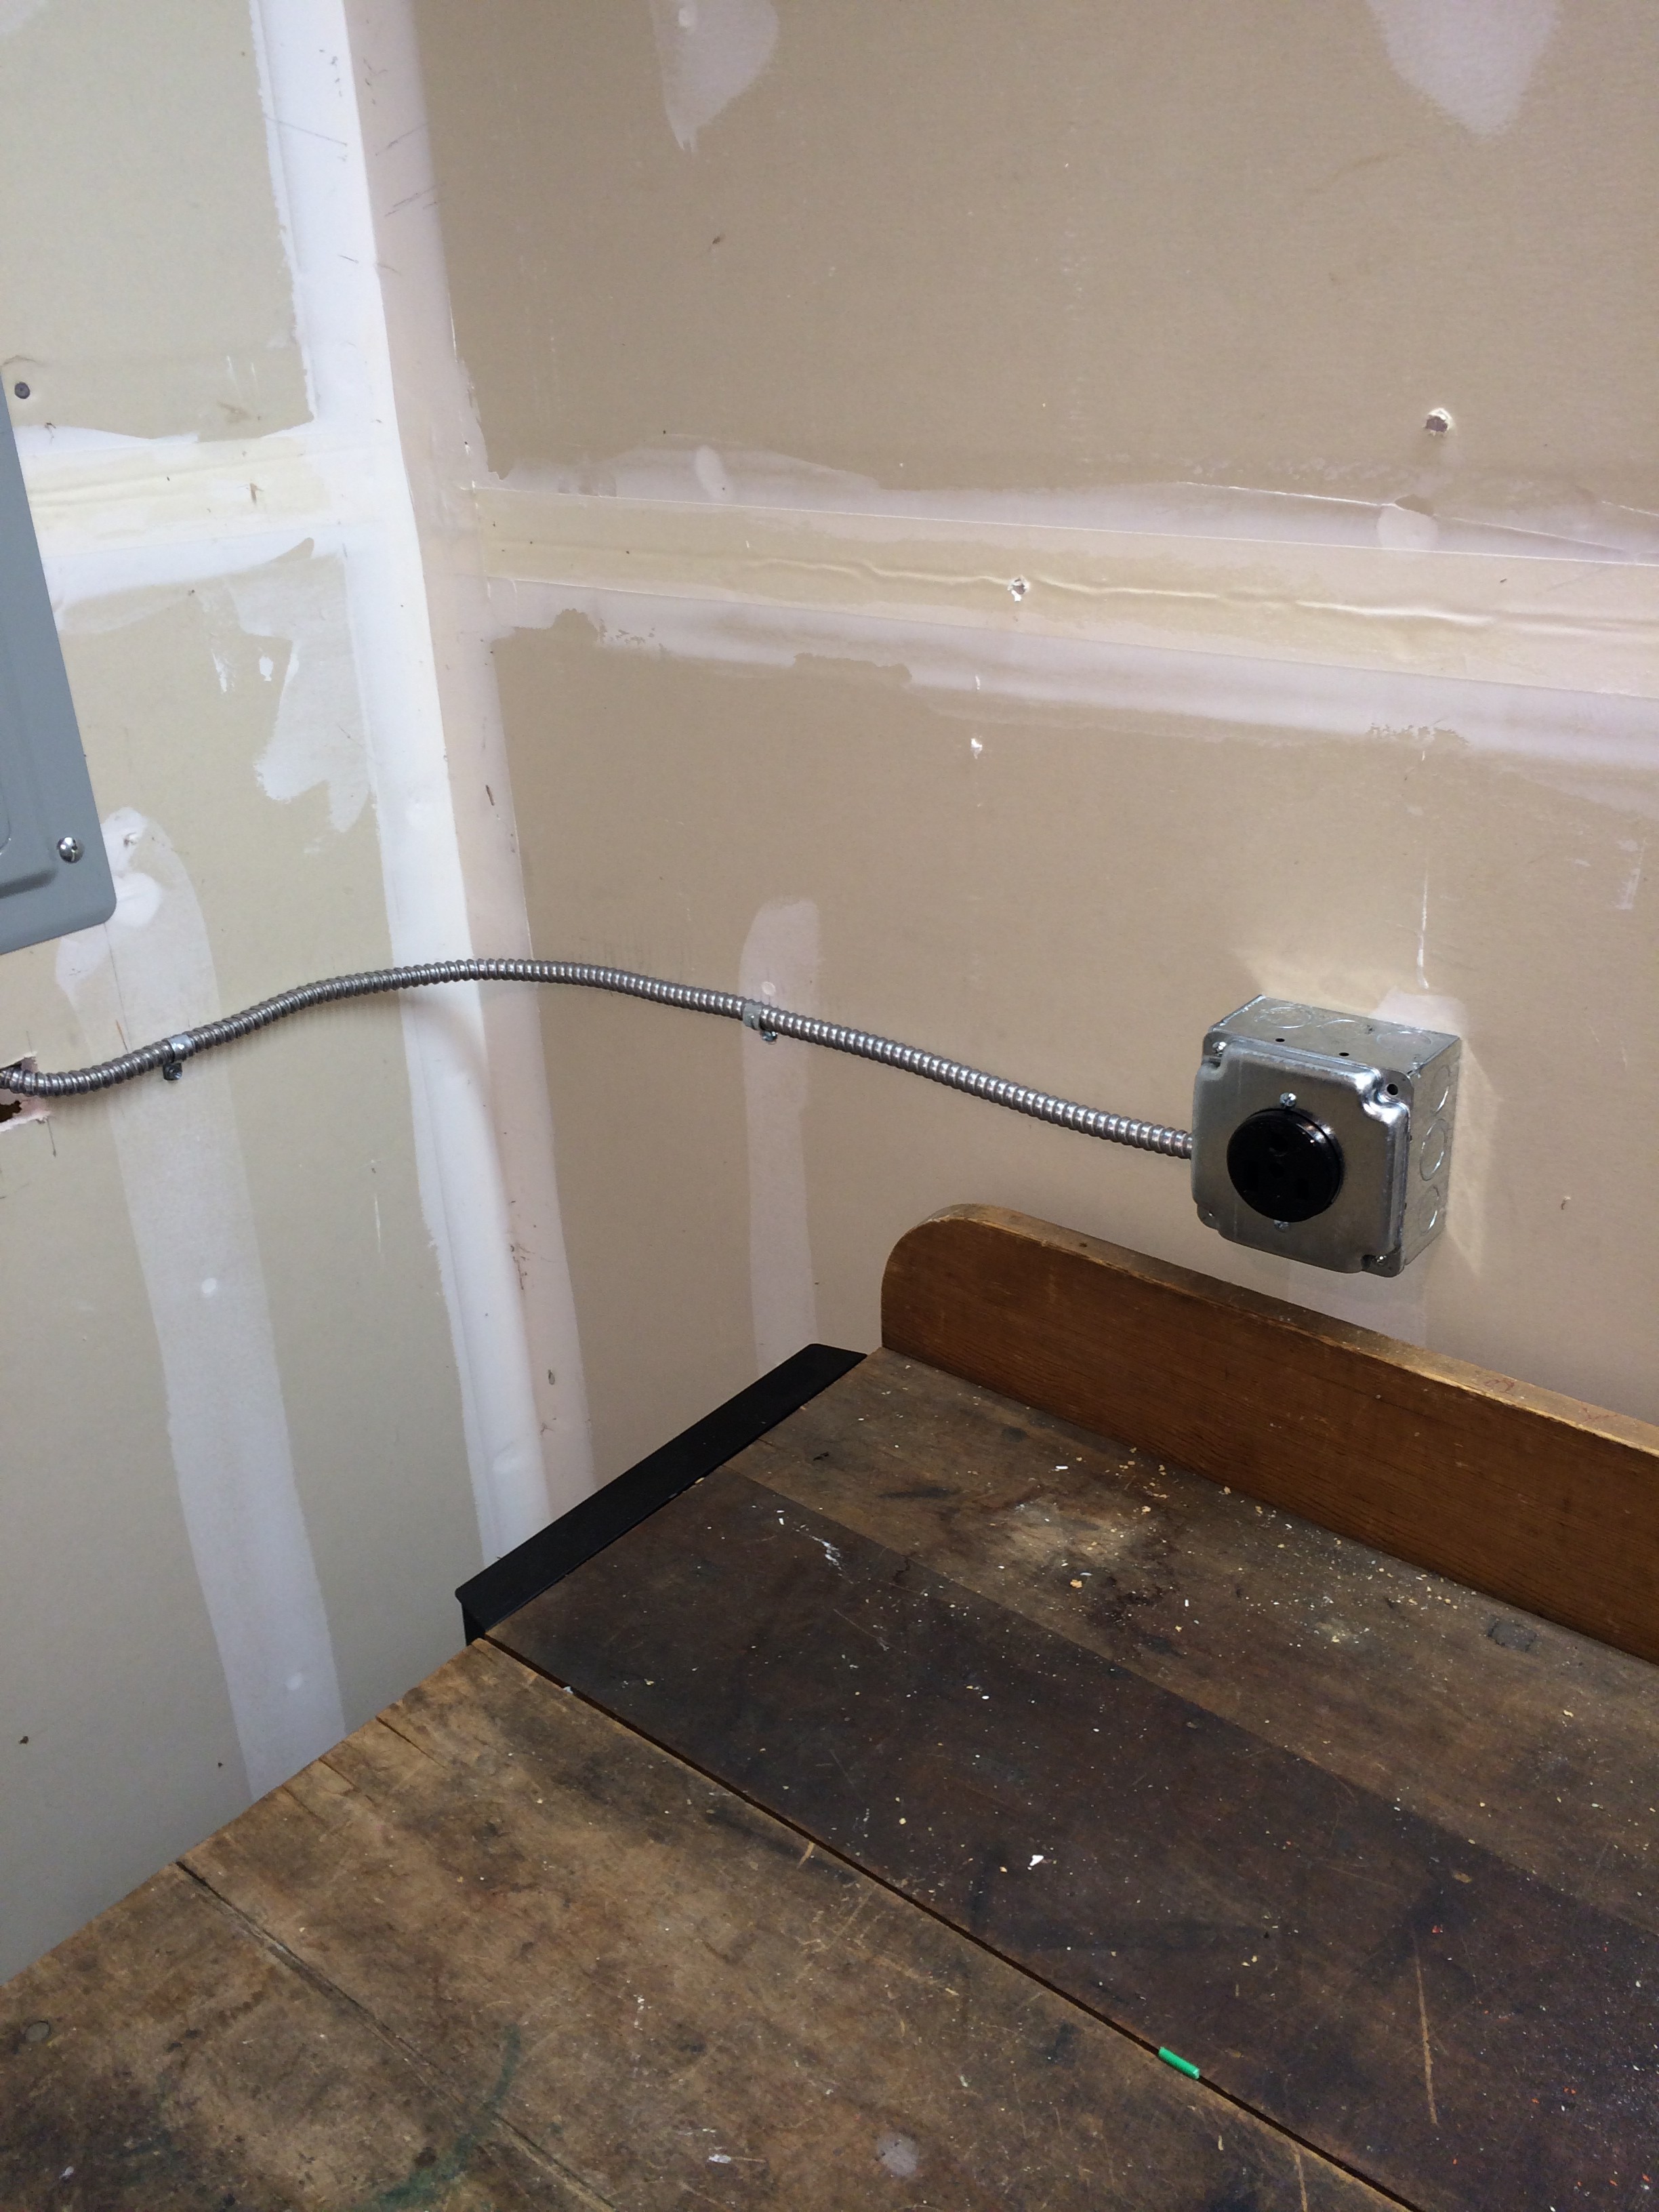
So… I finally got my reactor power supply wired up to…power. What I mean is that I wired up a cable and plug from my high voltage box so that it’s ready for the new 240 volt socket in my garage. This box converts the 240 volts alternating current to an adjustable zero to -60,000 volts direct current to be used in my reactor.
I’ve got to admit I was a bit apprehensive about this stage. Though I am an electrical engineer, I have always been leery of high voltage like you find in power circuits. One mistake and you are toast. Burnt toast. Literally. And I mean literally burnt, not literally toast…
Strangely, I have no fear of radiation, another great hazard of this project. I have no idea why. In both cases I have the wherewithal to learn and practice safe techniques, yet for some reason there is a difference. To me, this is like mountain climbing verses caving. Though both require highly similar techniques and abilities in rope work and climbing, I love mountain climbing and will never go caving. I really don’t know why. You couldn’t pay me to go caving. Well maybe you could, depends on the amount. Let’s talk…
Anyway, lethal voltages are something you need to operate a nuclear fusion reactor. This x-ray power supply can generate all the voltage and current I need but it isn’t a complete package. I guess it was pieced out of some laboratory instrument somewhere. I bought it because it was cheap and met my needs, and expected to have to work on it a bit to get it to function, just as I have for every part of this project.
So tonight I got it wired up to my 240 volt plug. I built the orange cable and plug you see in the pics. I turned it on and it works! The pic below shows the first power-on, that box is plugged into my wall socket through the orange cable. No electrocutions or fires either which is always a plus. Now I need to finish the controller so that I can adjust that mega voltage output.
Yikes! 😉
Posted in Nuclear Fusion Reactor by Mark with comments disabled.
Mysterious activities…

Madness!
I have recently been accused by a number of acquaintainces of being a mad scientist! I end the last sentence with an exclamation (!) to emphasize the “madness.” And I quote the word madness to emphasize madness. Which means, if you accept the common stereotype, that madness is more appropriately described as manic. And if that is true, then it may also be true of me. For some reason, this reactor project has had that effect on me.
To that end I acquired a TIG welder, pictured above. Why? This is what you need to weld stainless steel, the most common reactor chamber material. I have components that need custom adapters welded to them, the main one being the diffusion pump. I decided to learn to do this myself rather than have a shop do this work. Because that is what a mad scientist would do!
I took a half day welding class last summer. Wow, it was fun! Melting metal with plasma, there are few better (legal) activities for a barely controlled pyromaniac.
My mom, who will read this (hi mom!) might remember when I was about 12 years old attempting to make a radiation shield/neutron moderator. I won’t go into exactly why I was making this, let’s just say I was setting up for radiation experiments… I collected a bunch of lead from fishing weights and car batteries and put it all in a cooking pan. I placed it on the kitchen stove burner and turned it on high. As soon as the lead started melting, I threw in a brick of paraffin. It rapidly melted and smoked furiously, and then caught on fire. Just then, mom came into the kitchen, no doubt drawn by the savory smell of marinading wax and lead. She saw the pan on fire, grabbed a glass of water and threw it on the flaming concoction. It exploded in a fireball of sputtering wax and lead all around the stove. She then grabbed the pan handle and threw it in the sink, extinguishing the fire.
Yow! To this day I have no idea what I told her I was doing, whether it made any sense to her or even if she remembers it. It was just one of the uncountable outlandish stunts I pulled as a kid.
Sorry mom, but as you can see, the madness continues today! 😉
Posted in Nuclear Fusion Reactor by Mark with comments disabled.
Next stage…
 Reactor chamber ready to be assembled
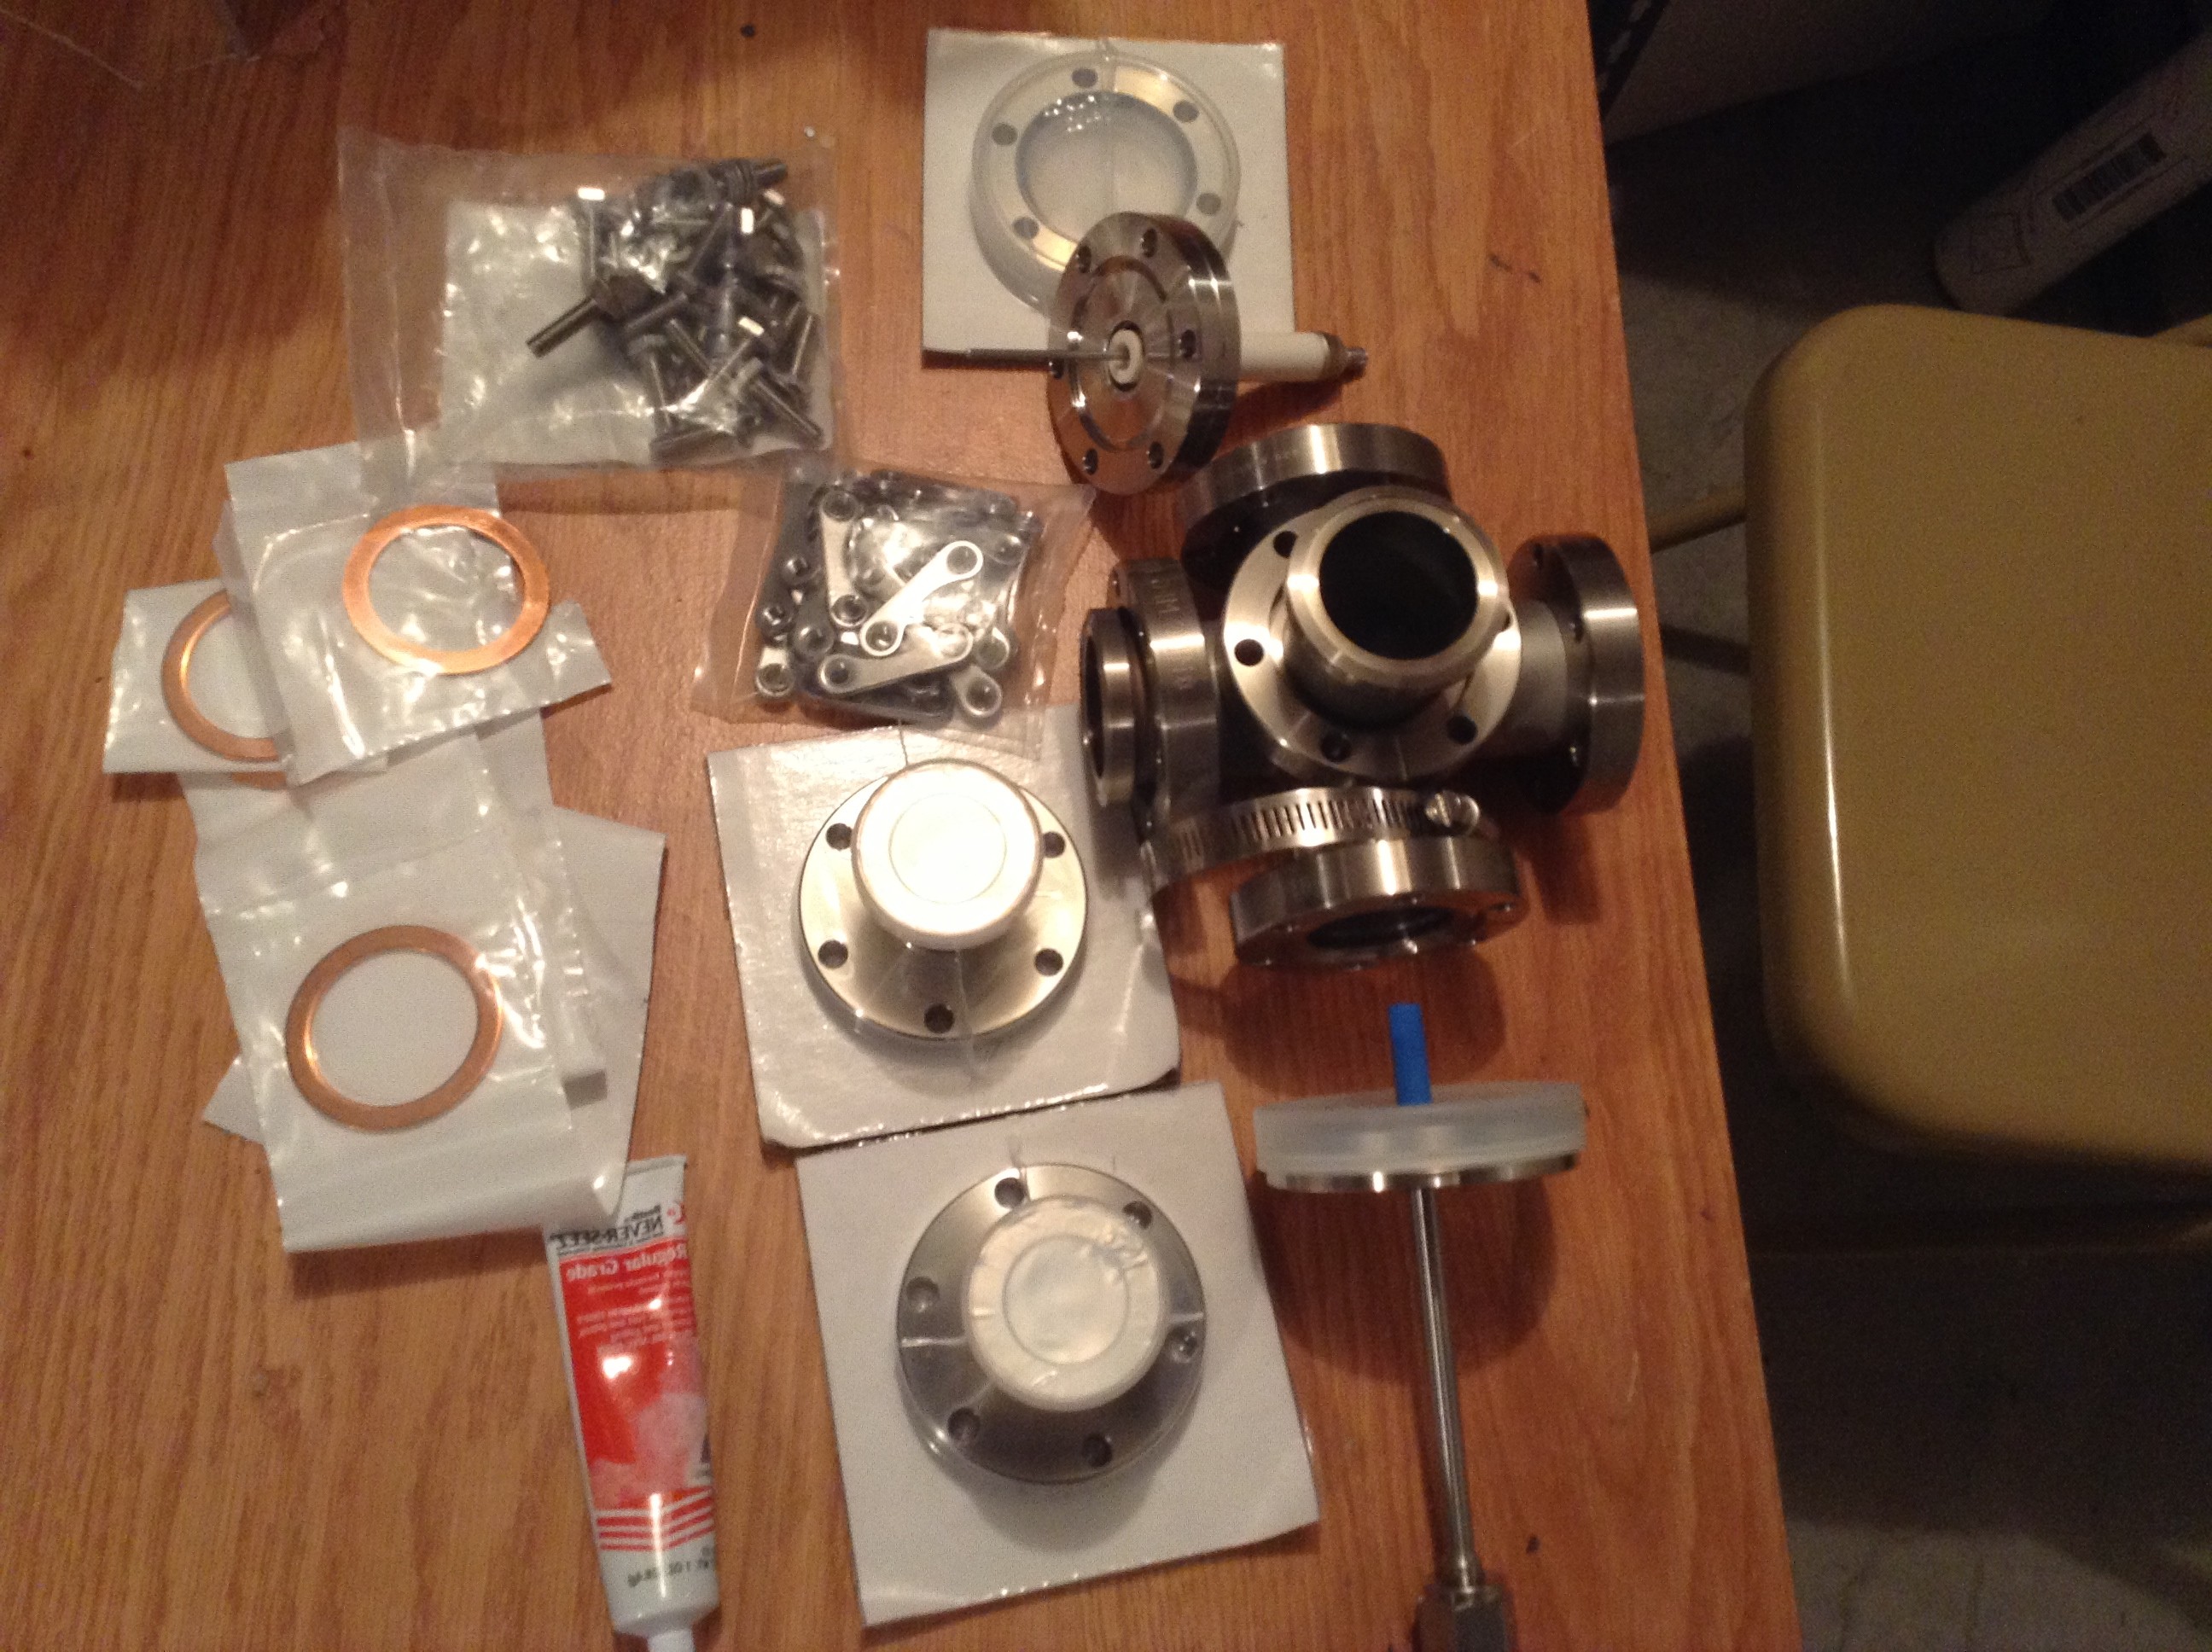
I thought I should post an update to my project since it’s been a while. I had a “demo party” for my beer can reactor Demon I and have disassembled it to make room for the next version. It will be a completely different chamber and power source, and require a bit more instrumentation.
The photo above shows all the parts necessary to put my reactor chamber together. On the right is the 5-way “T” that I am using as my vacuum chamber. The rest of the parts are the attachment adapters that get bolted on to the pipe openings. Also shown is a set of bolts and nuts, copper gaskets and a tube of bolt grease.
 This chamber uses attachment fittings known as Conflat Flanges, or CF flanges. They can be quite expensive but can hold a vacuum many orders of magnitude below what I need, and they are quite common to buy on eBay or order from a vacuum chamber retailer online. They are 2.75 inches in diameter, big enough to work with but not so big they become prohibitively expensive. You can buy huge flanges for big chambers, but the price is likely to be thousands of dollars.
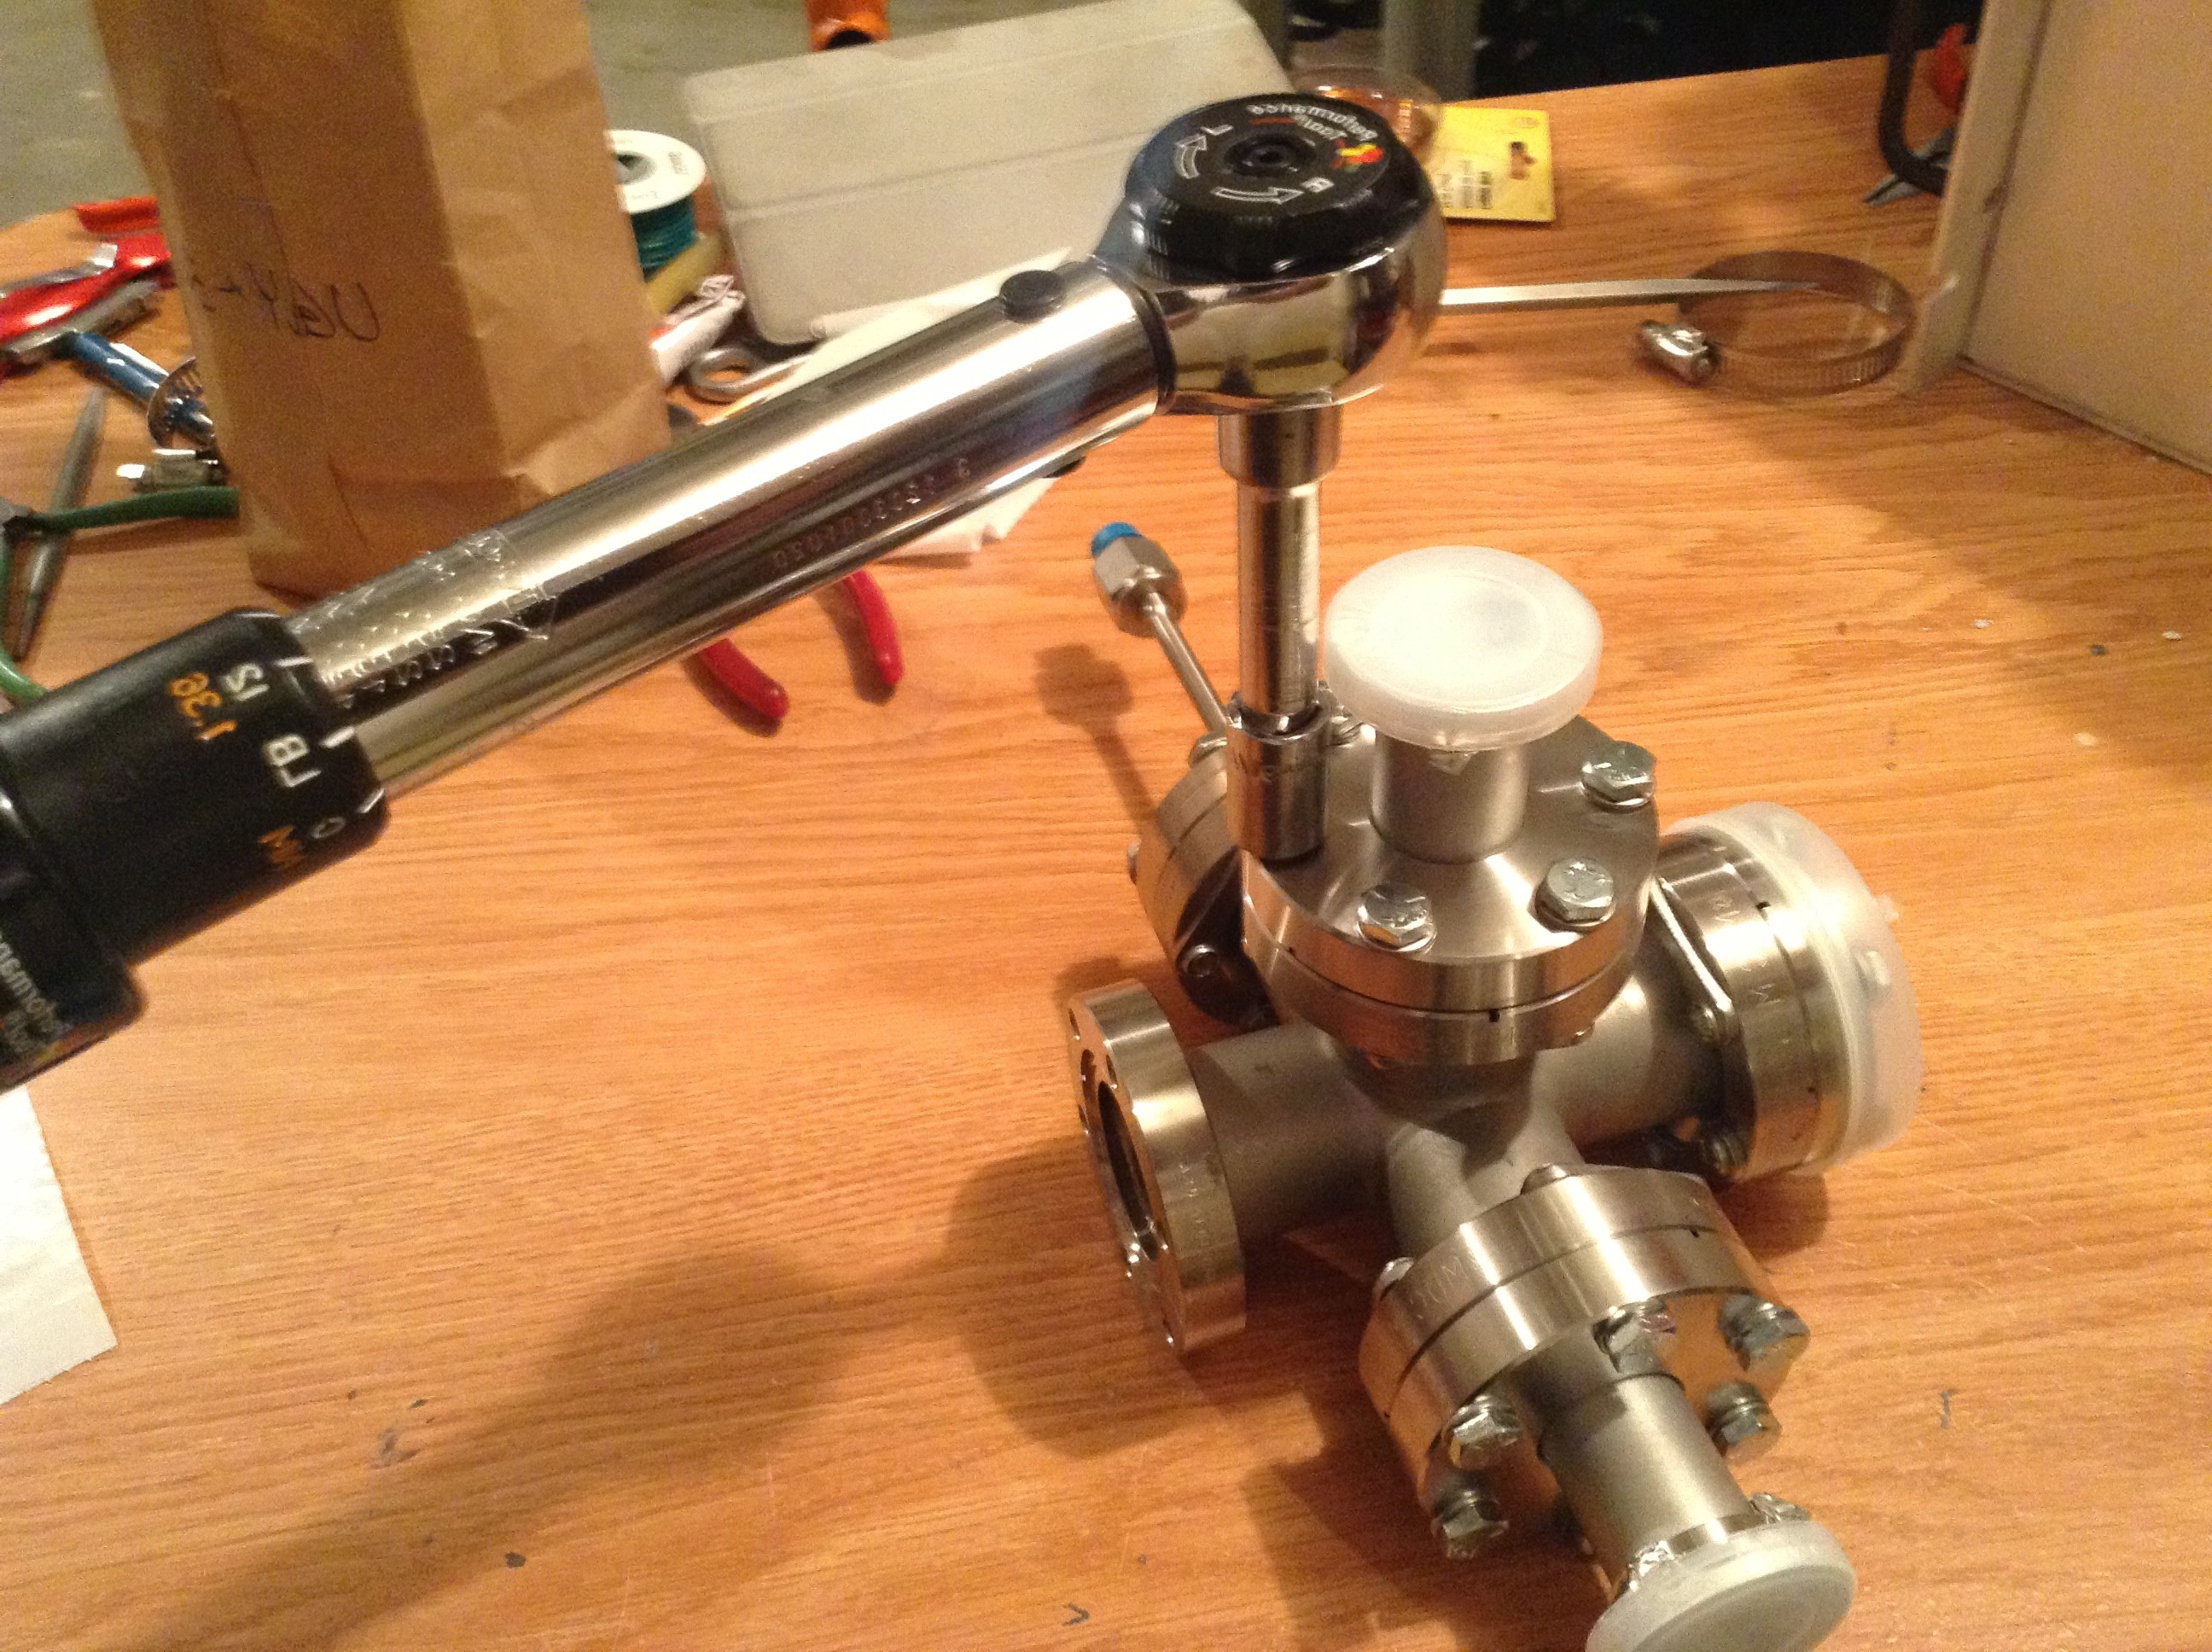
There are 6 bolts on each flange. The proper way to assemble these is to put the copper gasket between each flange and put them together. You then tighten the bolts slowly, cranking a bit on one then on the one directly across from it (shown above). This tightens the flange smoothly all around. You need to use a torque wrench and tighten to 144 inch-pounds for this particular flange. You also need to apply bolt grease to the threads first or the bolts tend to weld to the nuts over time, making it impossible to remove them with a wrench.
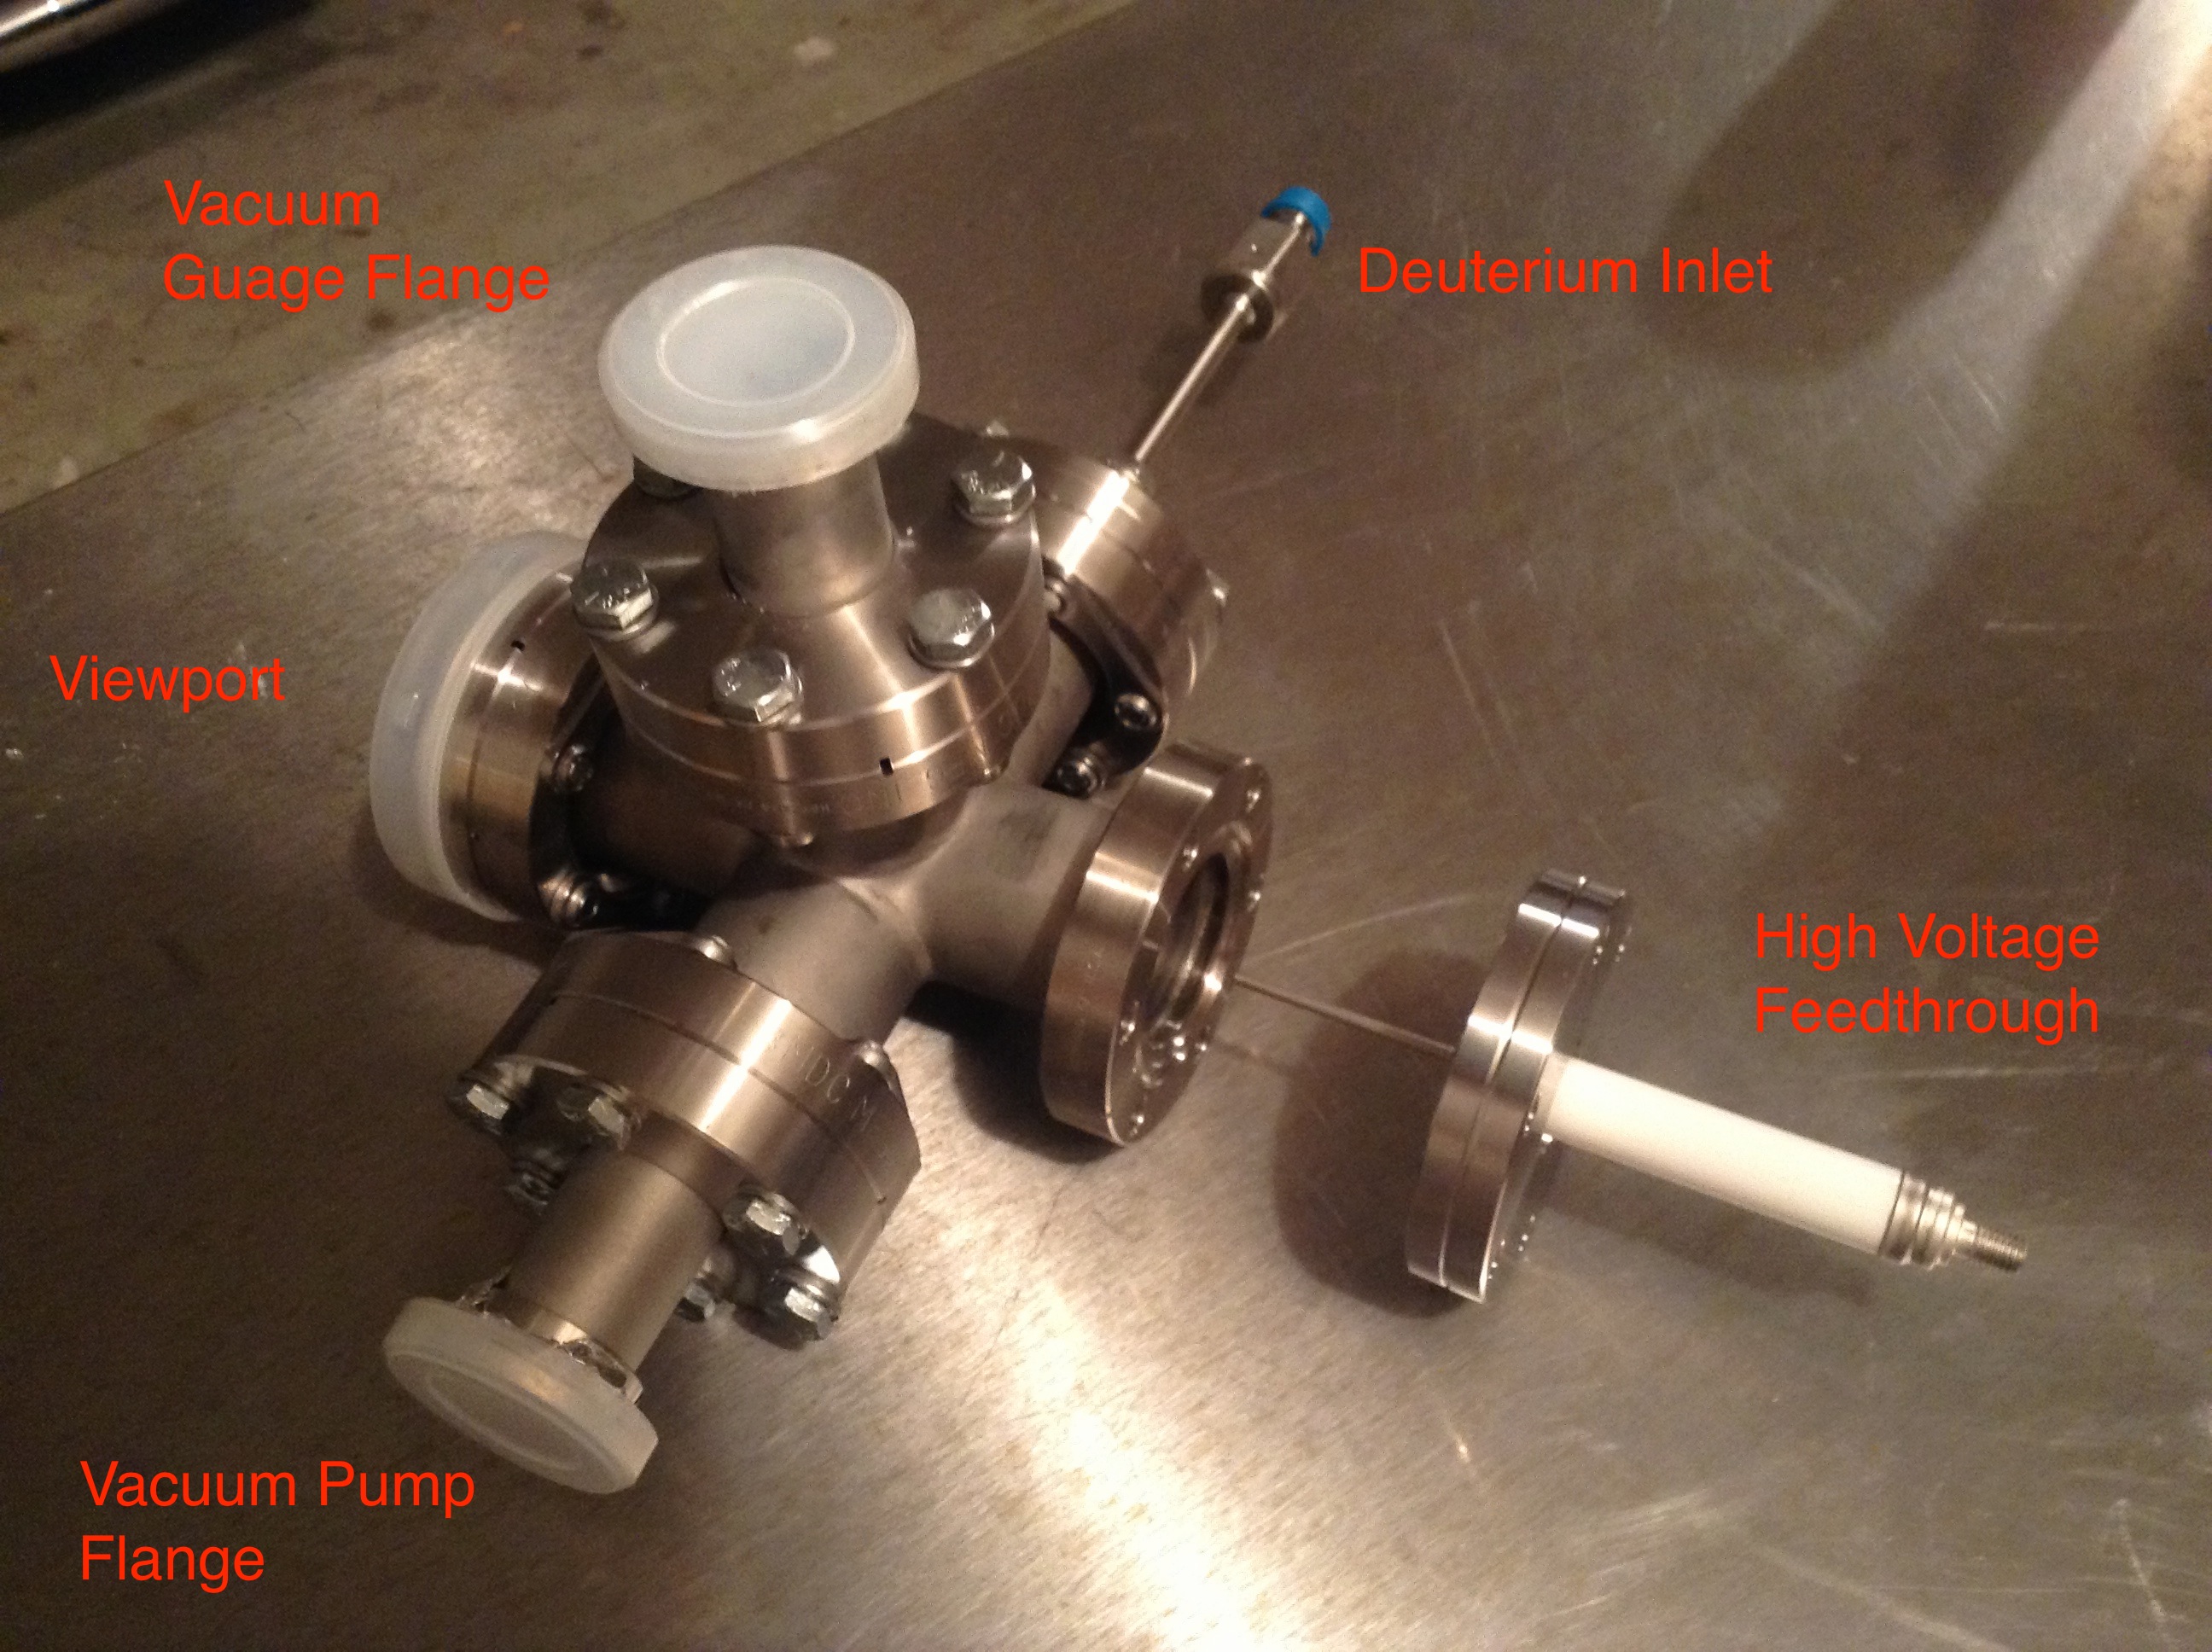 My assembled chamber is shown above with the fittings labeled. The only thing not attached is the high voltage feedthrough because I need to attach the tungsten grid for the core and insulate the stem. This chamber has one new fitting that my beer can reactor did not, the deuterium feedthrough. This will be the inlet for the reactor fuel.
Also, today I had a 230 volt single phase plug installed for my monster power supply, shown below.
Coming Next: Nuclear Instrumentation Modules!
Posted in Nuclear Fusion Reactor by Mark with comments disabled.
High Voltage Controller

Demon Server
You read that right, it is a servant of a frickin’ DEMON! What you see pictured above is an Arduino board with a wifi “shield.” What that means is this: An Arduino board is a hobbyist micro computer controller board that enables you to do all kinds of cool things, like make a wireless high voltage controller. Which is what I’m trying to do..
Ok, let’s step back a minute… A few months back I found a 60,000 volt boat-anchor-of-a-power-supply on eBay. Unfortunately, it did not come with a controller. I can’t adjust or monitor the voltage without a controller. The power supply, which is the size of a microwave oven but much heavier, has a connector in the back with a bunch of pins that are used for signals to control the voltage. Well, an Arduino can easily be modified to apply the proper signals to these pins. But I also want a bit of safety, I don’t want any physical contact between an adjusting knob and the power supply, just in case there is a problem… Like LIGHTNING arcing across the room!
So it turns out you can buy a wireless board, called a “shield” in the Arduino hobbyiest nomenclature, that allows the Arduino to receive and send data over a wifi network. Perfect! In theory. But NOT so much in practice…
It works, I’ll give a lot of credit for that. The problem is that the Arduino hardware and software are open source. This means someone makes something, a board design and software, and then throws it out to the public, open to modification. In theory someone picks it up from there and improves things incrementally until you have a great working product in the end. The BIG, BIG problem with this is that it relies on many people for input and there is no quality control. This technique works for popular projects like wikipedia, but is severely lacking for others. In this case, the most basic things, like readable documentation that could easily have been written by the original designers, is lacking. Big frustration, it took me probably 10 hours to get the thing to work as advertised…
Hey, I’m an Electrical Engineer/Computer Scientist and have done this stuff for decades. I imagine it’s quite a challenge for those who are new to it, but of course that challenge can be part of the fun!
Posted in Nuclear Fusion Reactor by Mark with 2 comments.
Sailing Lake Huron
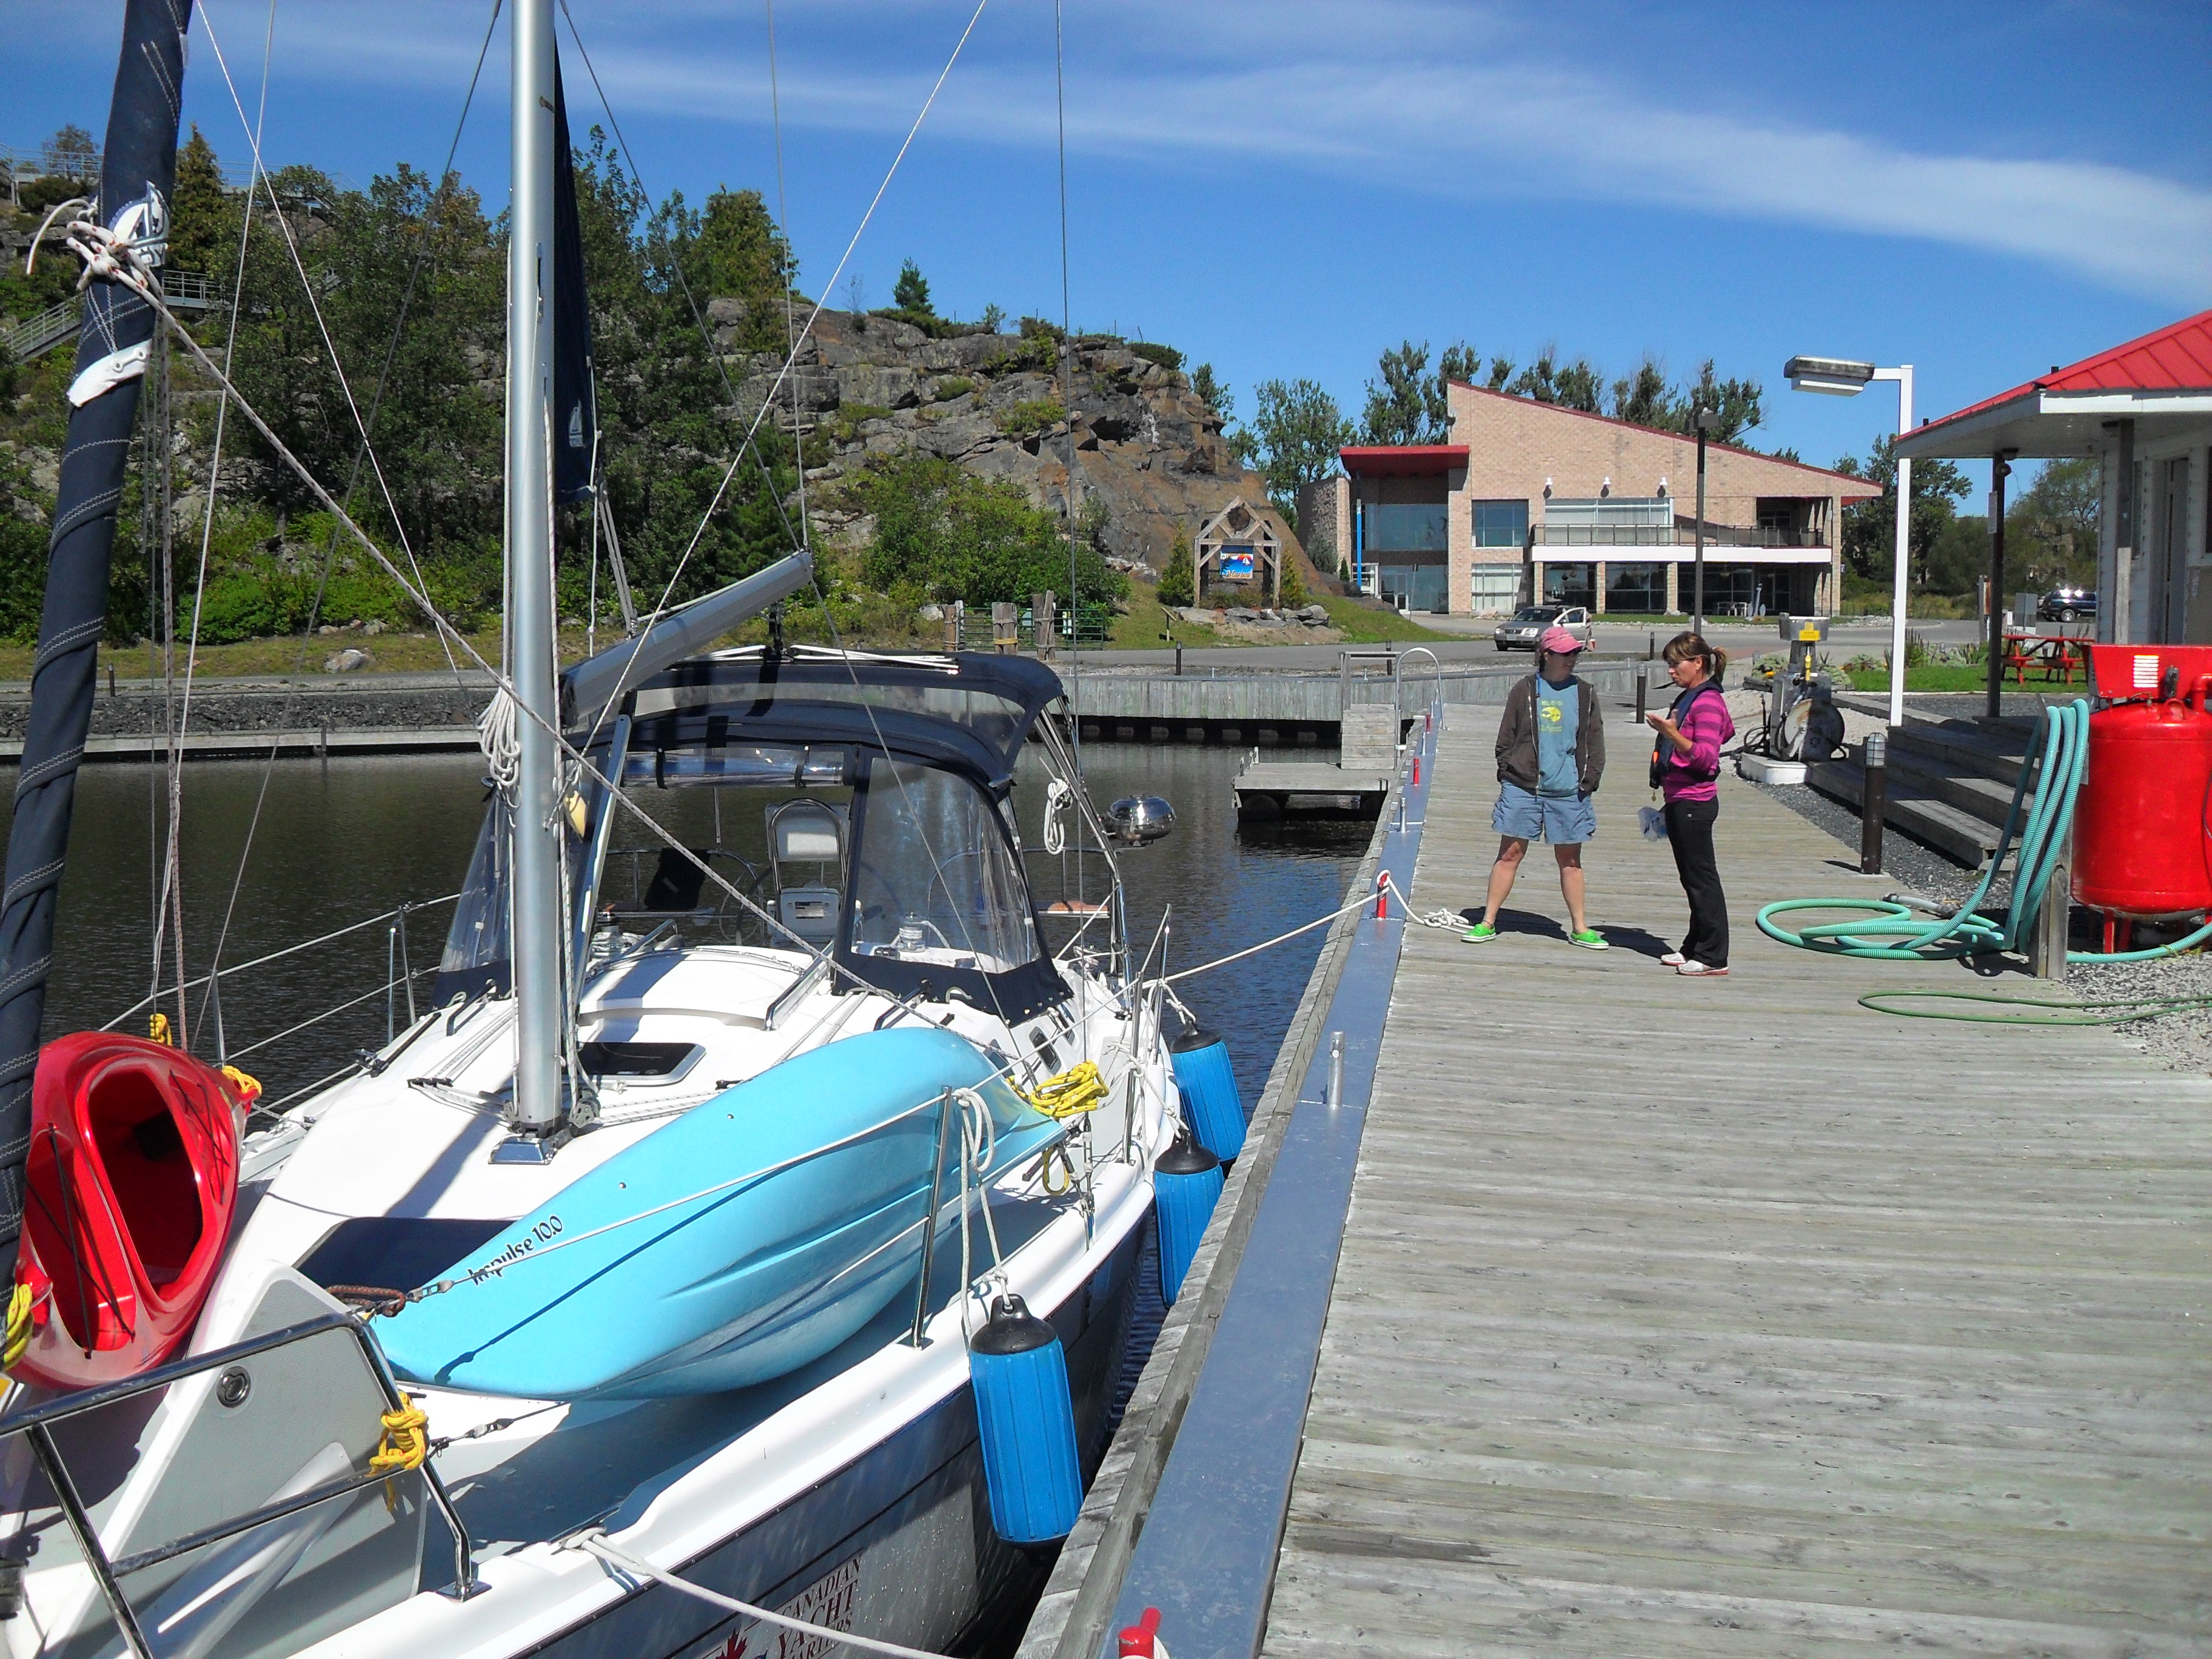
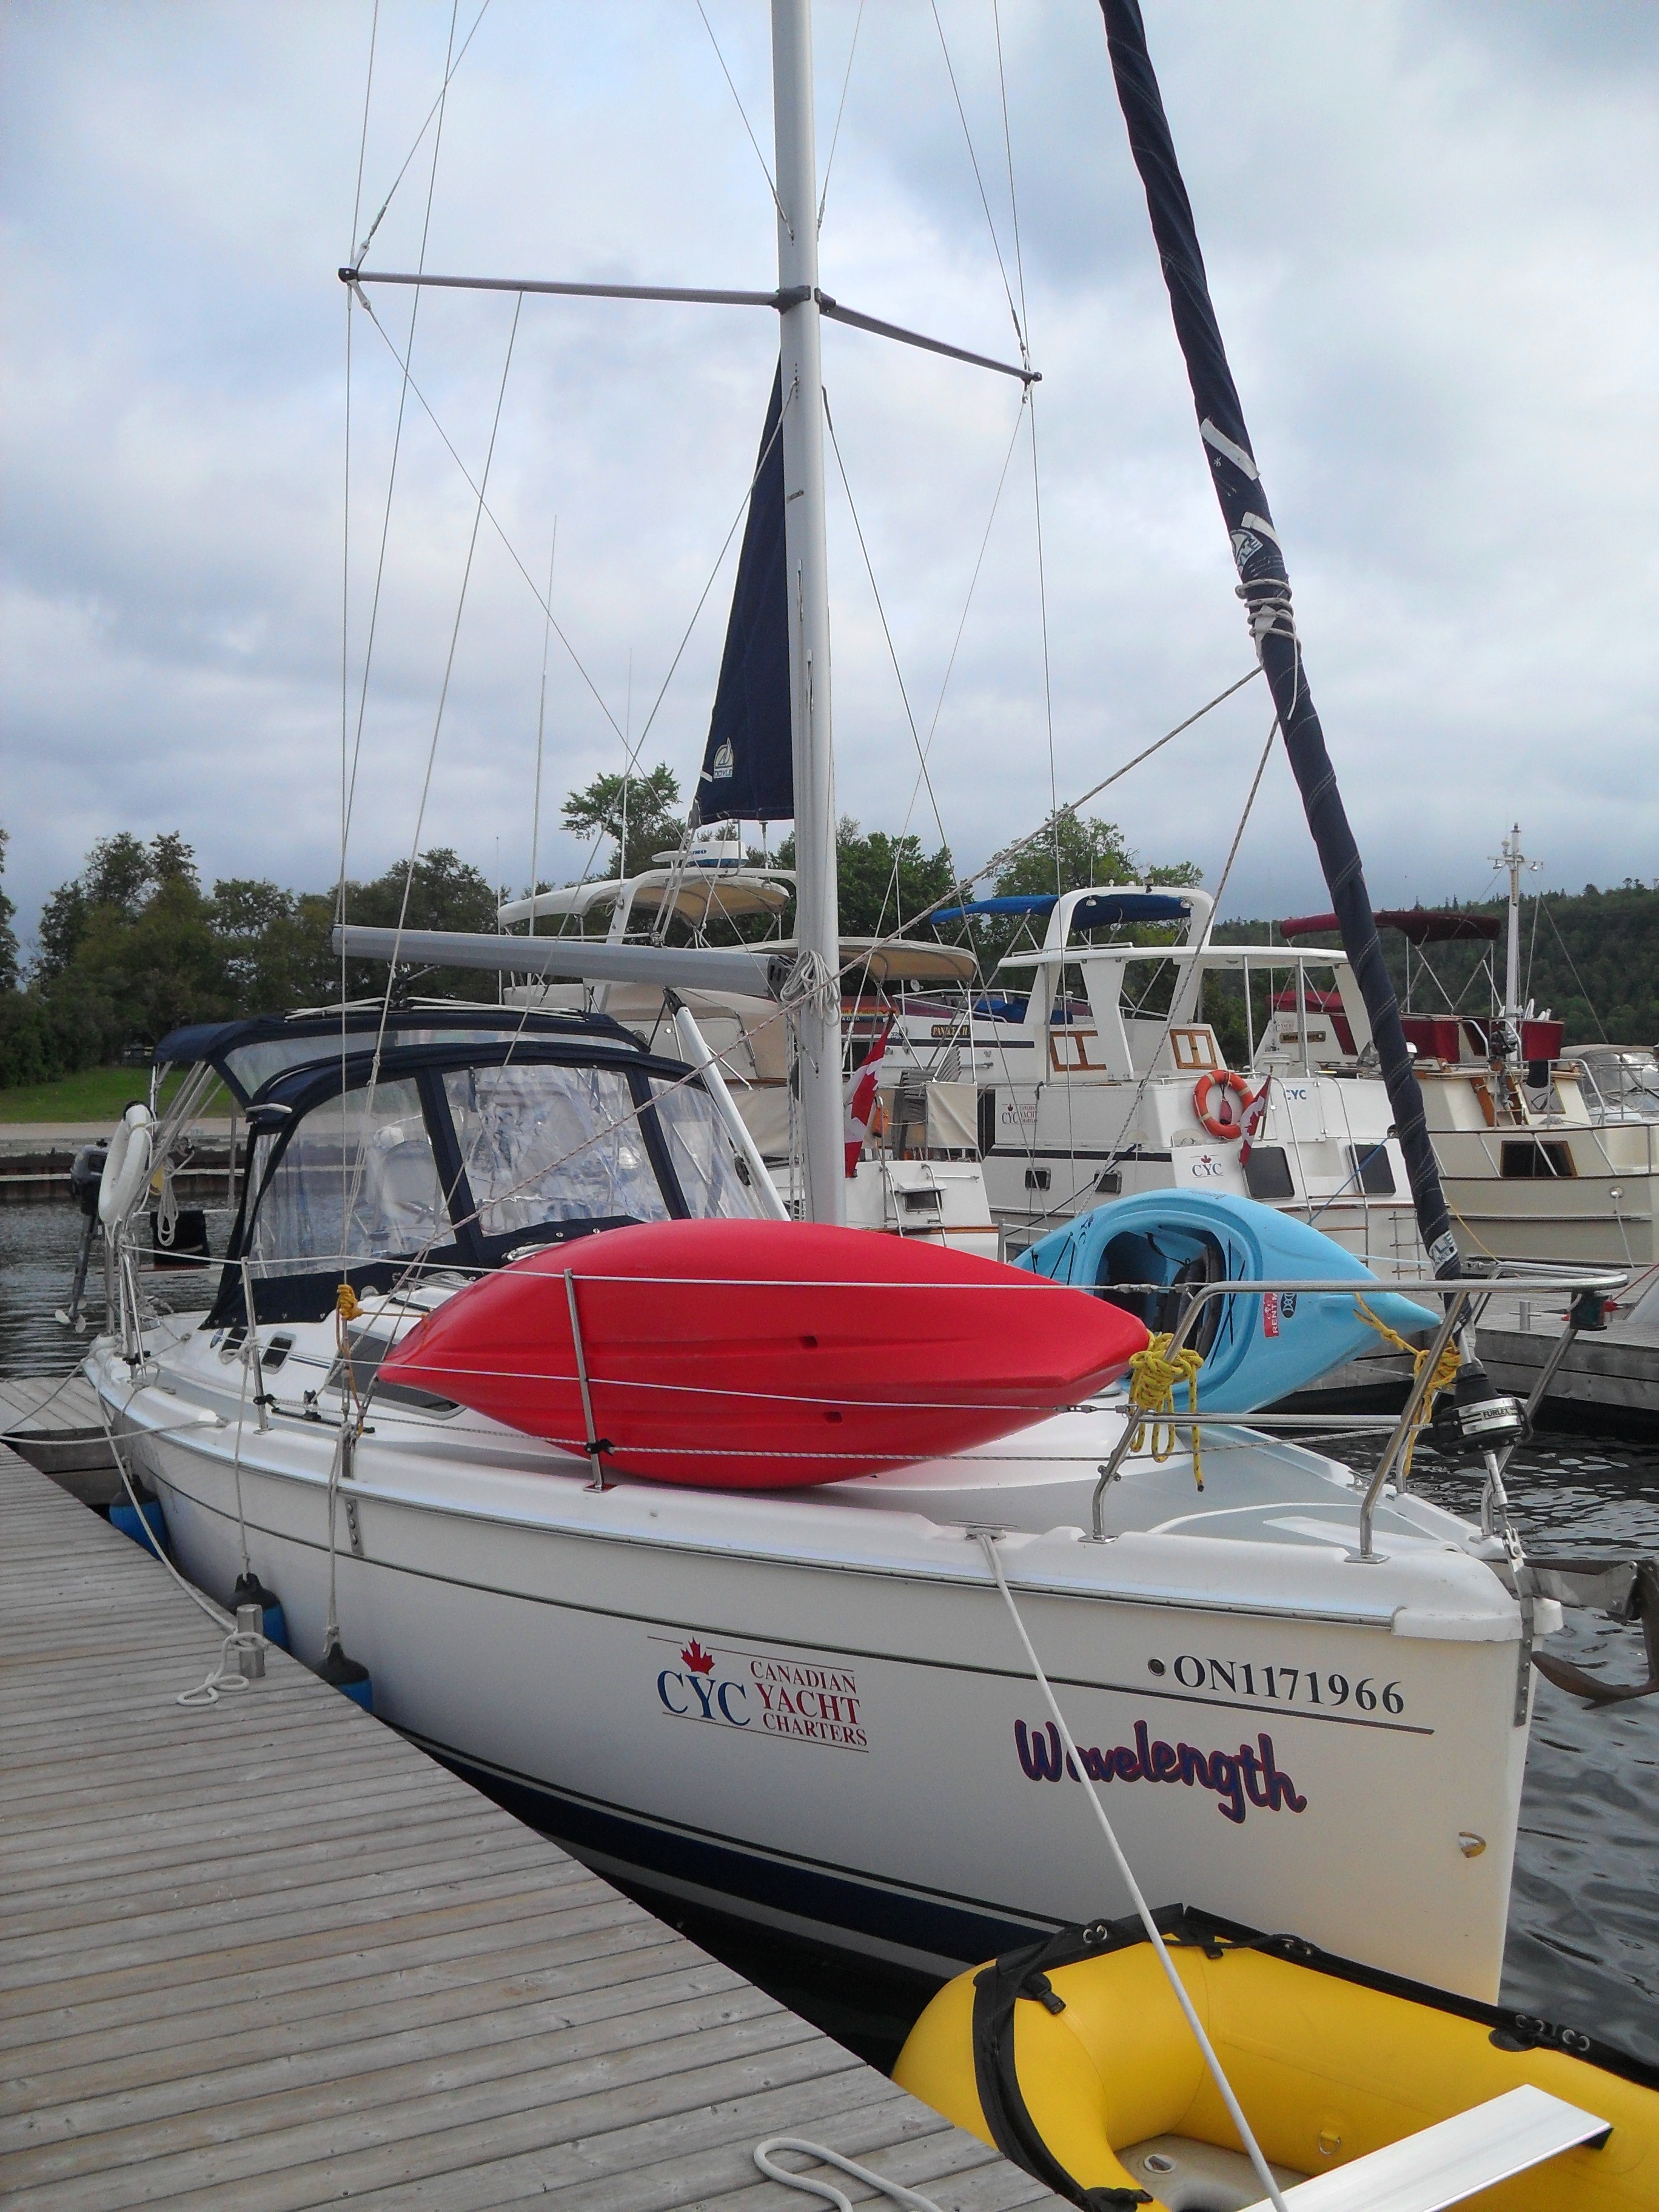 The 32-Foot Wavelength Preparing for Adventure
Just prior to the Great Boulder Flood, we left on vacation to do some sailing on Lake Huron, on the Canadian side, eh! Shelly did a lot of research and found that statistically, the North Channel of Huron is the place to find wind in the north this time of year. We also rented some kayaks to add to the fun.
On day 1 we sailed in good wind out of Gore Bay to Eagle Island and anchored in the north bay. The wind was out of the northwest and we were kind of exposed but it wasn’t terrible. At about 2:30 am that night I got up for some reason to check things out. We had originally anchored about 500 feet from shore in about 15 feet of water, which is fine for that area. Anchoring is supposed to be fantastic, the bottoms are generally clay or rock. Well, as I got up on deck in total blackness (it was overcast and there are no lights on shore), I noticed I could hear the leaves rattling in the trees on shore. That meant we were now about 20 feet from shore. For the second time we experienced the pleasures of anchor drag in the middle of the night. Previously it was in The Grenadines.
Shelly grabbed a flashlight. She had wisely noted their location when we checked out the boat. We were so close to the shoreline trees that we could illuminate them. The depth meter showed 3 feet. Given that we had a 4.5 foot keel draft, we were, in theory, on the ground. But we weren’t on the ground, probably because the depth meter was calibrated such that it read a shallower depth than was actually under the boat for safety reasons.

An Anchor
We got the engine started and Shelly pulled the anchor. BUT, since it was pitch black I had no reference to steer by. I tried using the chart plotter, which shows direction and speed, but it is a bit too crude for tight maneuvering and I didn’t want to motor into the shore. I was finally able to get the boat aimed away from shore and we reset the anchor once again. It held.
So what happened this time? We had a small-ish anchor and probably had it set in grass which was not solid enough for this anchor to grab. We originally dropped, set and watched the anchor as we always do and we didn’t drag. We couldn’t have done anything different except watch our position periodically (which we did for the rest of the trip). We didn’t have a problem after this incident.
The next day was short, had high wind. Not sure what the wind speed was because the Wavelength did not have an anemometer. We were doing 5 knots into the wind on reefed sails, which is fantastic speed. Got into Oak Bay and stayed there for a couple of nights. Never saw another boat in the bay.

Despite the general belief that Canada is a dry country, we did find some beer… Creemore was the local brand.
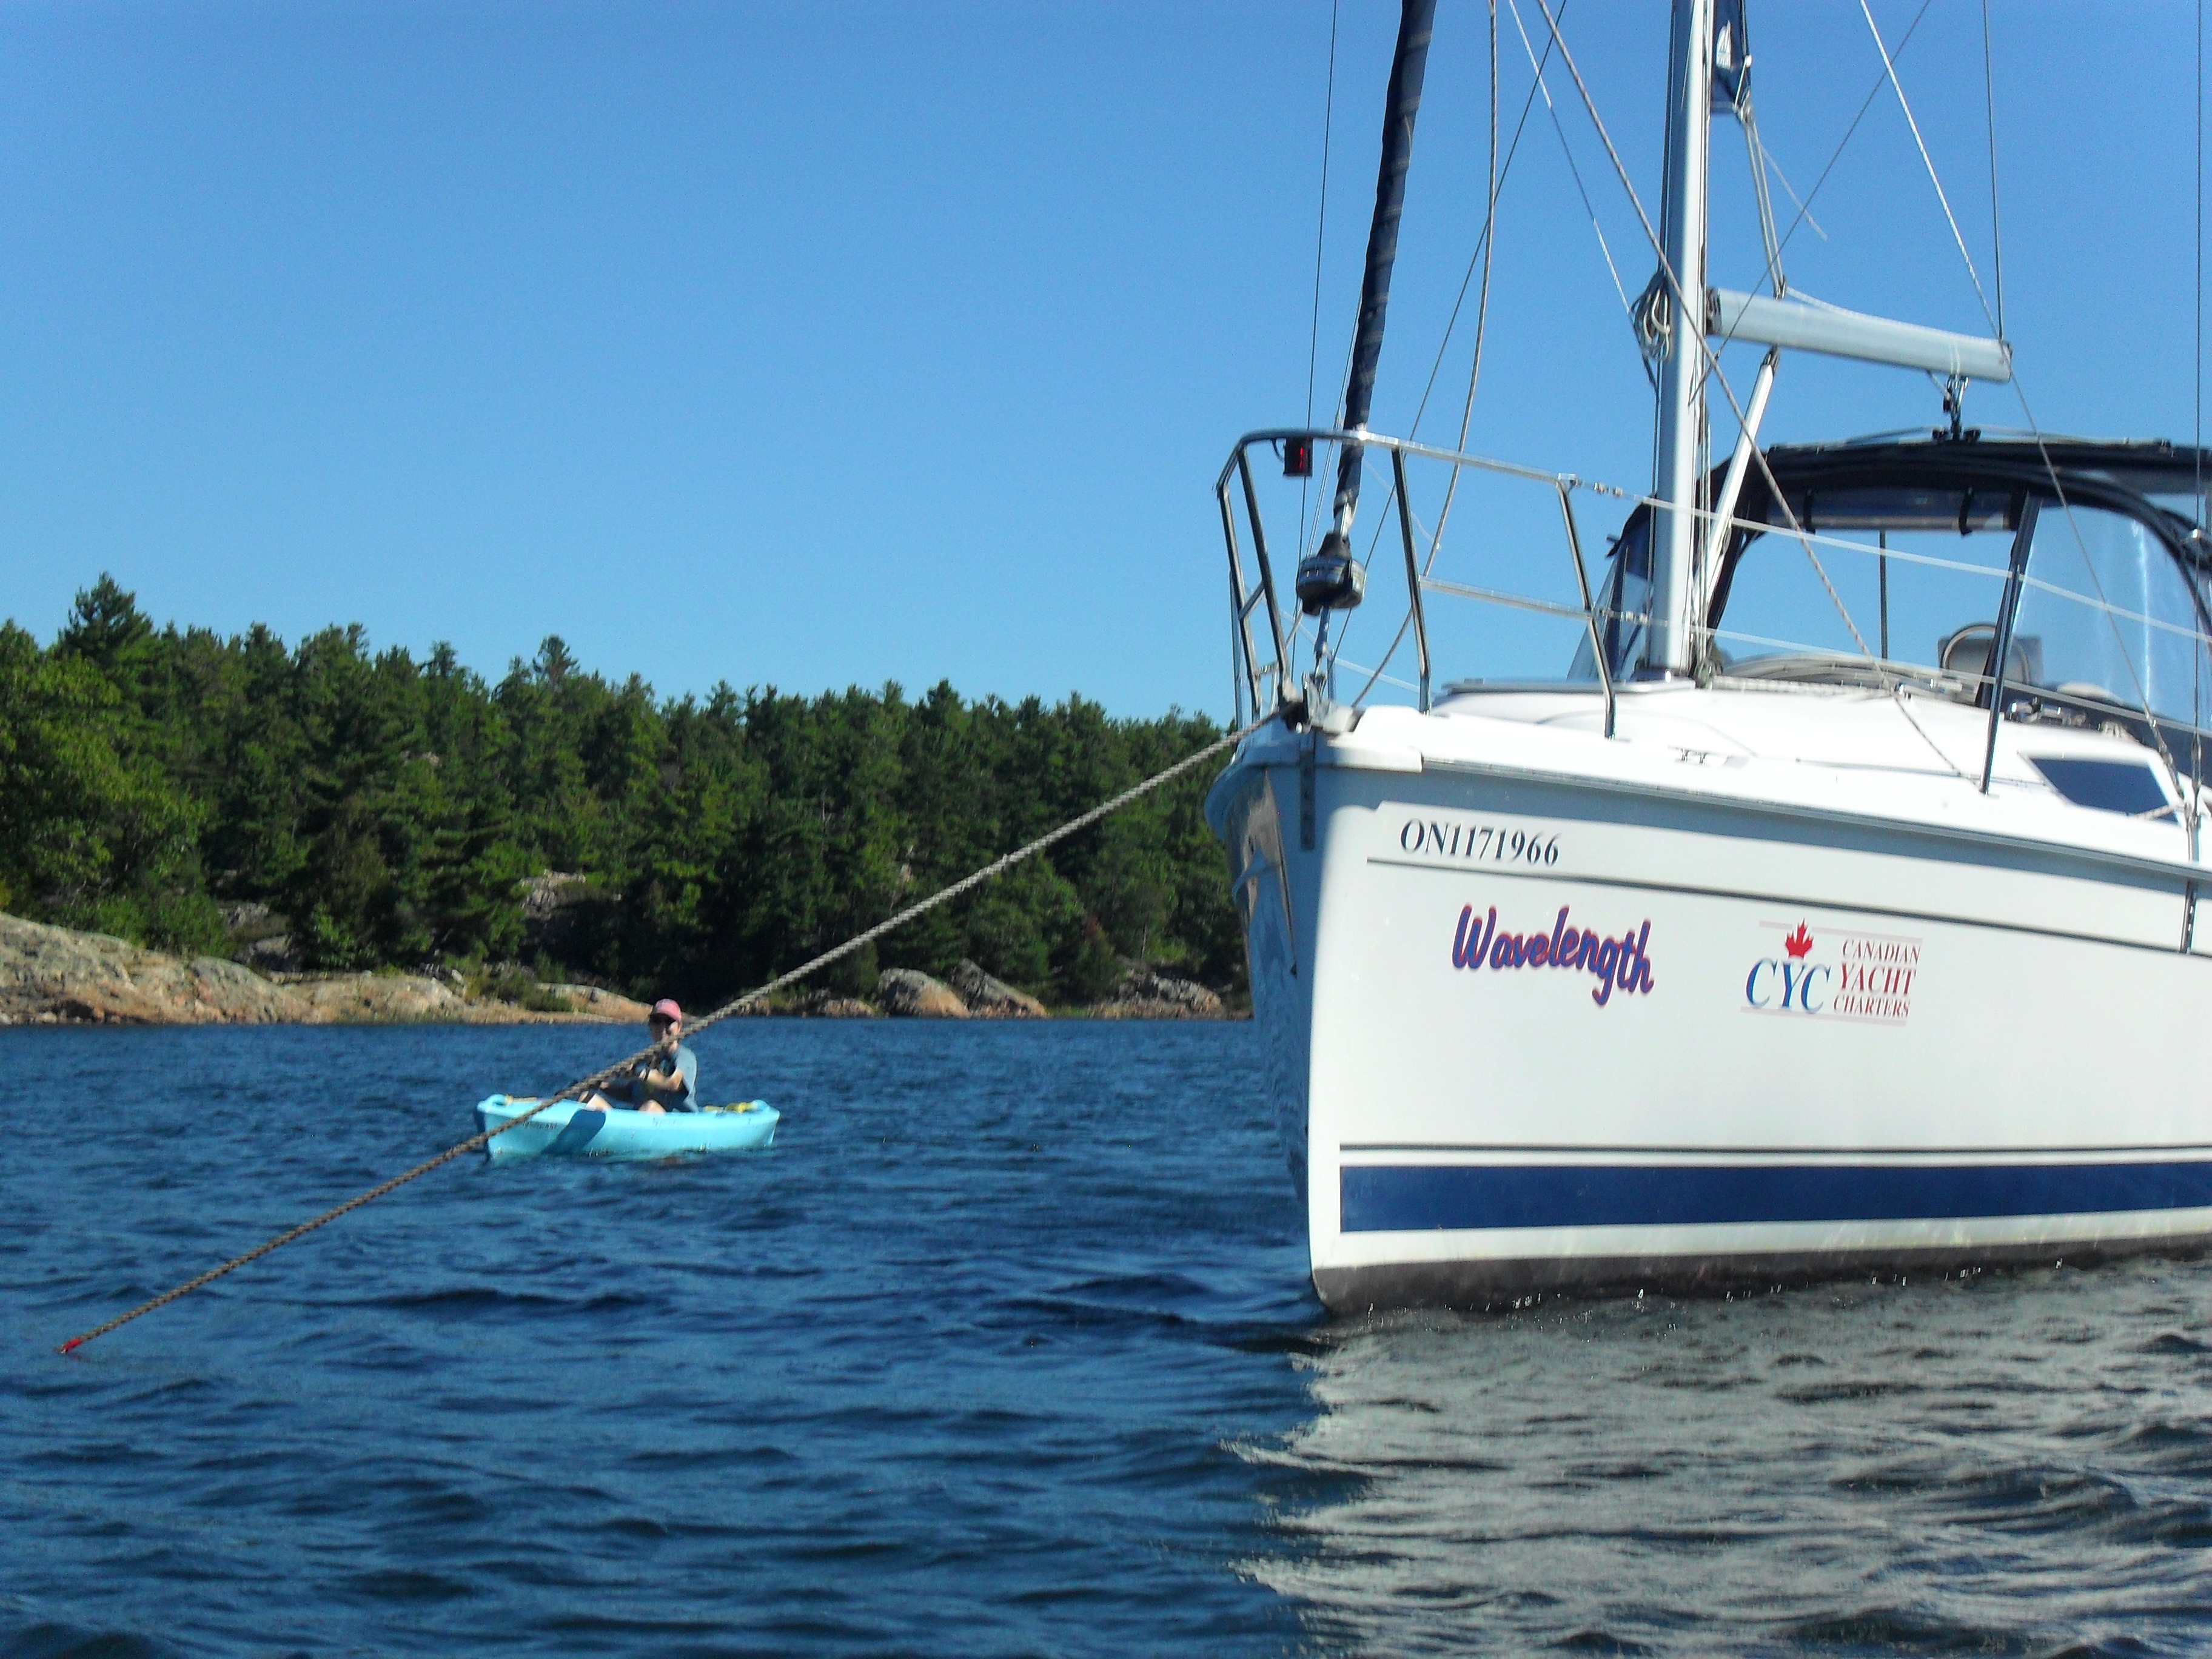
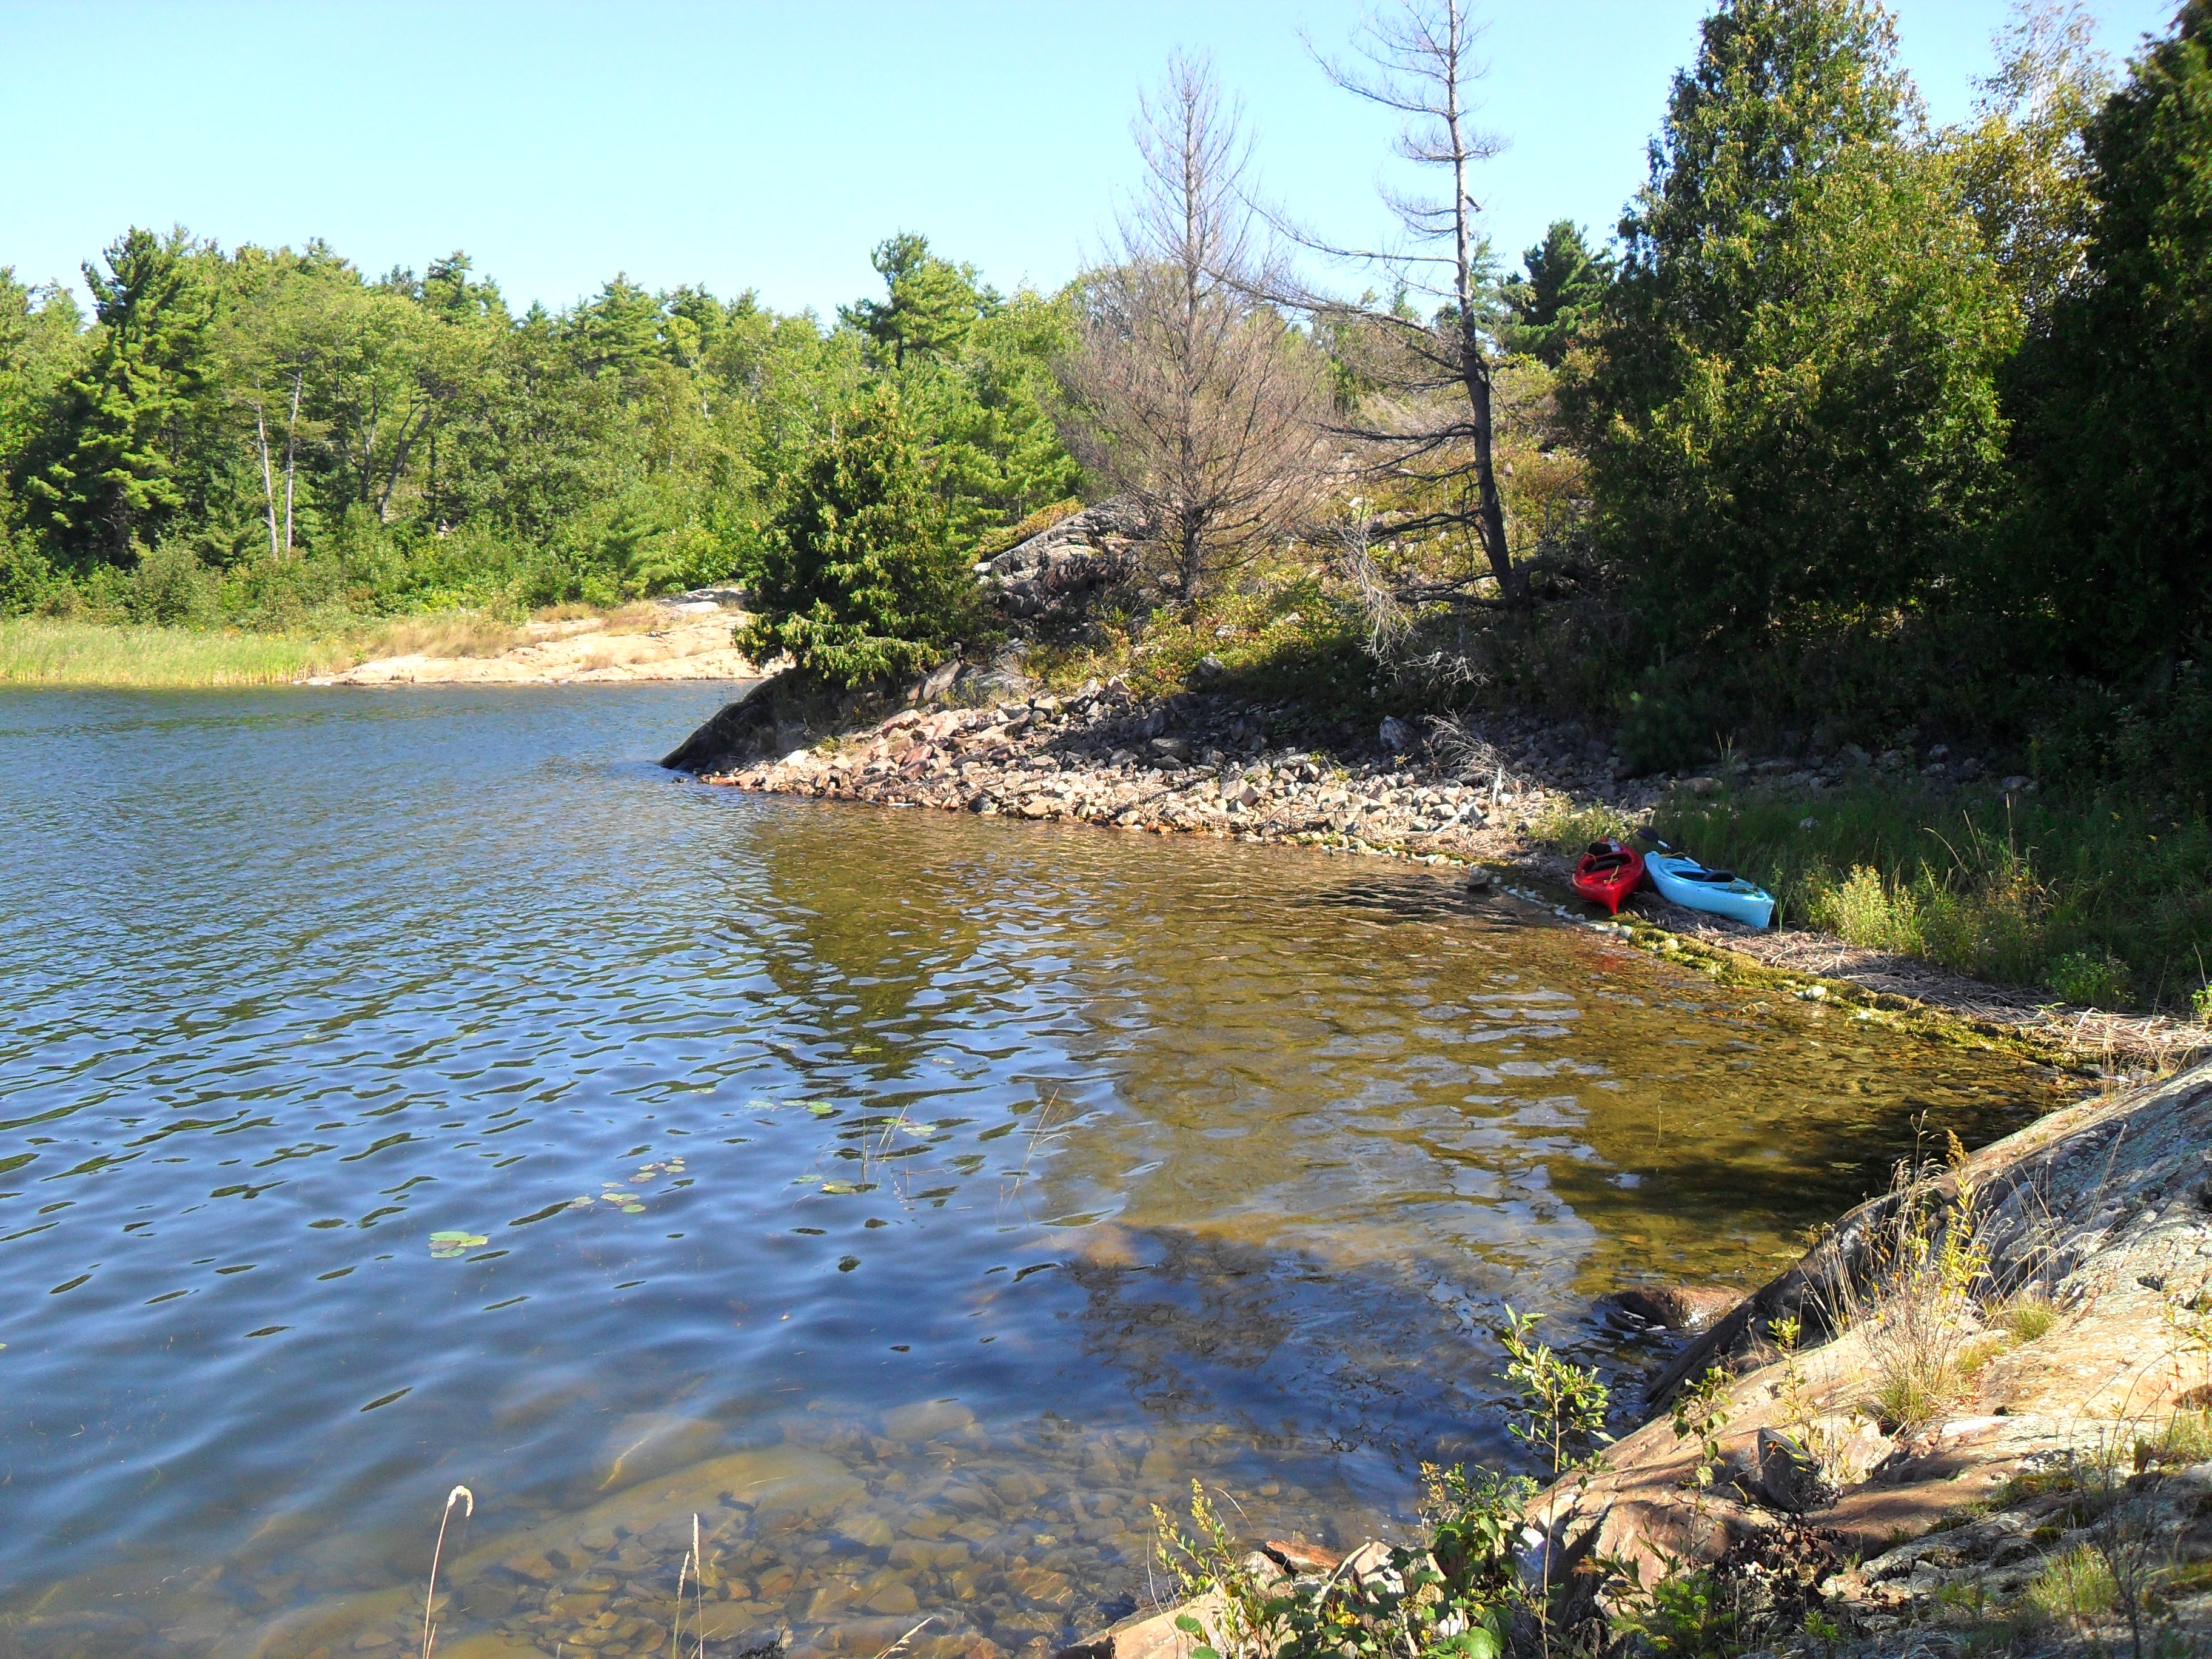
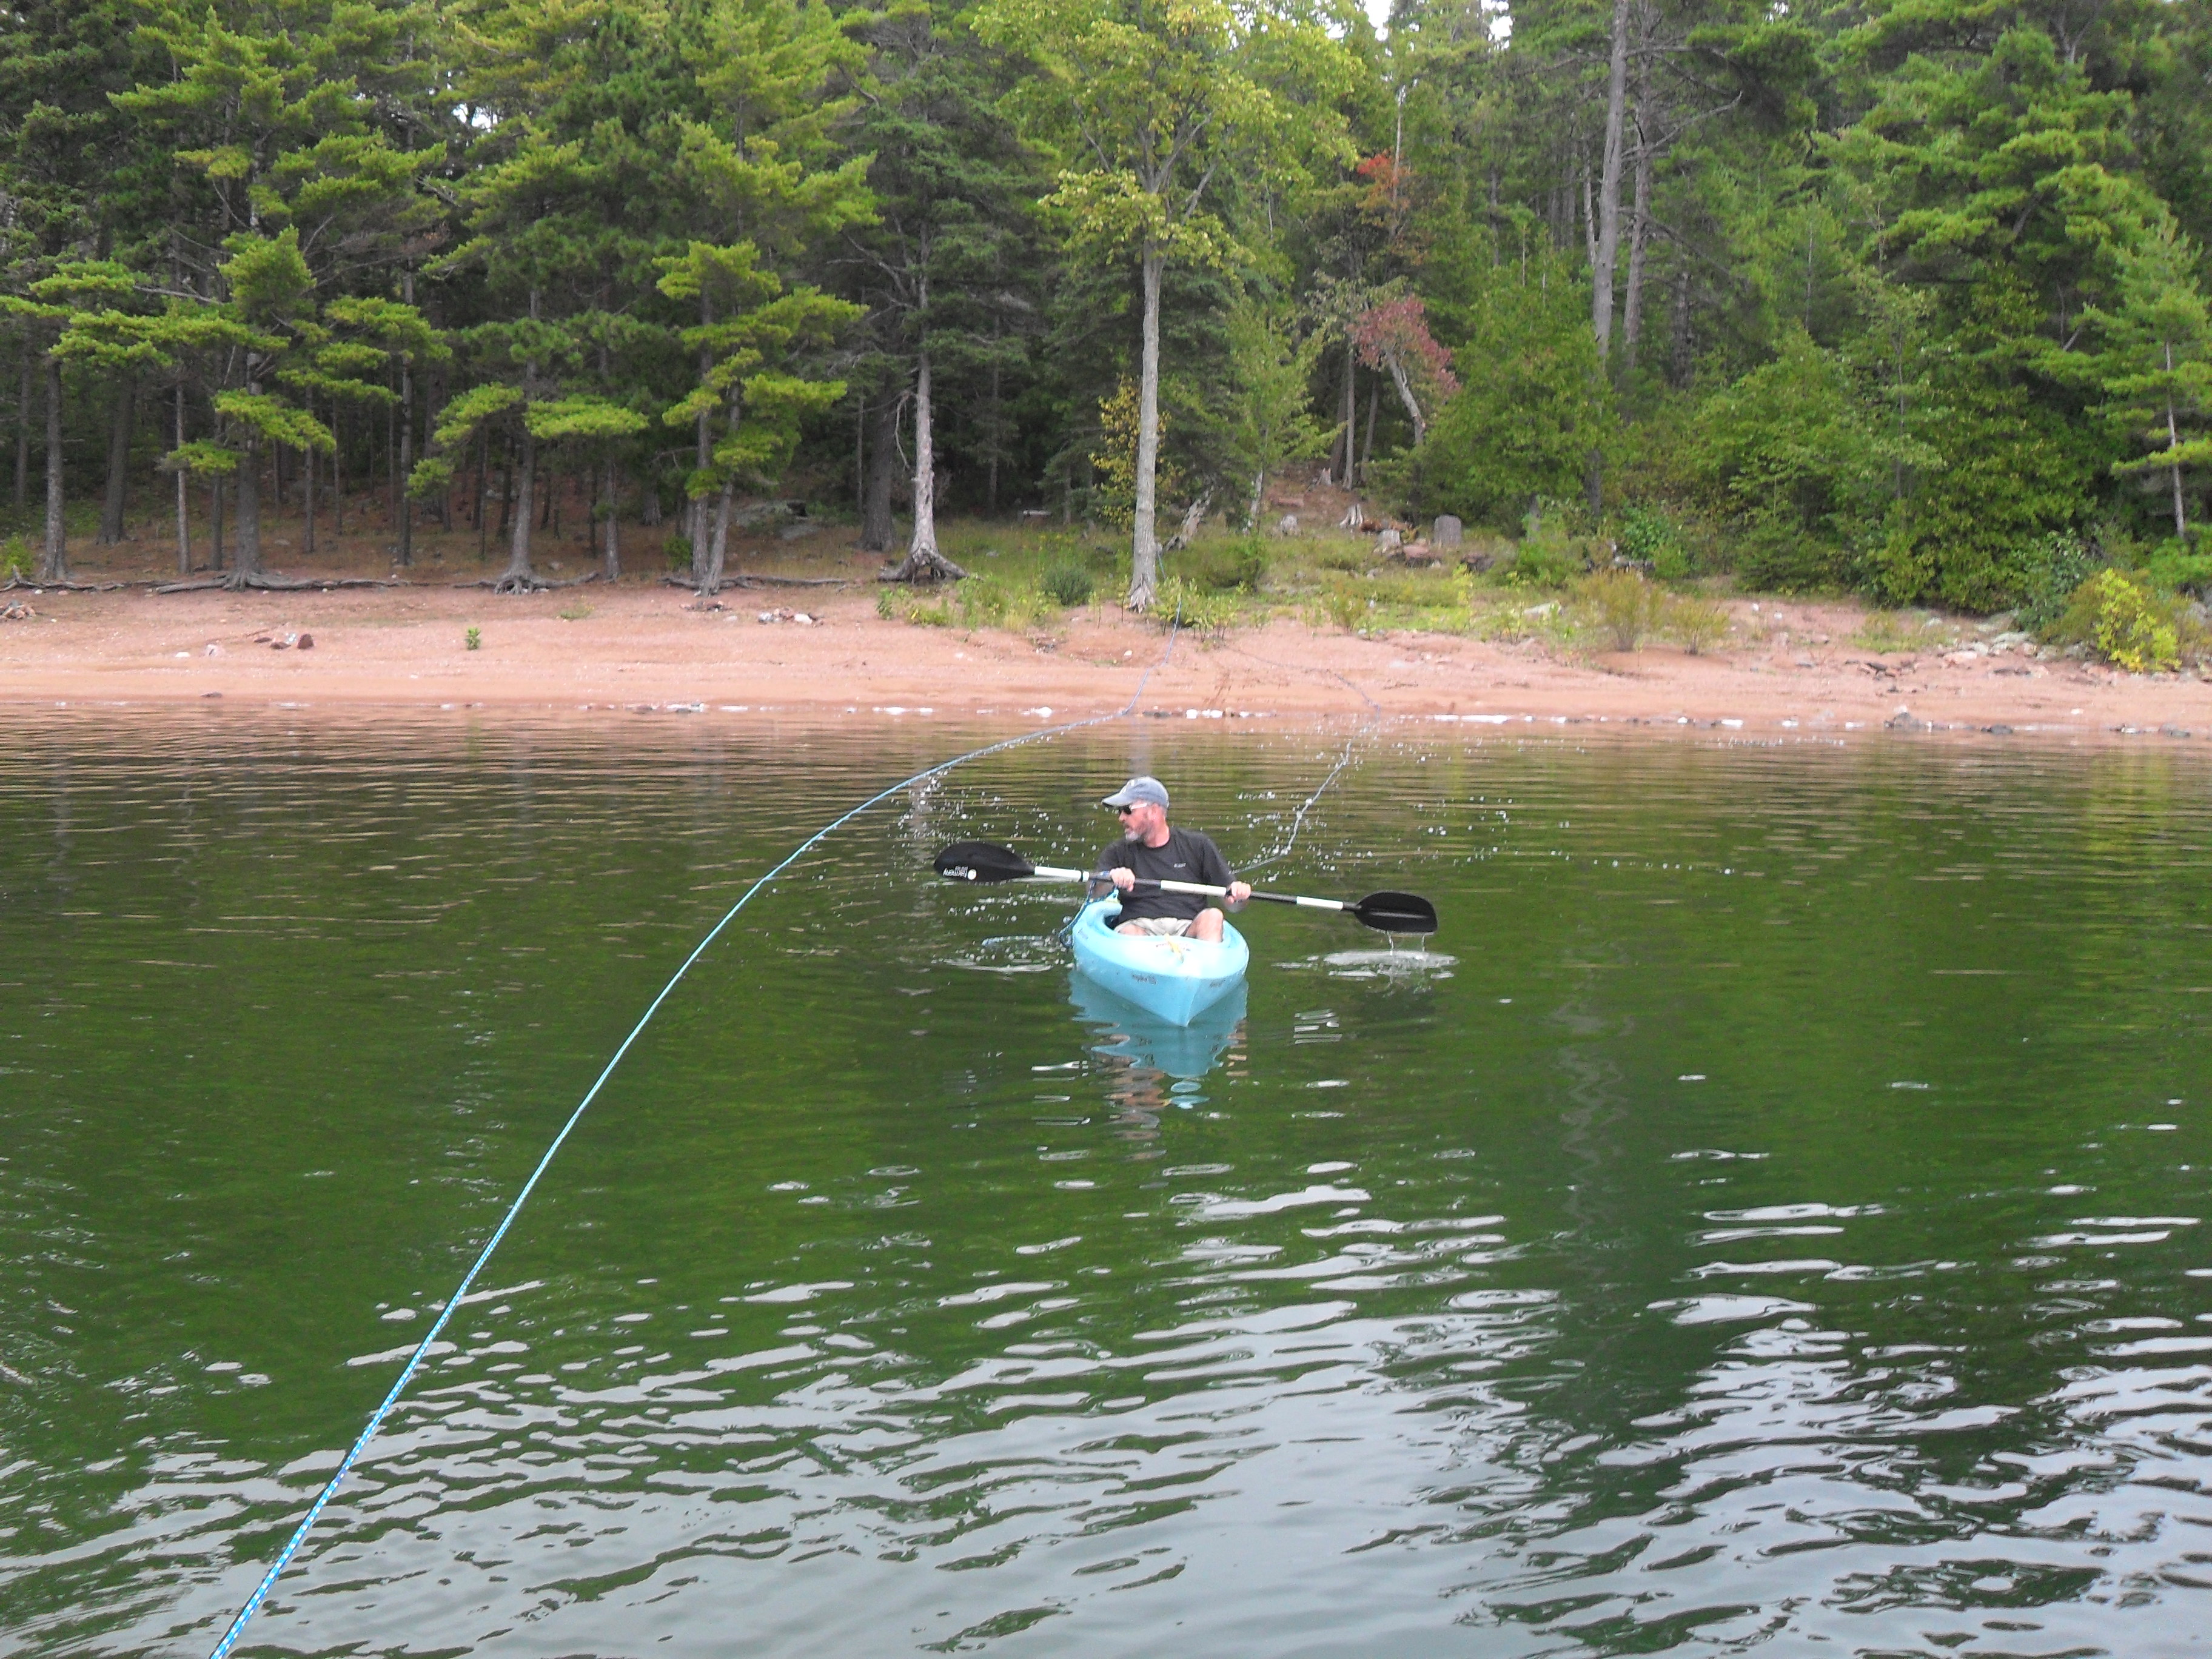
We tried out the kayaks in Oak Bay, Shelly is coming around the Wavelength in the pic above. There are no tides to speak of in the Great Lakes, but there is certainly a lot of current. We paddled upstream in a dead-end cove and were impressed by how much the wind drives the water. It took us about a half hour to get into the cove and about 10 minutes to get back to our boat.
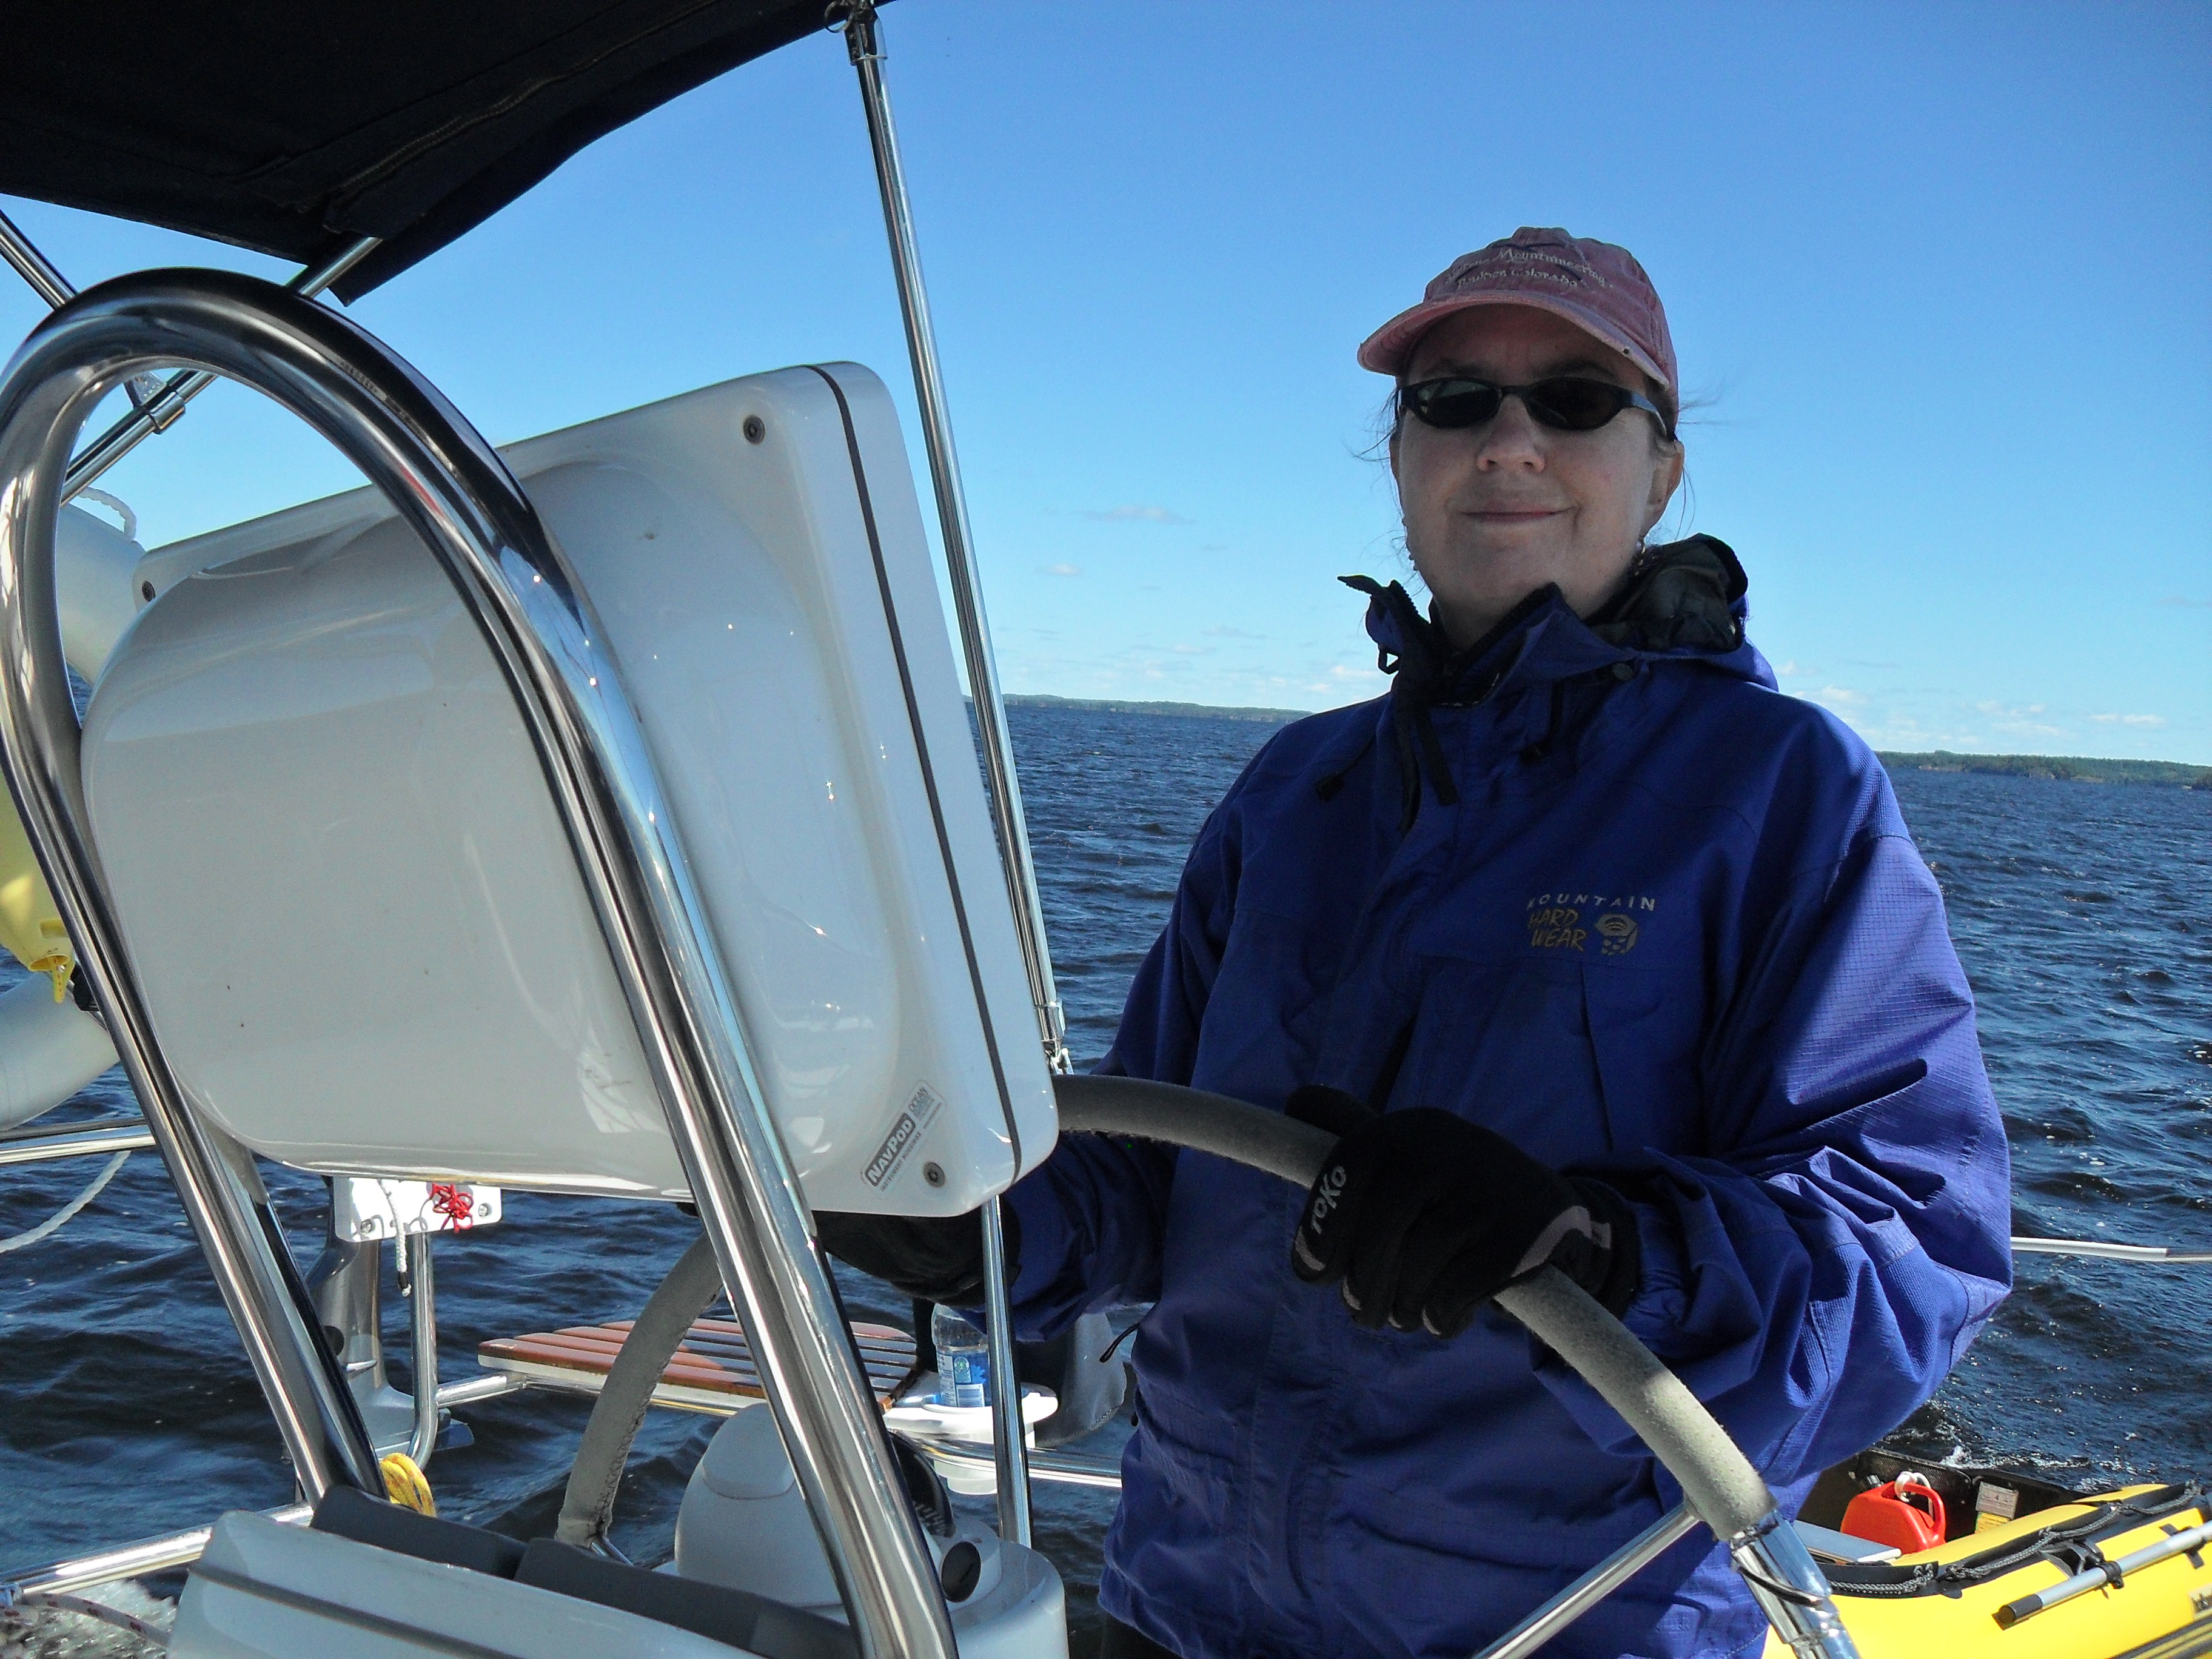
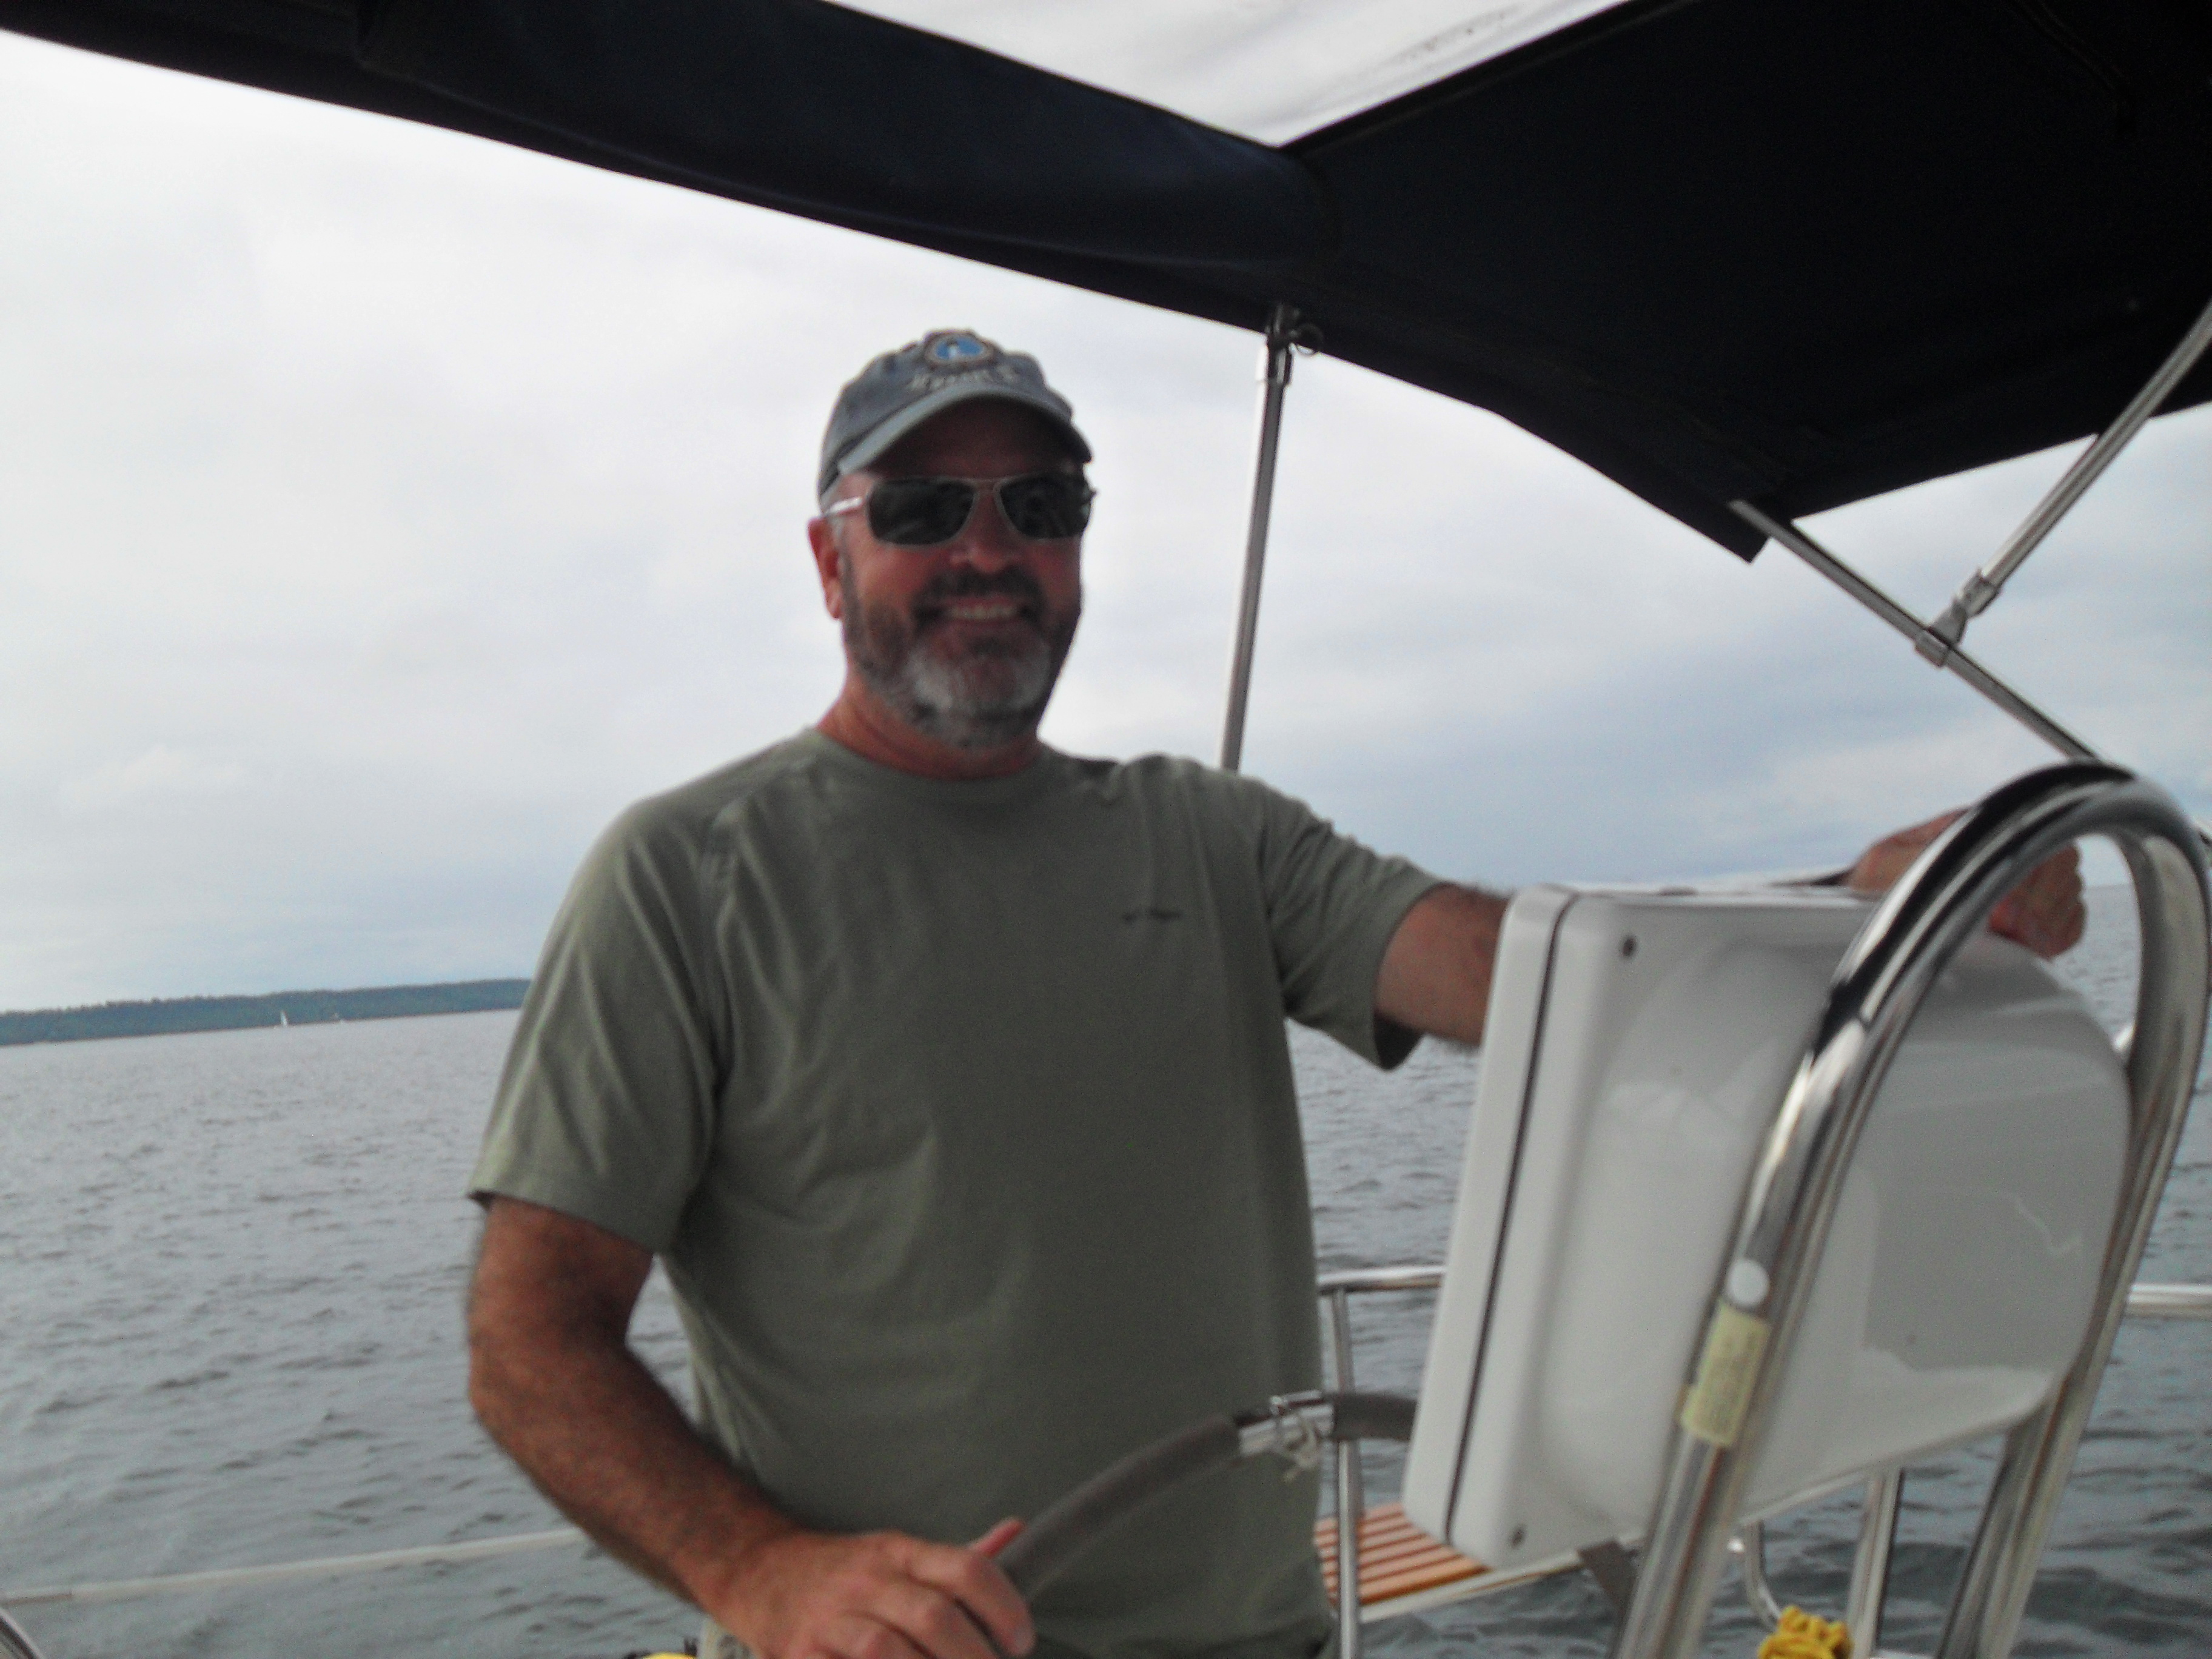
The weather was mild. It really didn’t get too hot on the lake but at times it was definitely chilly, especially in the wind. Shelly is piloting with her gloves above.
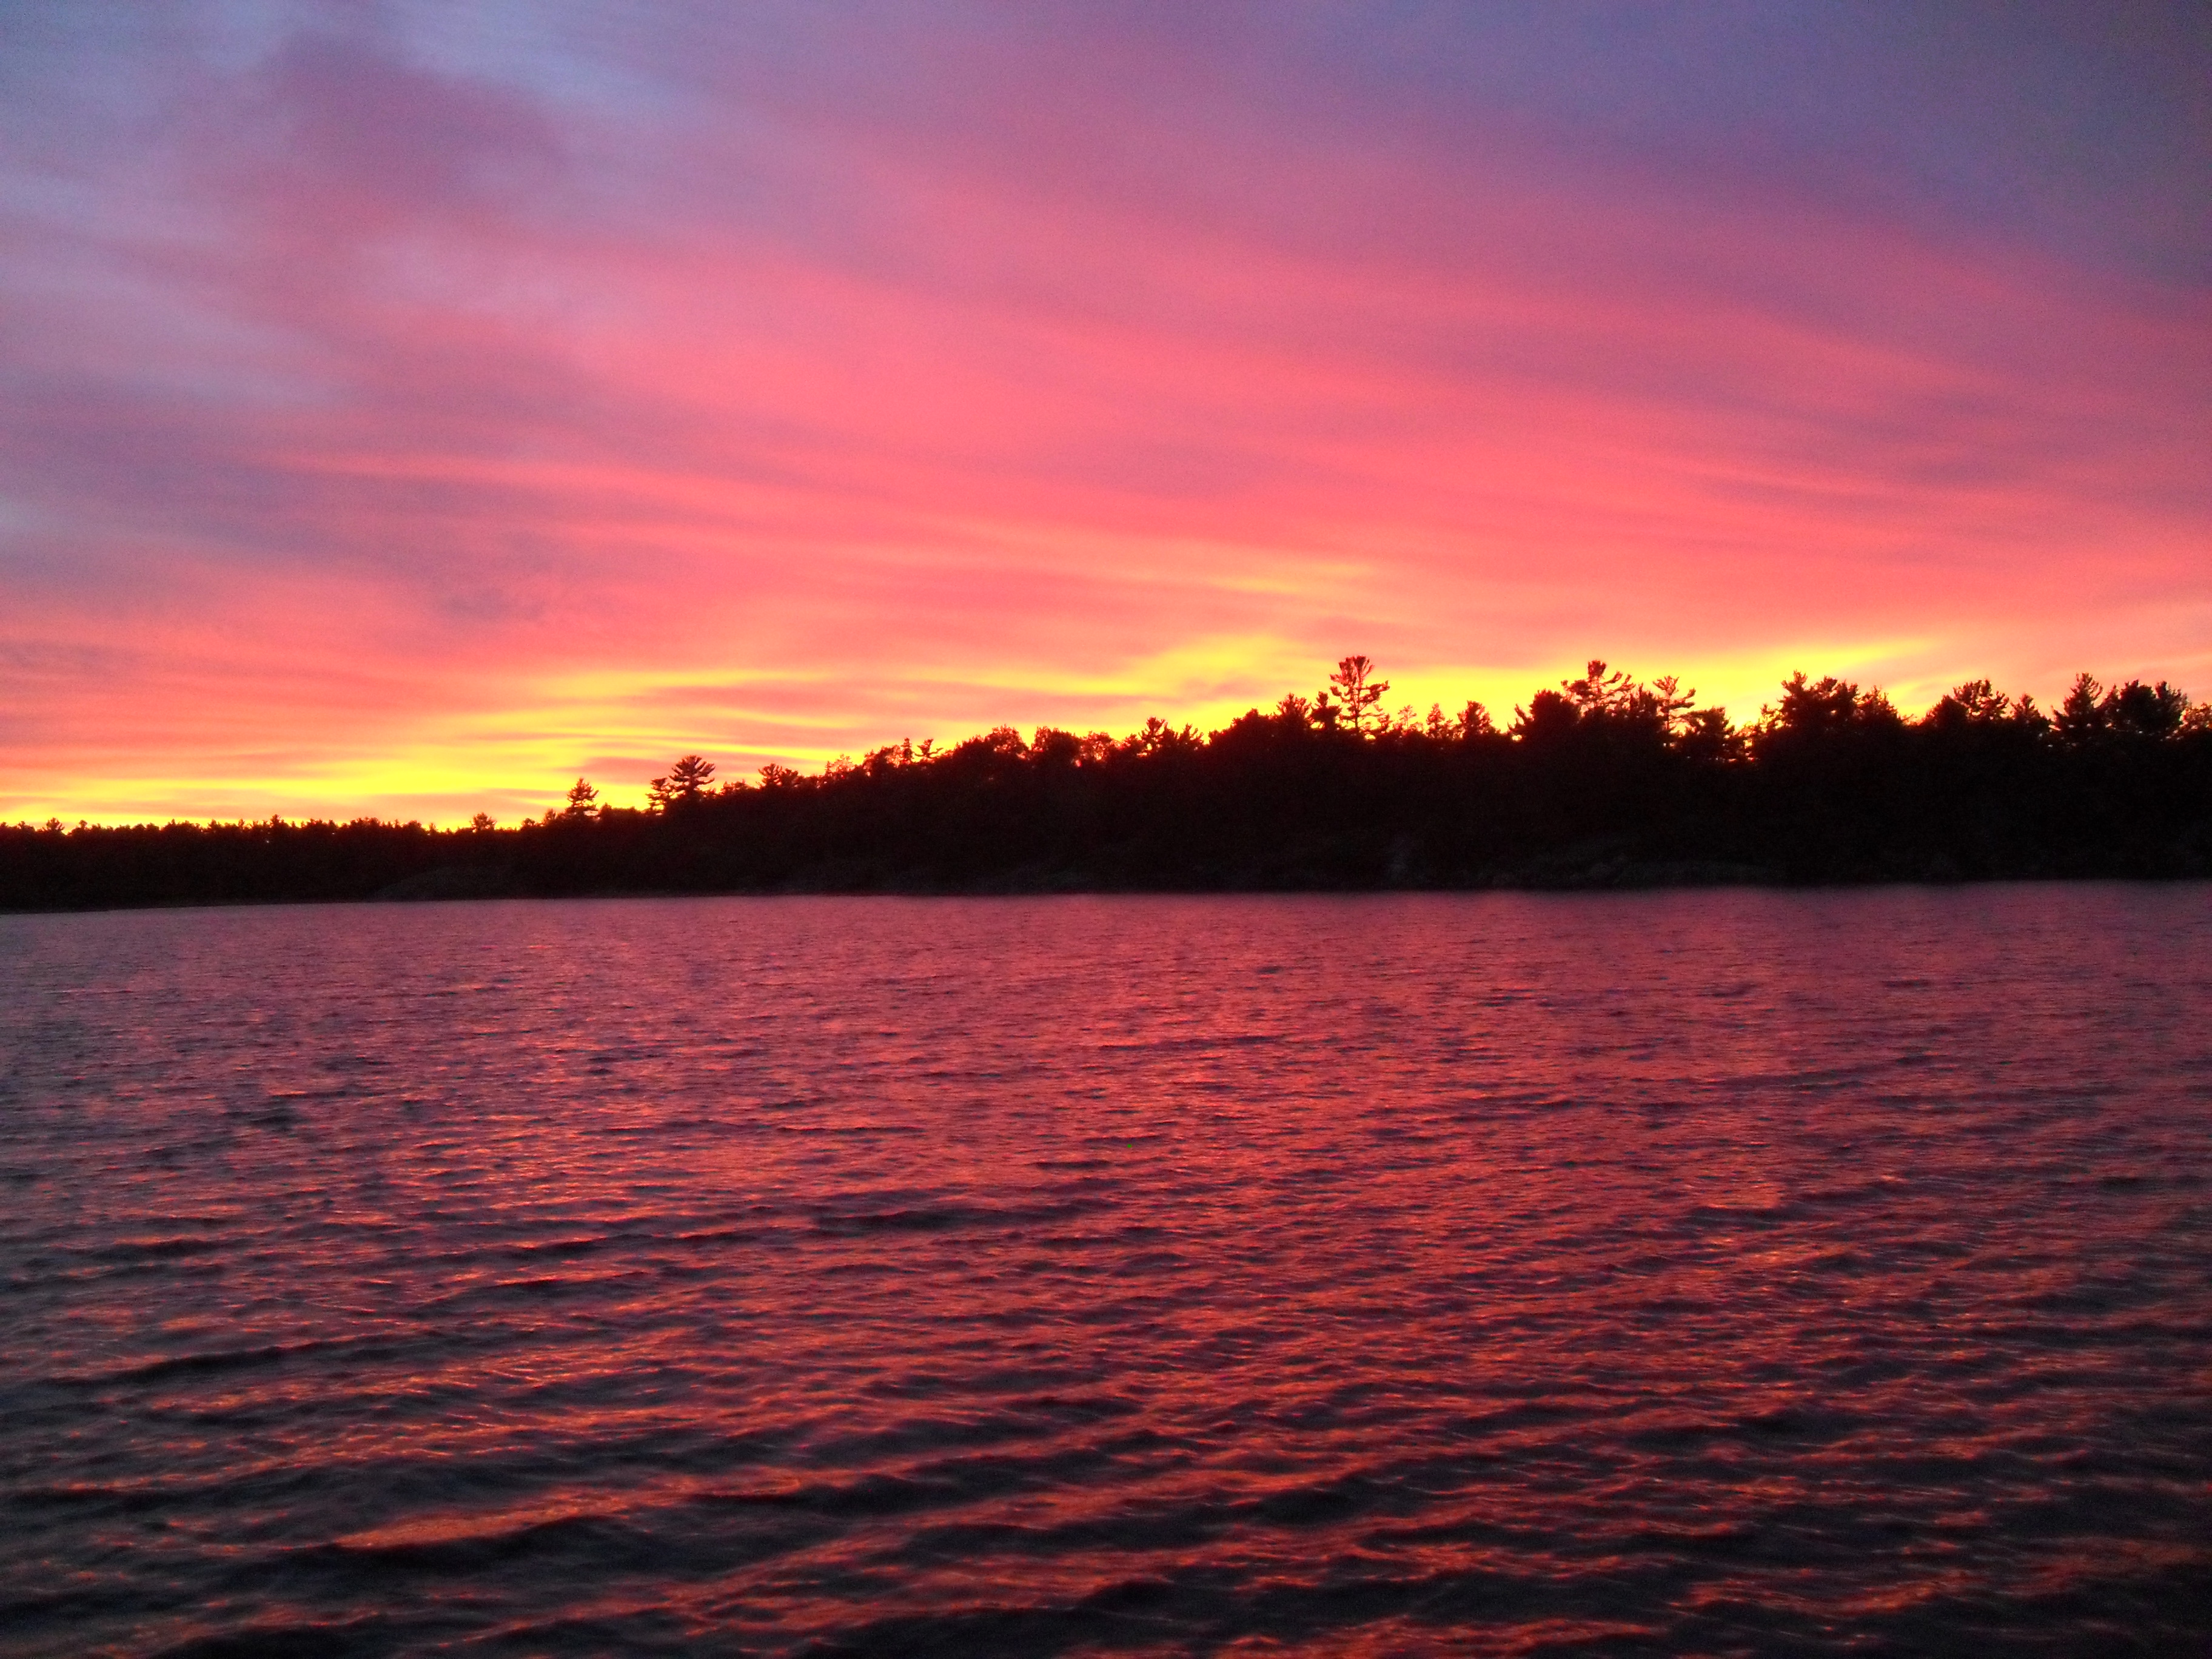
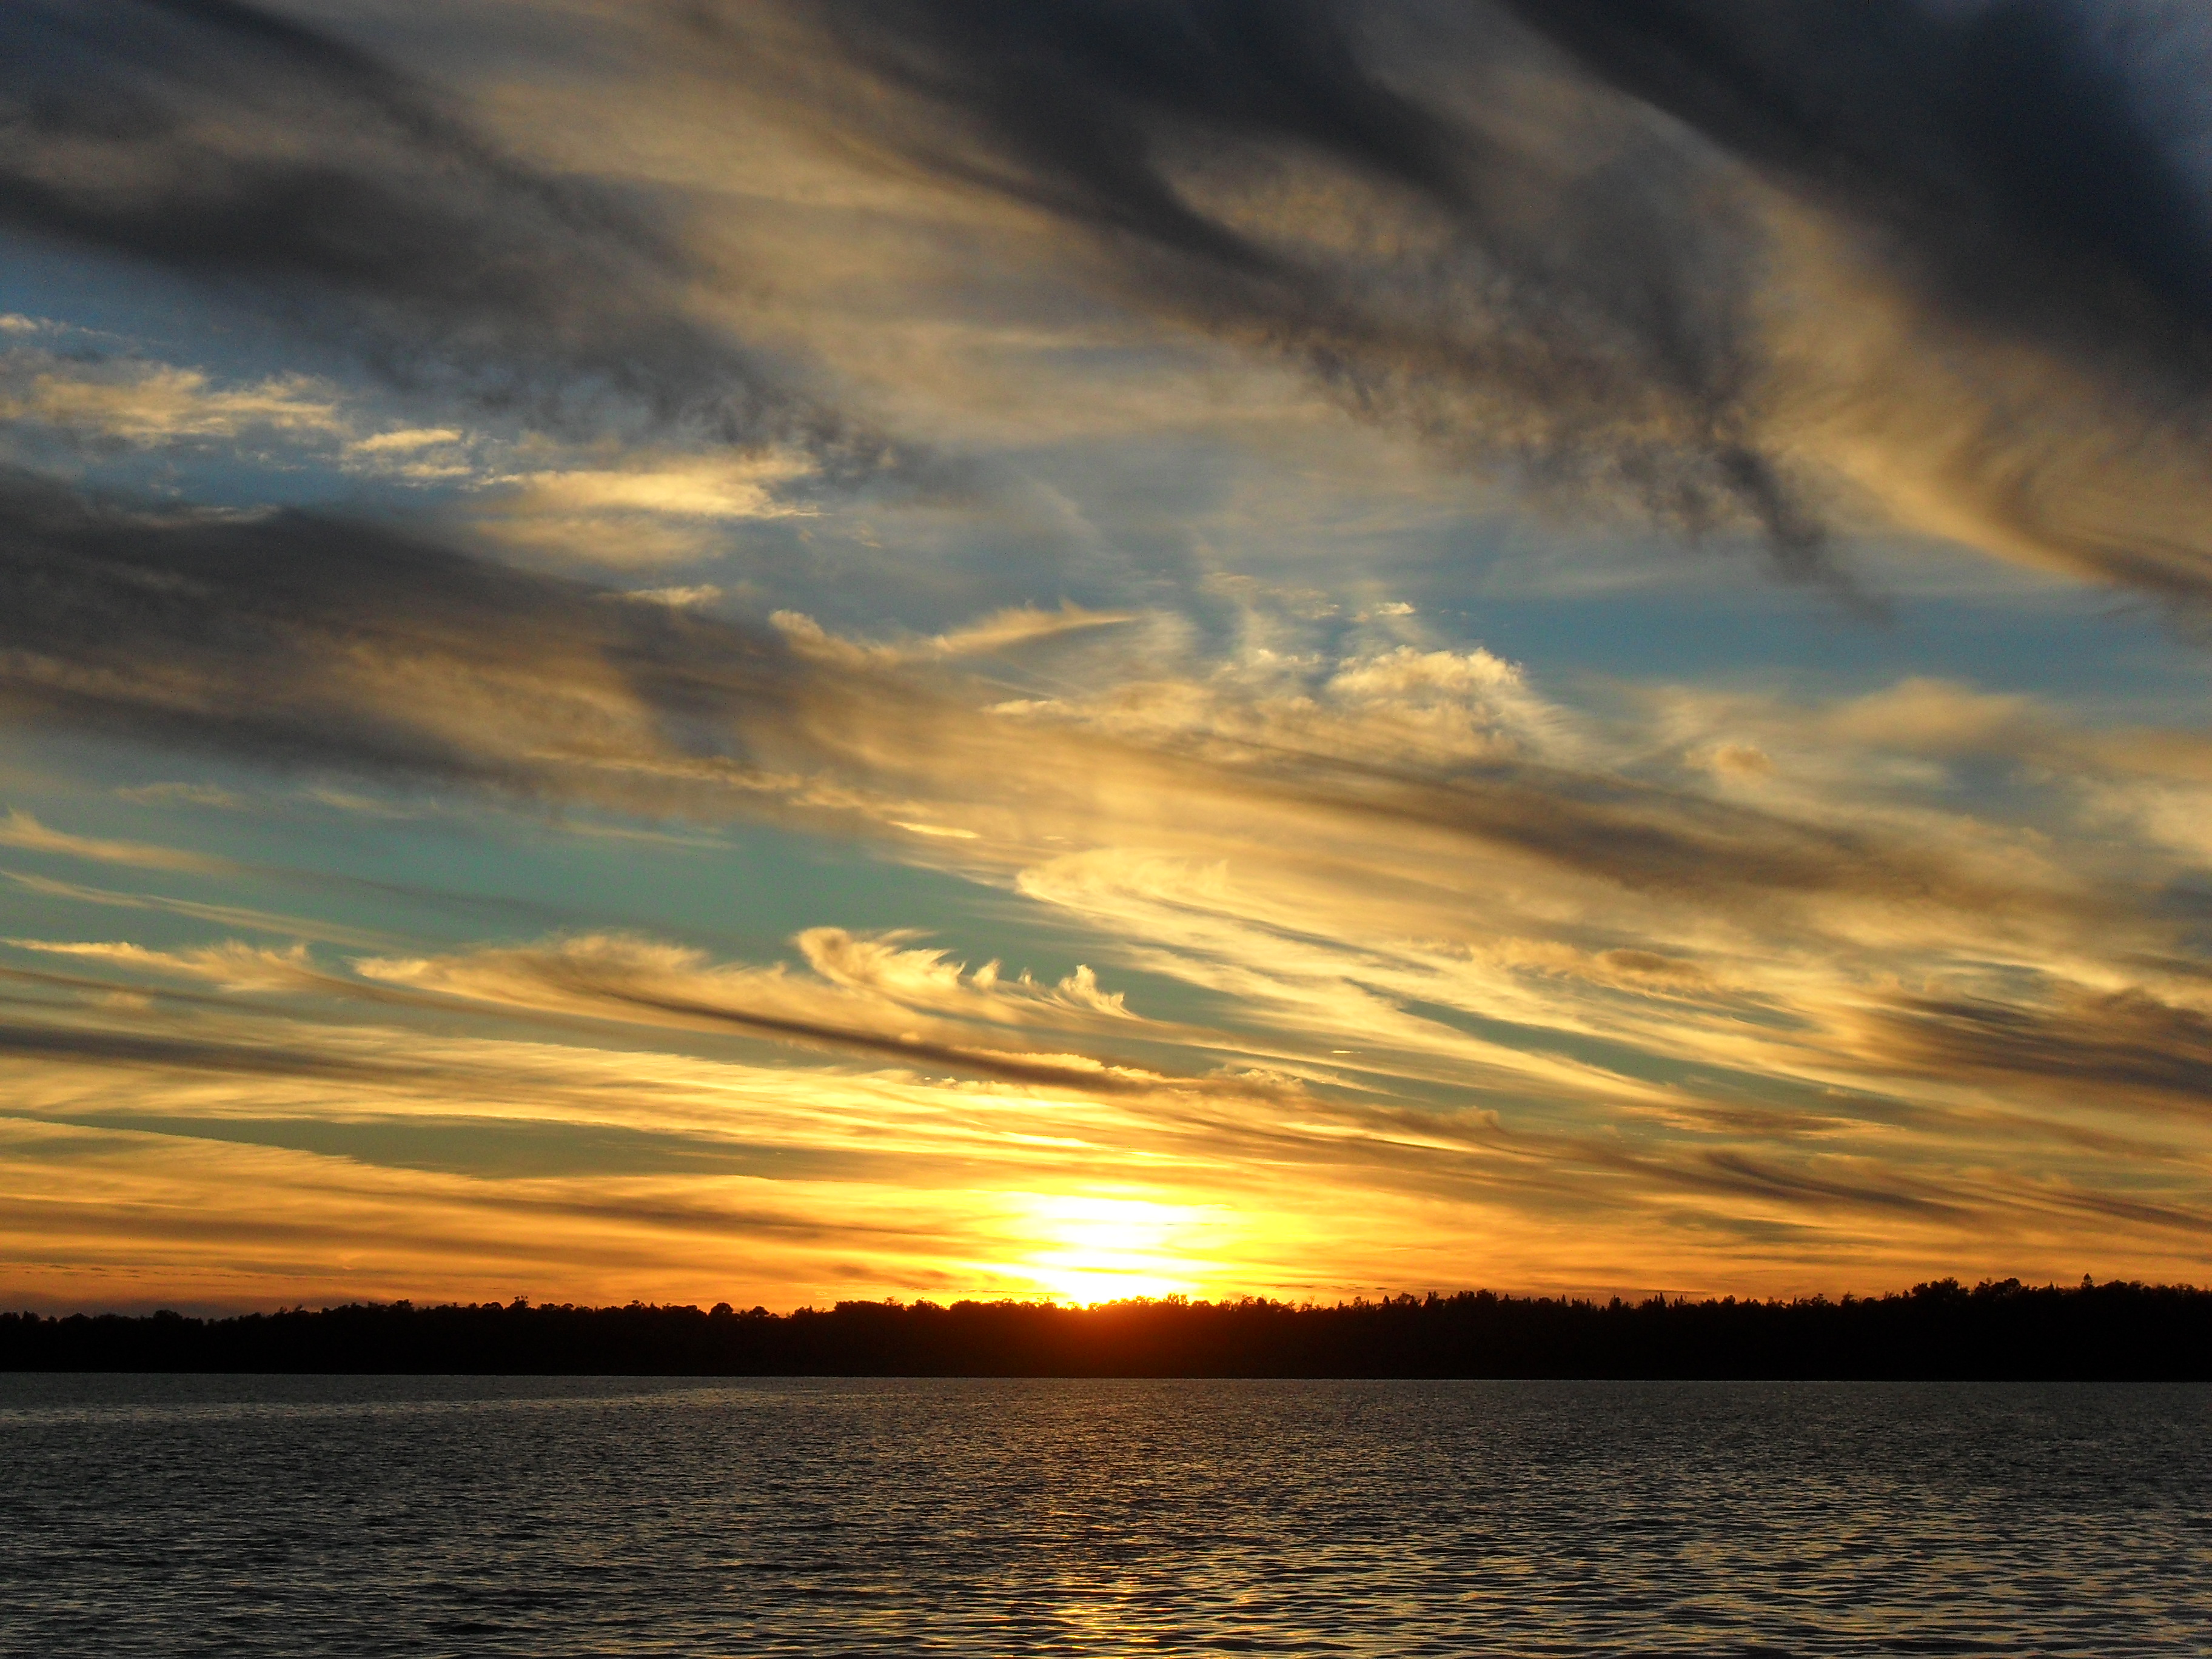
Almost every sunset was spectacular!
We only docked once during the nine day trip for supplies and a pump-out in a town called Spanish (above). The channel going into Spanish is way shallow, they had just dredged it and there were many spots our depth meter read 4 or 5 feet. Despite warnings not to go in, we did anyway after seeing masts in their marina, meaning other sailboats had successfully navigated the channel. It was no problem. The dock lady saw me coming in wearing my winter hat and yelled “you’re making it look chilly with that touk!” Ah, those crazy Canadians!
We checked out a few islands for hiking, never found a trail. In the photo above is in Oak Bay. After this we went to anchor off of Aird Island. We set an anchor, no problem, but as we swung on the anchor we heard knocks, the boat was hitting a deadhead in the water. Turns out it wasn’t a Grateful Dead fan in this instance, but an underwater log or tree. Lots of them in this area. We moved and reset the anchor, no problem.
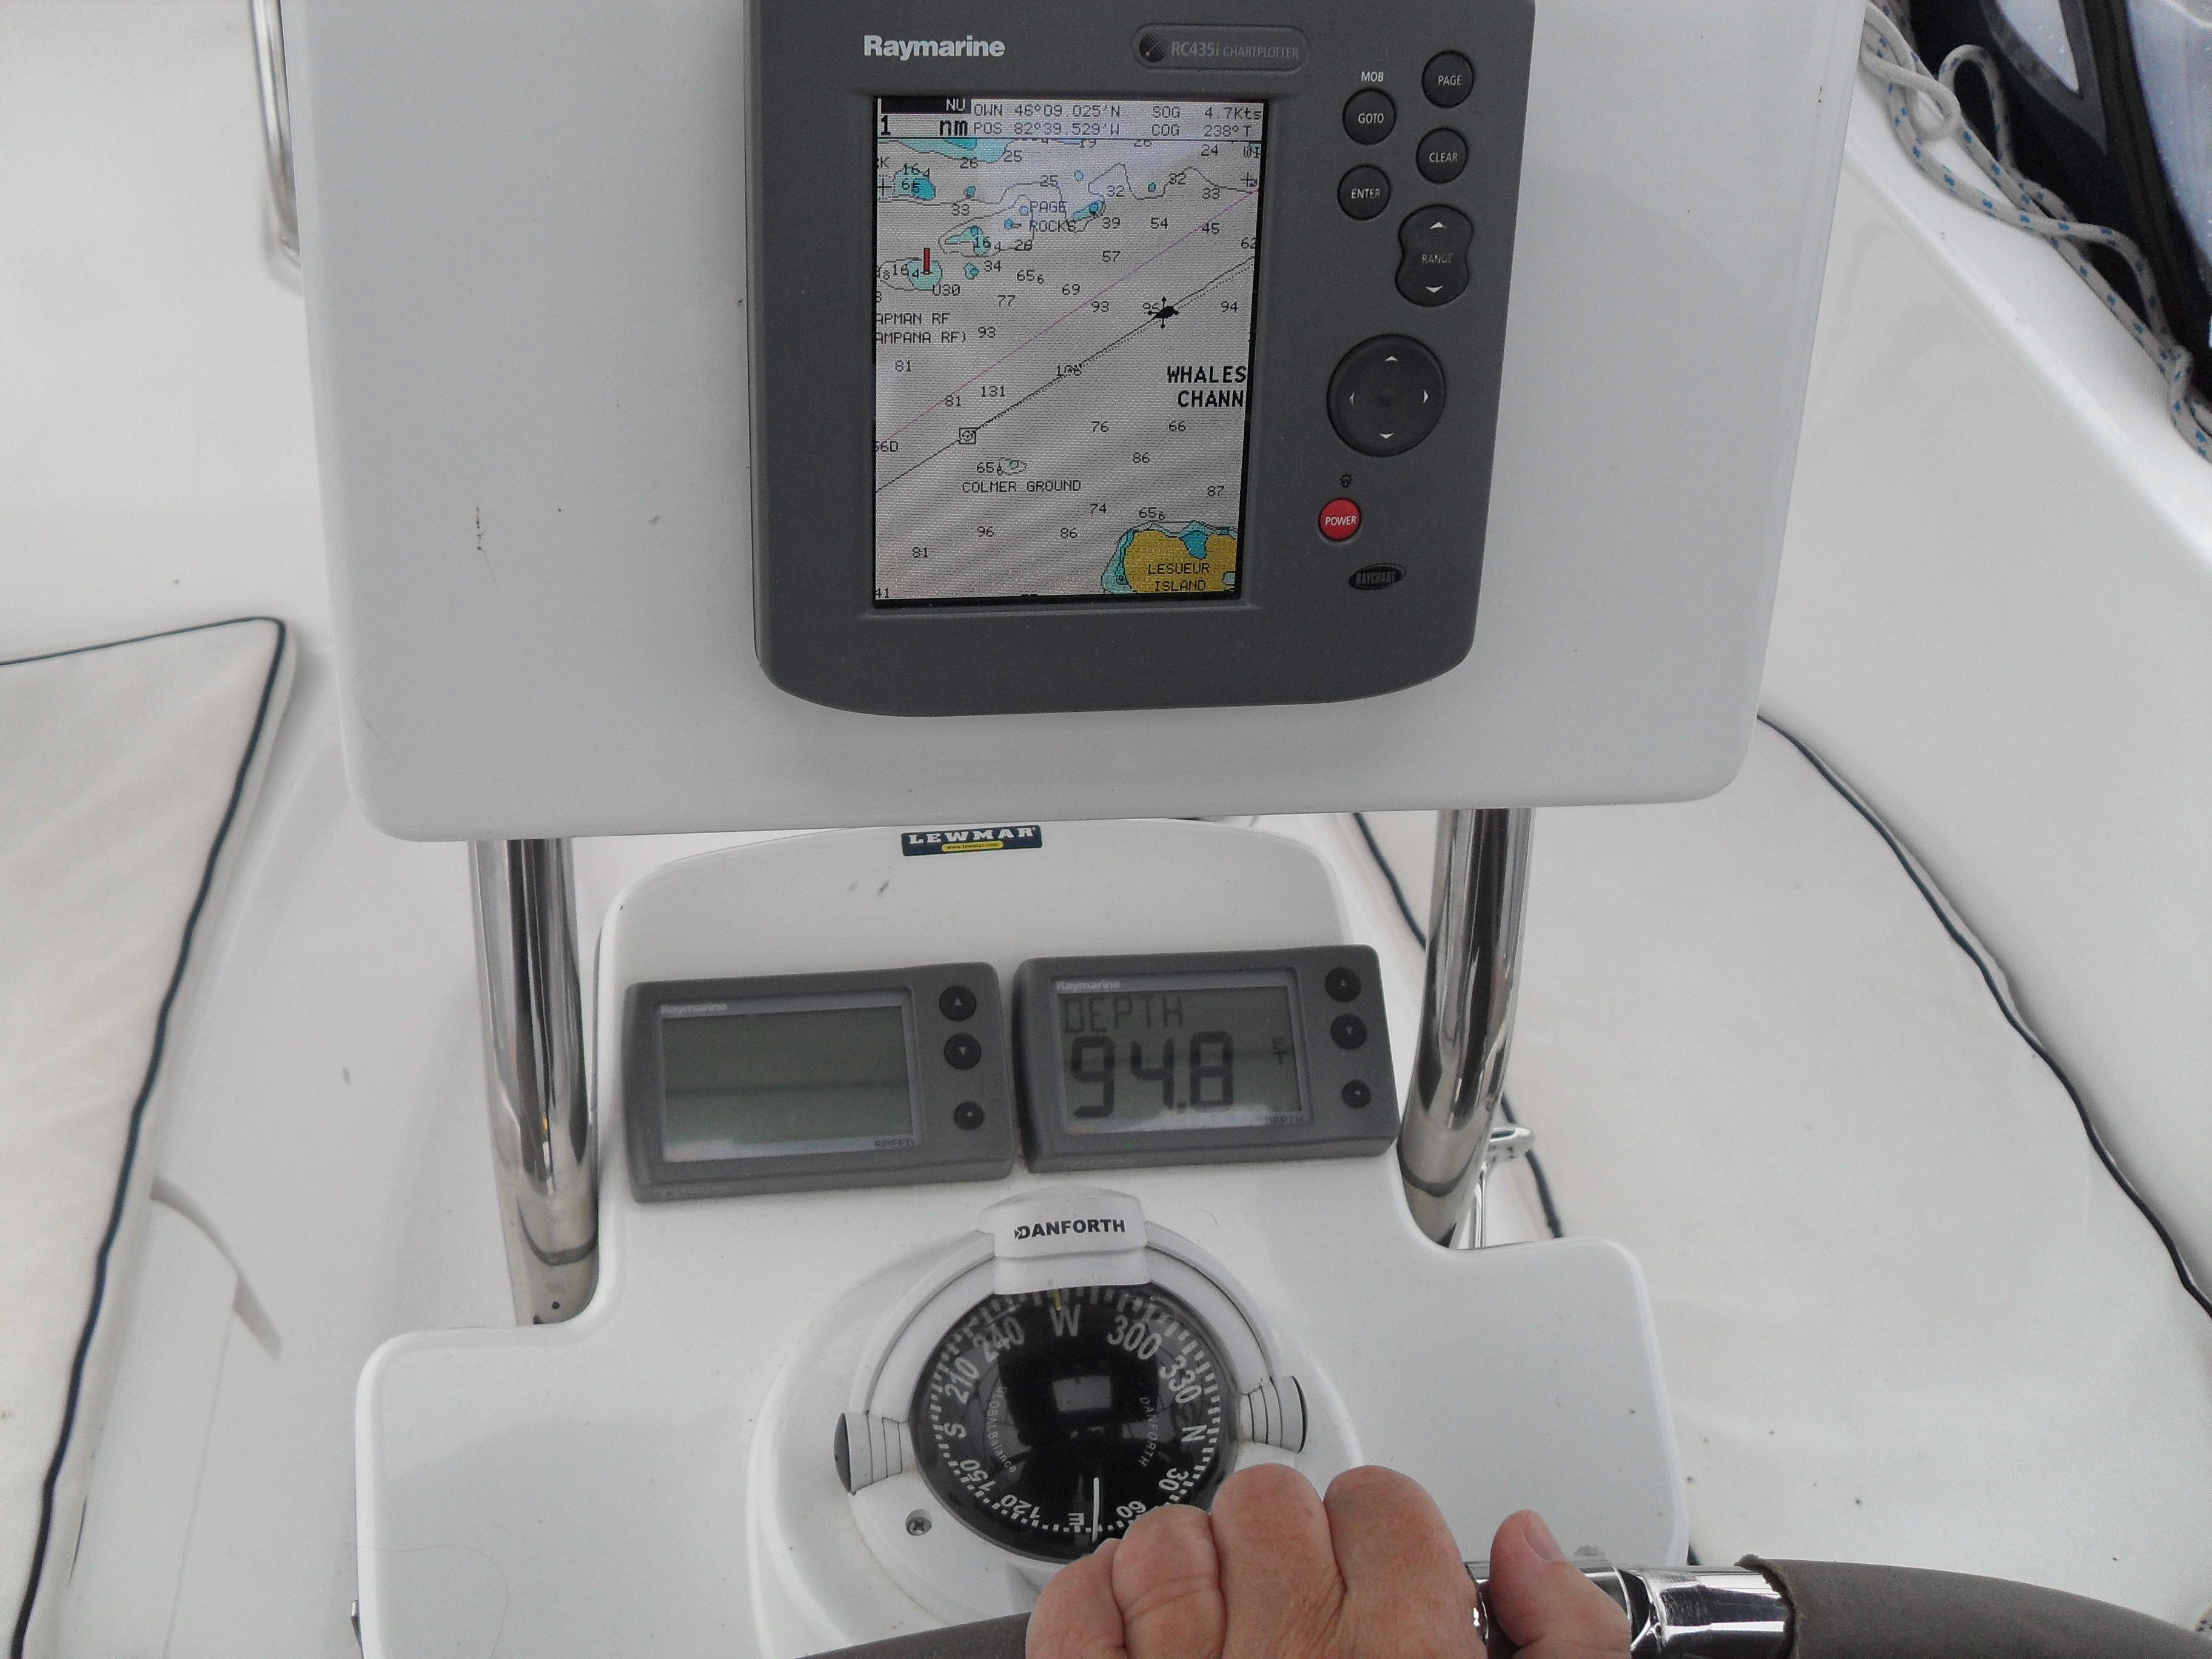
We had a couple of days of absolute calm and so had to motor many long hours to get to our next destination. Unfortunately we did not have an auto-helm, so someone had to steer the boat continuously. The above pic shows the instruments at the helm including the chart plotter. It’s basically a GPS navigator that uses nautical charts instead of land maps. Click on the photo to get a closeup. The two readouts below the chart plotter are the windspeed indicator (not working) and the depth meter showing 94.8 feet. Oh, and a compass.
 On day 7 we anchored at Coker Island. We also put in a stern tie, a line that anchors the back of the boat to shore. This keeps the boat from swinging all around an anchor and allows you to put many more boats in a small area, like parallel parking. In the above photo I am kayaking back from putting a line around a tree. I kept my pants on, I was a bit too modest to practice the ancient Canadian tradition of stern tying in your underwear.
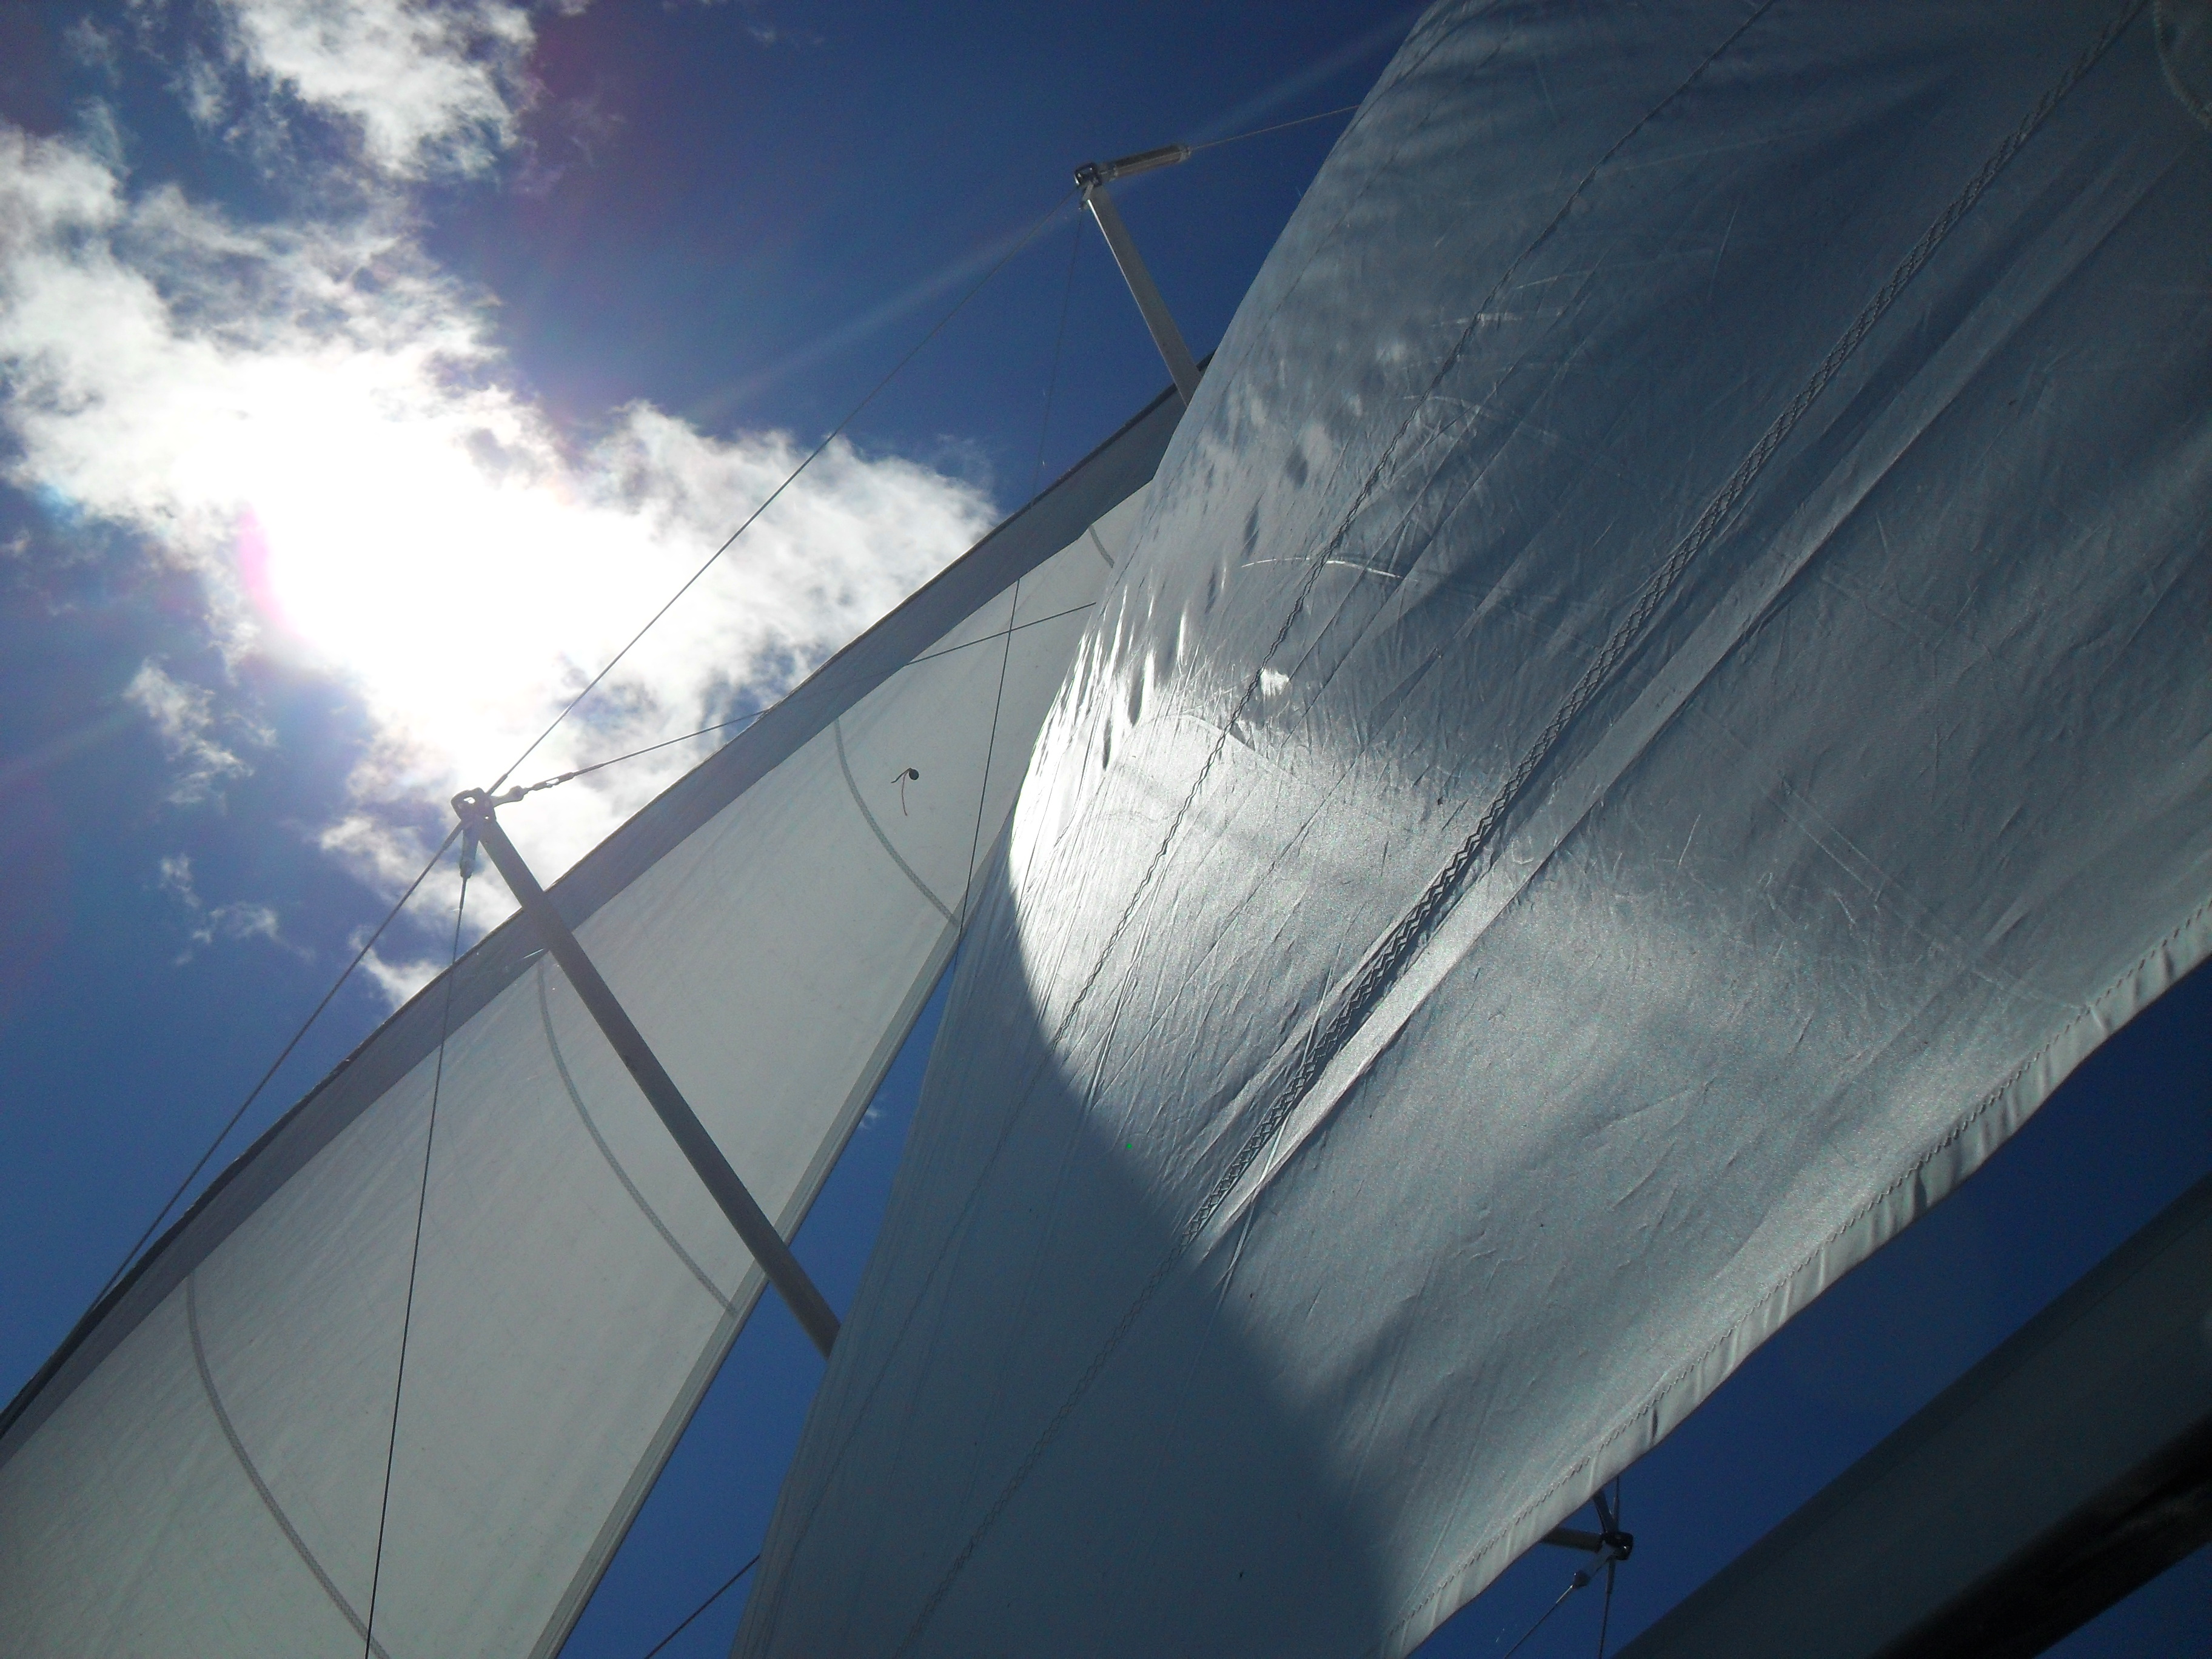
We only got a tiny bit of wind the next day, but we sailed on a reach for a while, above.
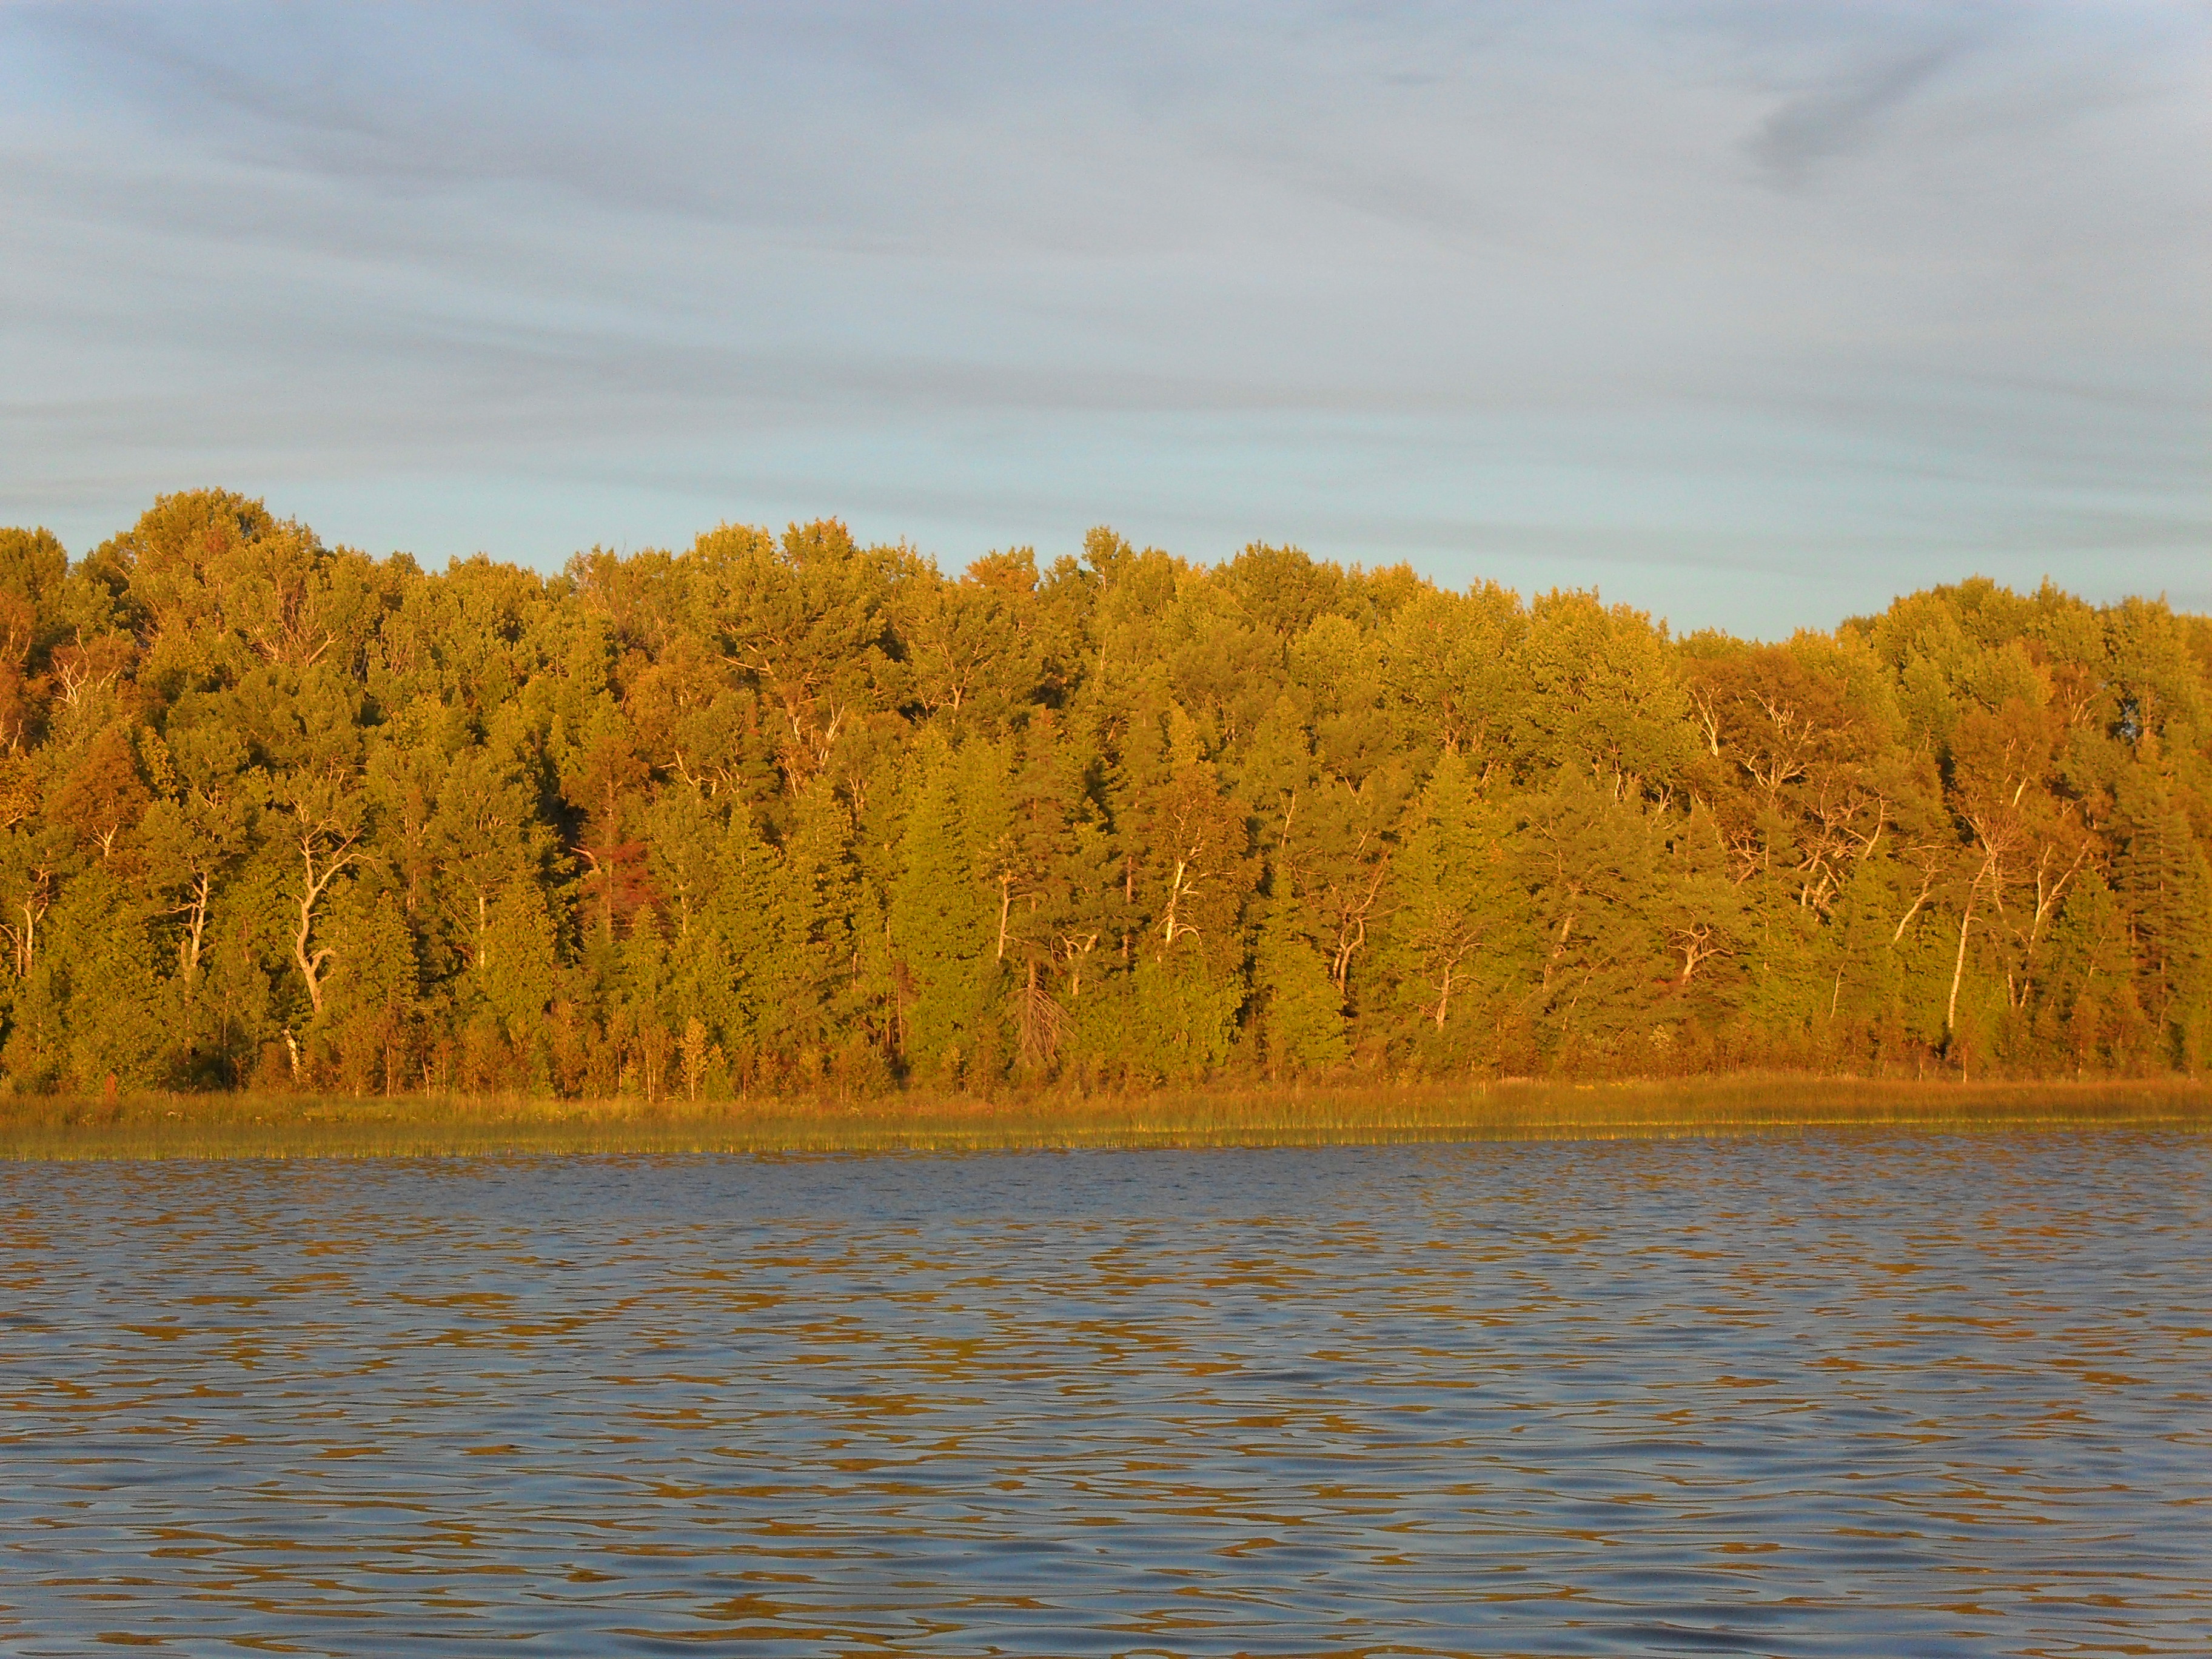
The last night we stayed on Clapperton Island with another great sunset illuminating the forested shoreline.
We experienced a lot of wind sailing back to Gore Bay the next day. All-in-all a good trip, very low key and uncrowded. We spent the rest of the trip touring the area. One cool thing was to take a ferry that cut off about 4 hours of driving.
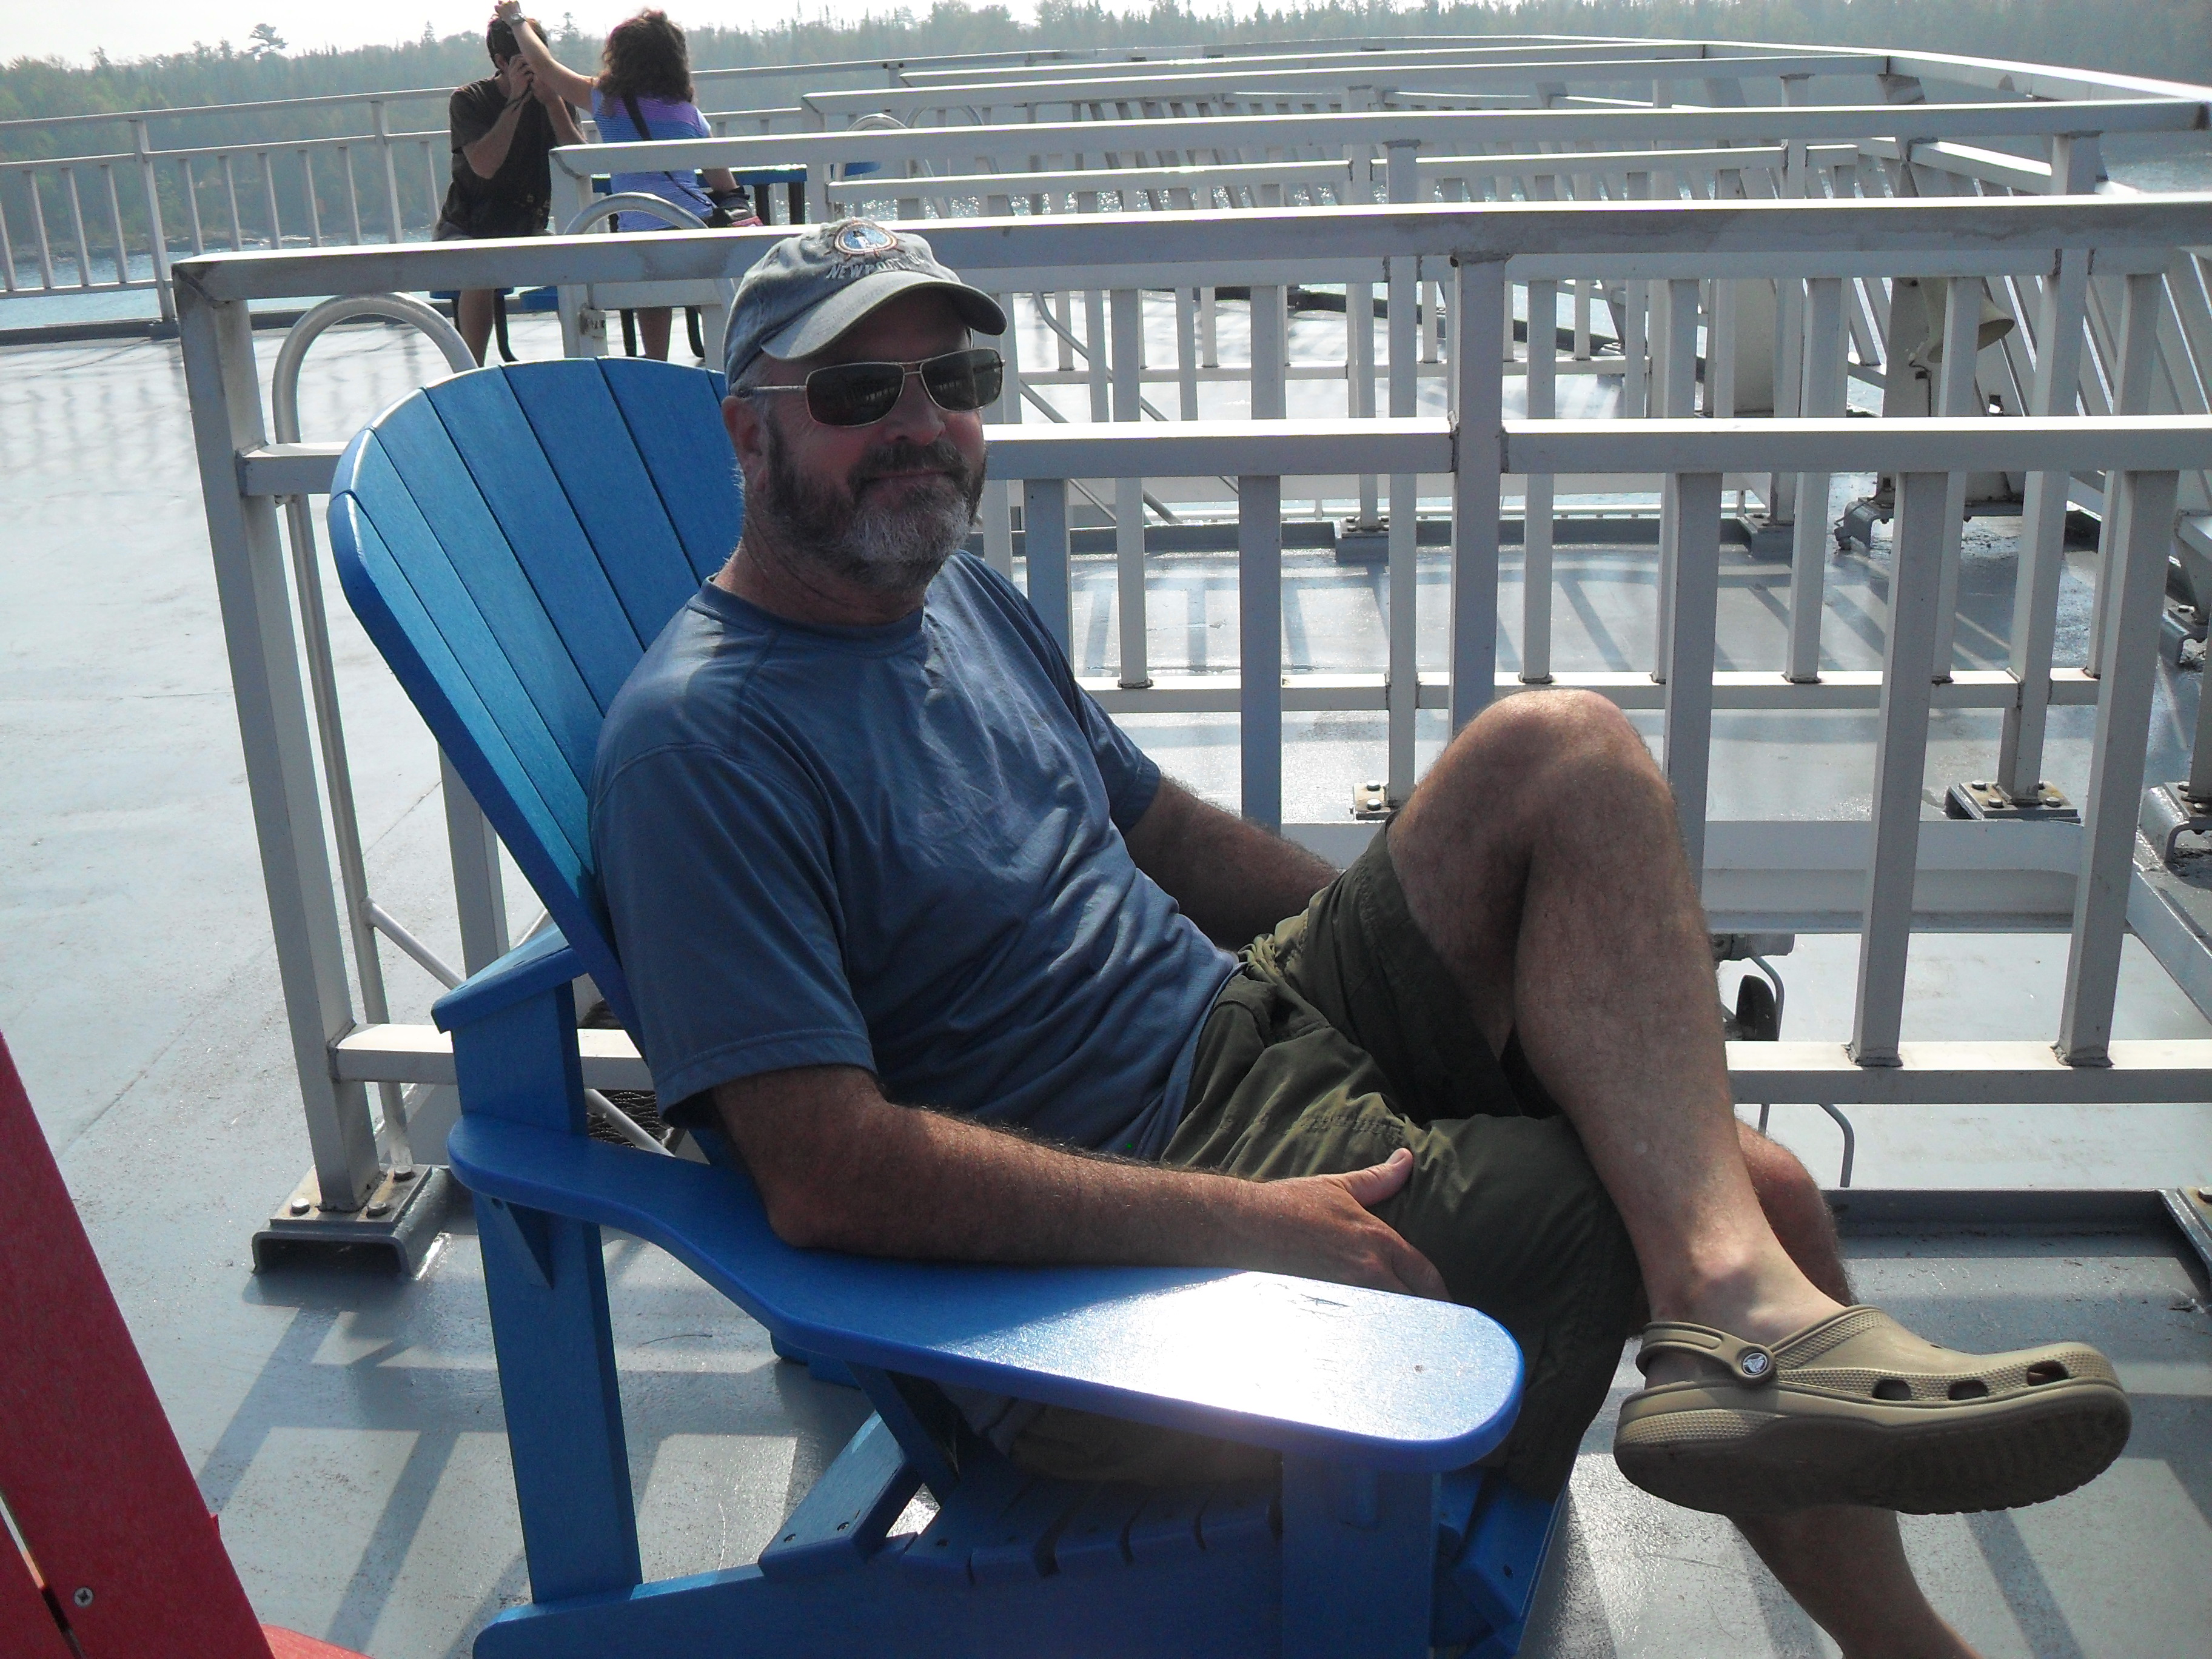
In the photo above, I am relaxing on the top deck of the ferry, taking in the view. In the background you can see two Canadian women tussle over the last piece of back bacon on the boat. Those crazy Canadians!
That’s Niagara Falls above, but Boulder Falls was probably about this big at the time of this photo.
And for the finale:
Posted in Sailing by Mark with comments disabled.
Aftermath: Great Boulder Flood

The Newly Formed 7th Street River, fed by Gregory Creek on September 15, 2013
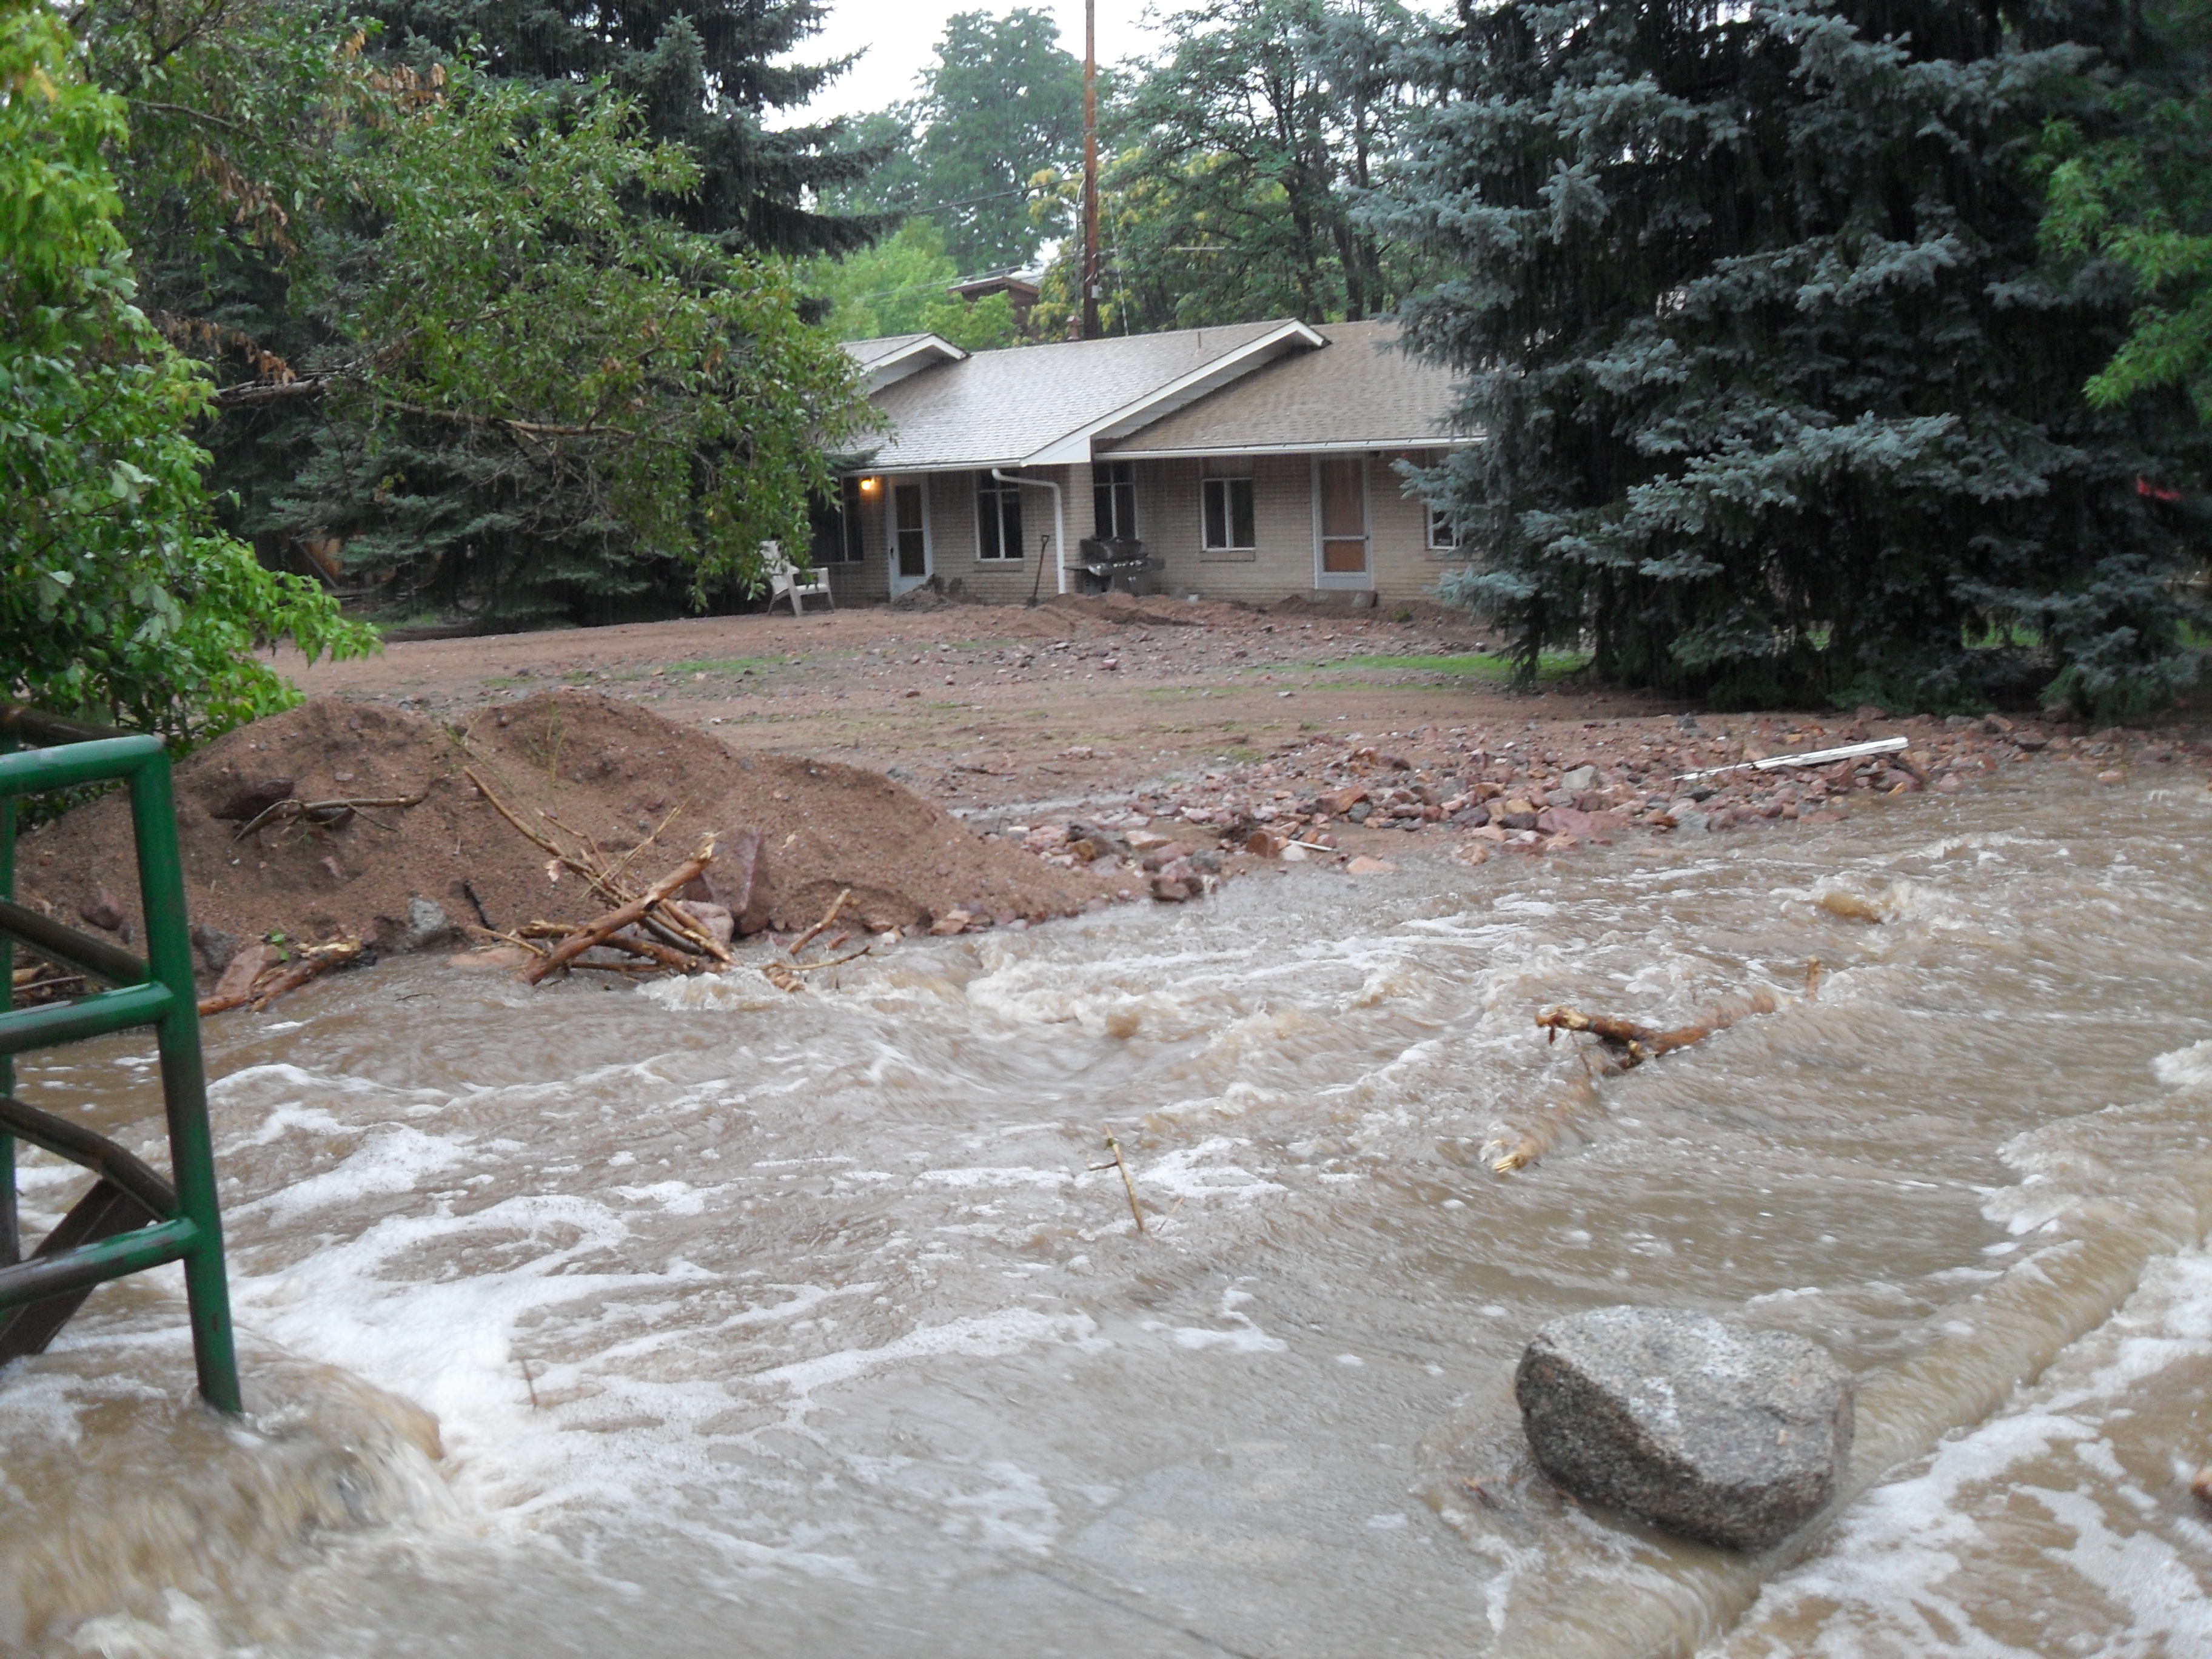
The pic above is 7th street, a block east of our house. I took this photo yesterday and we haven’t had significant rain for about 24 hours, but the 7th Street River has only subsided a bit. Click or tap on any picture to get a full resolution view of that pic. Interestingly, I mentioned in my May 14th post that Gregory Creek was flowing for the first time in 3 years. Four months later it has destroyed streets, bridges and houses.
The story was that the Pennsylvania Ave. culvert was overwhelmed and overflowed, blowing gravel and rocks out into, among other places, the house pictured below. It looks like a foot deep wall of gravel overwhelmed the house and flooded the basement and first floor:
The water also washed into the houses just downstream of the culvert mouth:

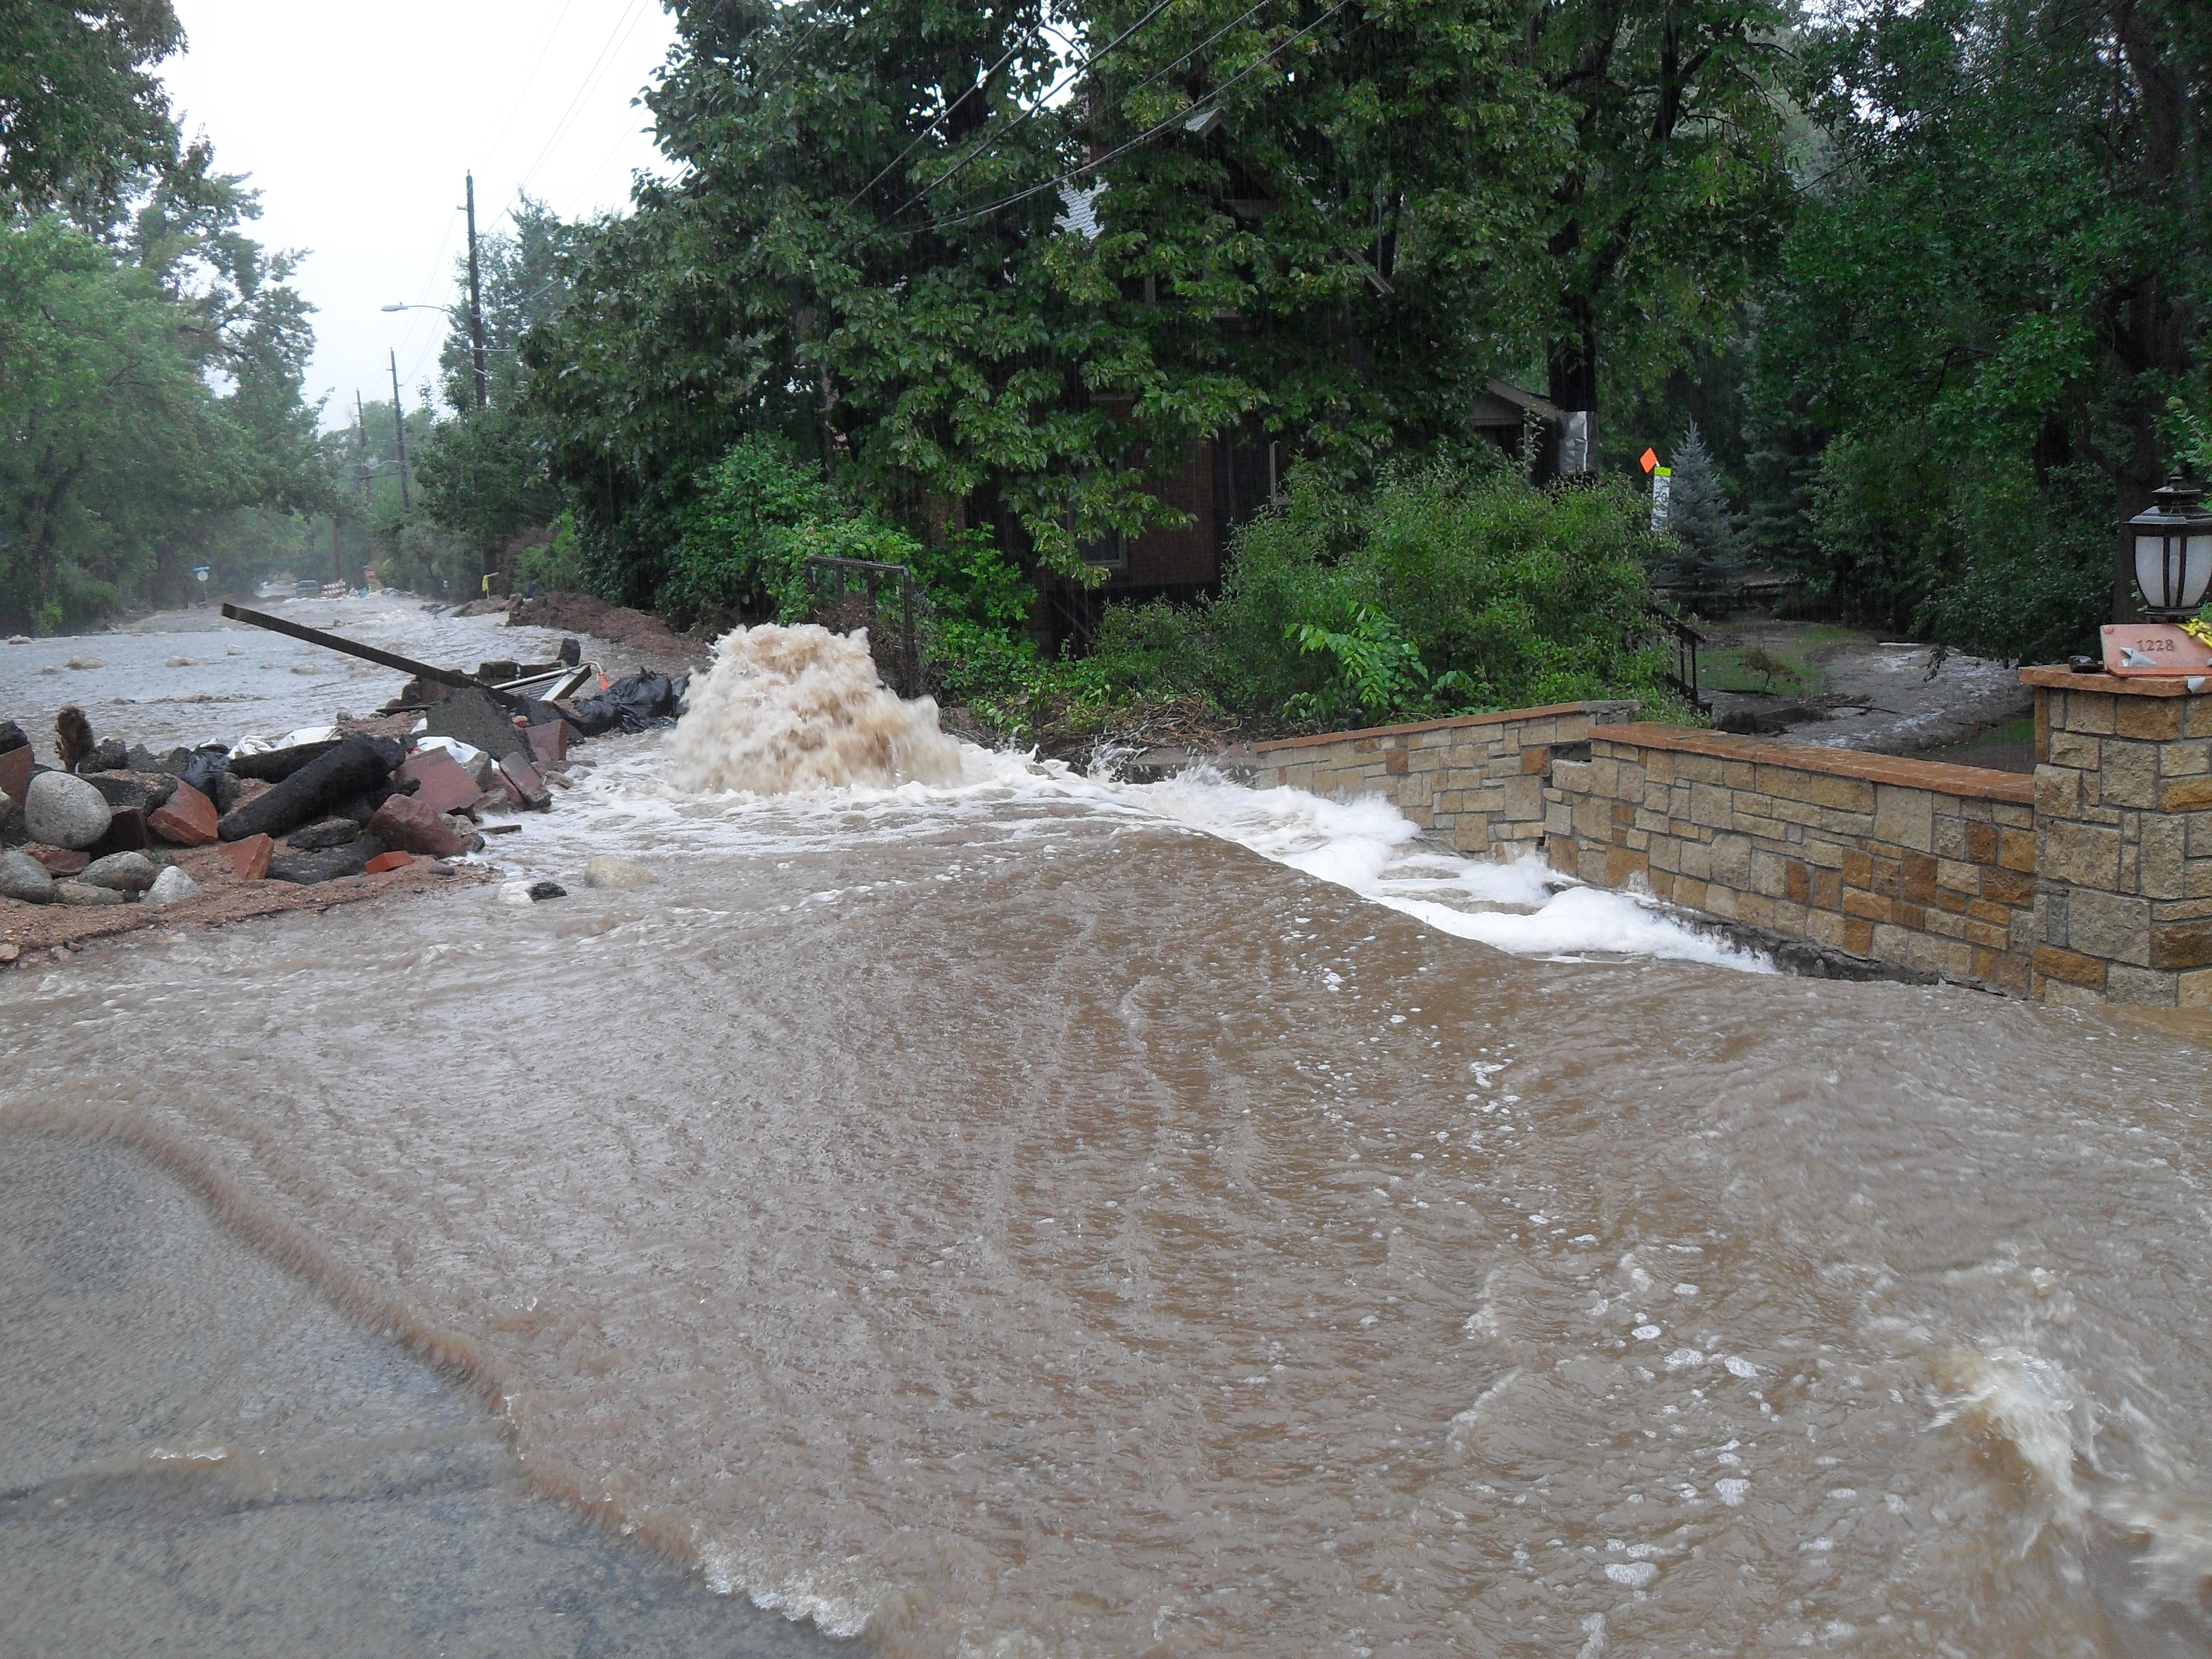
When the stream finally eroded the sides of the culvert and collapsed the street as pictured in my previous post, the water subsided as it was channeled into the culvert trench. BUT, the next culvert down crosses under 7th street and it too was overwhelmed and has not collapsed, so a lot of water is overflowing onto the street as seen just behind Shelly below:

Some water makes it through the culvert but is apparently being blocked at the far end producing the 7th Street Geyser, shown erupting below:
All of these pictures were taken in the block just east of our house. We talked with our neighbors and found that every single one of them had significant flood damage, uphill, downhill, and directly across the alley from us. Incredibly, our house came through completely unscathed, not even our landscaping was touched. The two reasons for this, I believe, are luck and the fact that at 11 years old, we have by far the newest house.
Luck came in the fact that Gregory Creek blew out to the east instead of west. If even a bit of that water diverted west we would likely have been flooded. Interestingly, Shelly found that the water pretty much flowed in the direction predicted by the flood plane maps recently updated by the city. But Gregory Creek wasn’t the whole story, there was also significant water flowing down 6th street in front of our house. Because our driveways were built with a slight rise at the property line, no water streamed into our yard. Our neighbor on the north (downhill) whose house is literally 10 feet from our had completely flooded, as did the next 4 houses down. The house directly behind us flooded as did the house just uphill of them and the house just uphill of us.
I did a short jog around The Hill and surveyed the damage. A significant number of houses are flooded with little rhyme or reason, some yards are wiped clean, houses on steep slopes are flooded, alleys have turned into deep gullies. There is debris everywhere, it even looks like a tree was pushed into a parked car on 6th and College. You could not have predicted who would have been flooded out from this storm. Correction, you could have tried and you would have been wrong. I read an estimate that there is $150 million in road damage from this storm, I’d be surprised if it were less that $1 billion.
We thought for sure at least our crawl space would be a lake but it is bone dry. Despite the guy in the picture below taking credit for watching our place while we were on vacation, after seeing all of this devastation I find it almost miraculous that we have absolutely no damage.
Posted in Great Boulder Flood by Mark with comments disabled.
The Great Boulder Flood
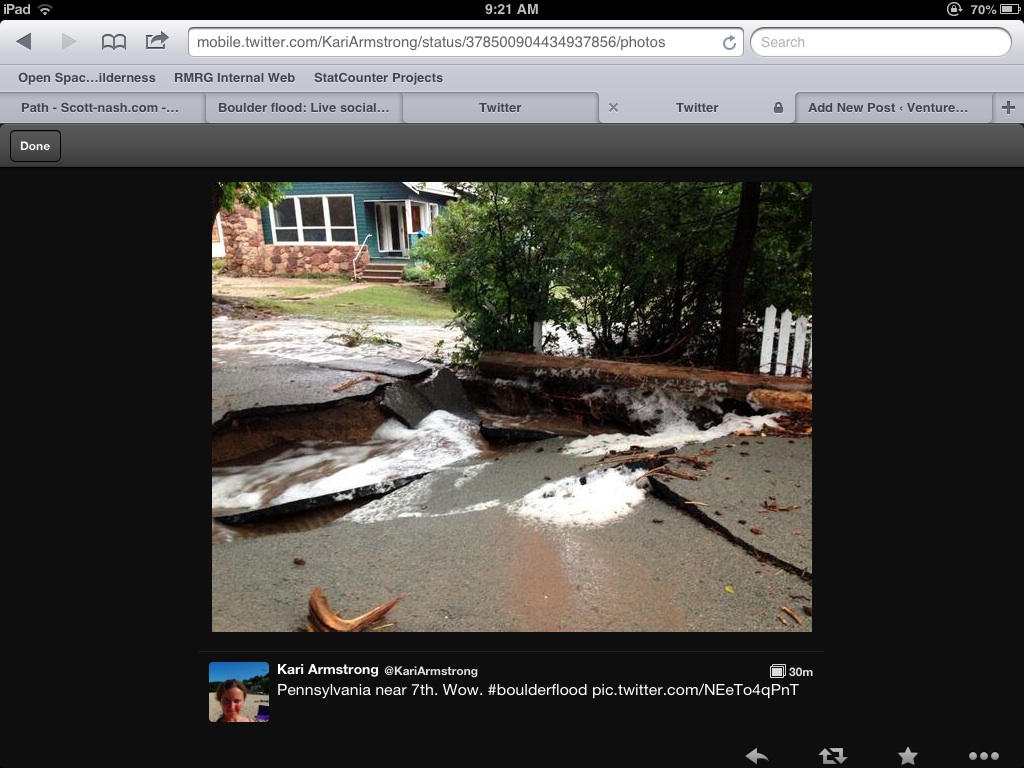 Gregory Creek Destroys Pennsylvania Street 1/2 Block Behind Our House
While we’ve been away, Boulder suffered a devastating 100 year flood, apparently so destructive that Obama has approved federal disaster aid for the county. Wow. Last time we went on vacation the big Fourmile fire raged and forced evacuations in our neighborhood, missed that one too. The people watching our house say it is ok.
I found the pic above on a twitter account of Kari Armstrong. This shows where Gregory Creek passes under Pennsylvania between 6th and 7th streets. This little creek is dry ten months out of the year, normally flowing in April and May during the spring thaw. Nice to listen to on warm spring evenings, not so nice during floods.
Posted in Great Boulder Flood by Mark with comments disabled.